Snowflake
This data destination connector sends data to a Snowflake database. It can either write data to an existing Snowflake database, or to a new database it provisions to you. The latter case is available only for projects using own Snowflake backend (KBDB/BYODB) and is useful for sharing your data in form of an SQL database with some service. For example, you can use it to send data to Tableau, PowerBI, etc. Projects using Multi-tenant Snowflake backend can use Data Gateway component instead.
Configuration
Section titled “Configuration”Create a new configuration of the Snowflake data destination connector.
The first step is to set up credentials:
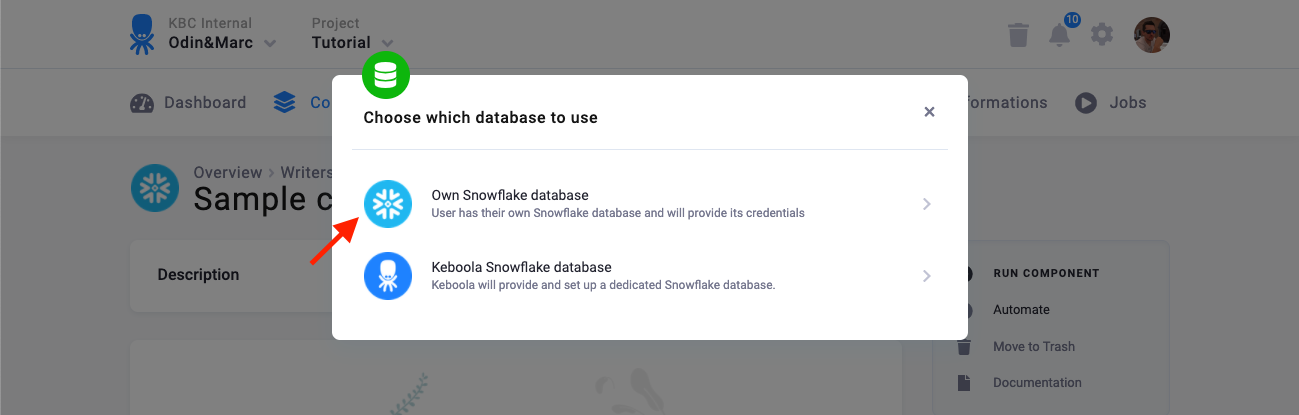
There are two modes of operation of the connector:
- Own Snowflake database --- Use this when you have your own Snowflake database — i.e., you have a contract with Snowflake, or someone gave you credentials of a database to write to.
- Keboola Snowflake database --- In this mode, the connector will create a new schema in project’s database for you and give you credentials to it. This option is available only for projects using own Snowflake backend (KBDB/BYODB).
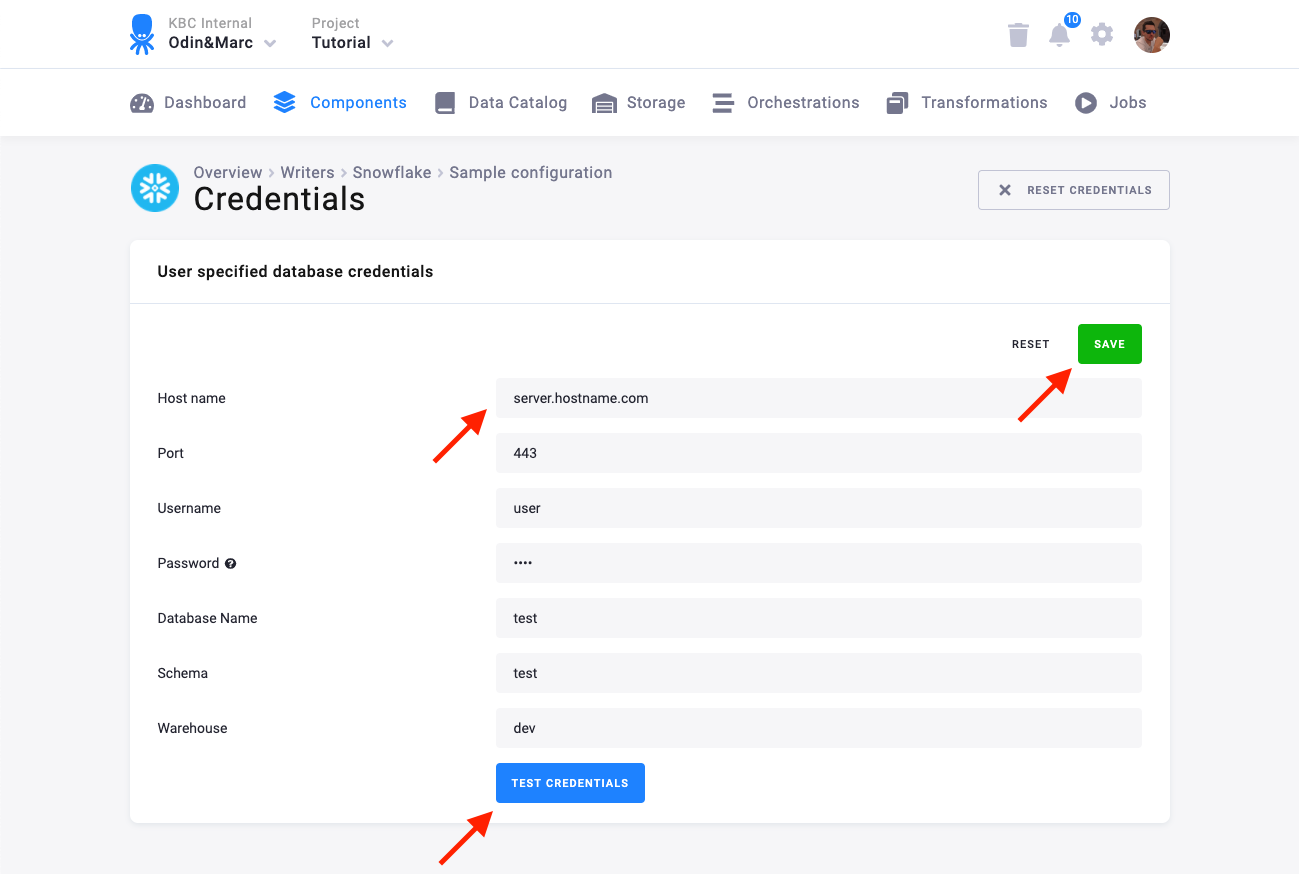
Own Snowflake Database
Section titled “Own Snowflake Database”You need to provide a host name (account name), user name, private key/password, database name, schema, and warehouse.
We highly recommend that you create a dedicated user for the connector in your Snowflake database. You can use the following SQL code to get started:
CREATE ROLE WRITER_SAMPLE;CREATE DATABASE WRITER_SAMPLE;GRANT USAGE ON DATABASE WRITER_SAMPLE TO ROLE WRITER_SAMPLE;CREATE SCHEMA WRITER_SAMPLE.WRITER_SAMPLE;GRANT ALL PRIVILEGES ON SCHEMA WRITER_SAMPLE.WRITER_SAMPLE TO ROLE WRITER_SAMPLE;GRANT USAGE ON WAREHOUSE dev TO ROLE WRITER_SAMPLE;CREATE USER WRITER_SAMPLE PASSWORD = 'WRITER_SAMPLE' DEFAULT_ROLE = WRITER_SAMPLE DEFAULT_WAREHOUSE = dev DEFAULT_NAMESPACE = WRITER_SAMPLE.WRITER_SAMPLE TYPE = LEGACY_SERVICE;GRANT ROLE WRITER_SAMPLE TO USER WRITER_SAMPLE;You need to provide the user with access to a Snowflake Warehouse.
Keep in mind that Snowflake is case sensitive and if identifiers are not quoted, they are converted to upper case. So if you run, for example, a
query CREATE SCHEMA john.doe;, you need to enter the schema name as DOE in the connector configuration.
Keboola Snowflake Database
Section titled “Keboola Snowflake Database”A Keboola Snowflake schema is created in project’s database by the component and the credentials are provisioned for you:
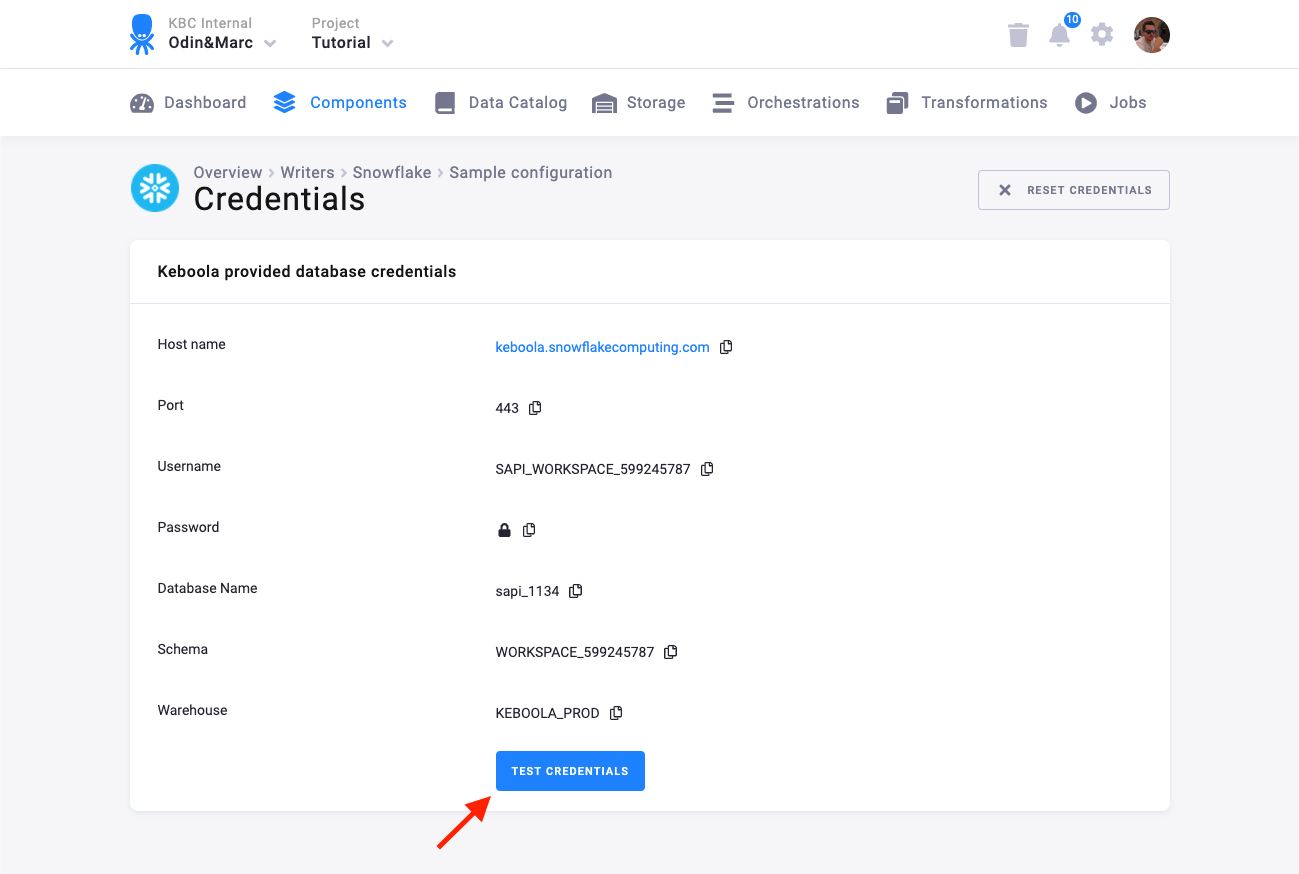
You can share the credentials with whatever service that needs to access your data.
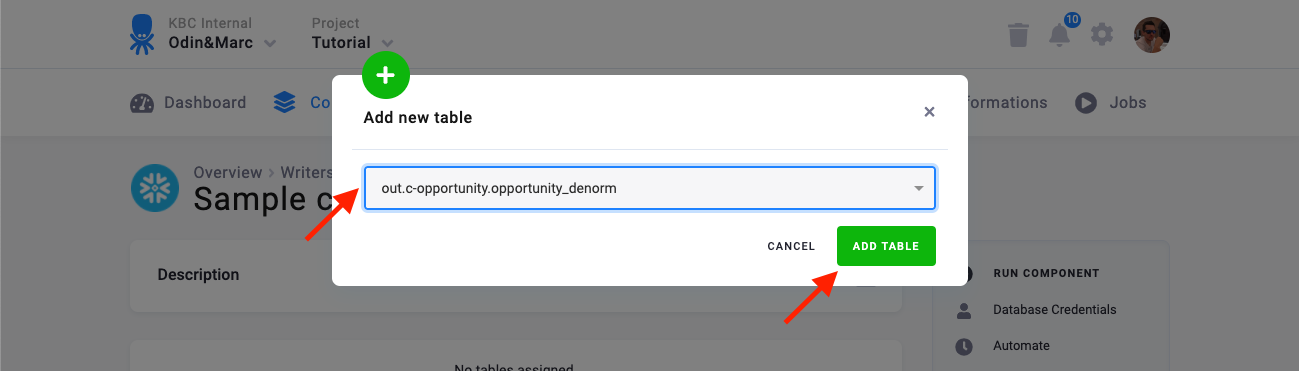
Table Configuration
Section titled “Table Configuration”The next step is to configure the tables you want to write. Click Add Table and select an existing table from Storage:
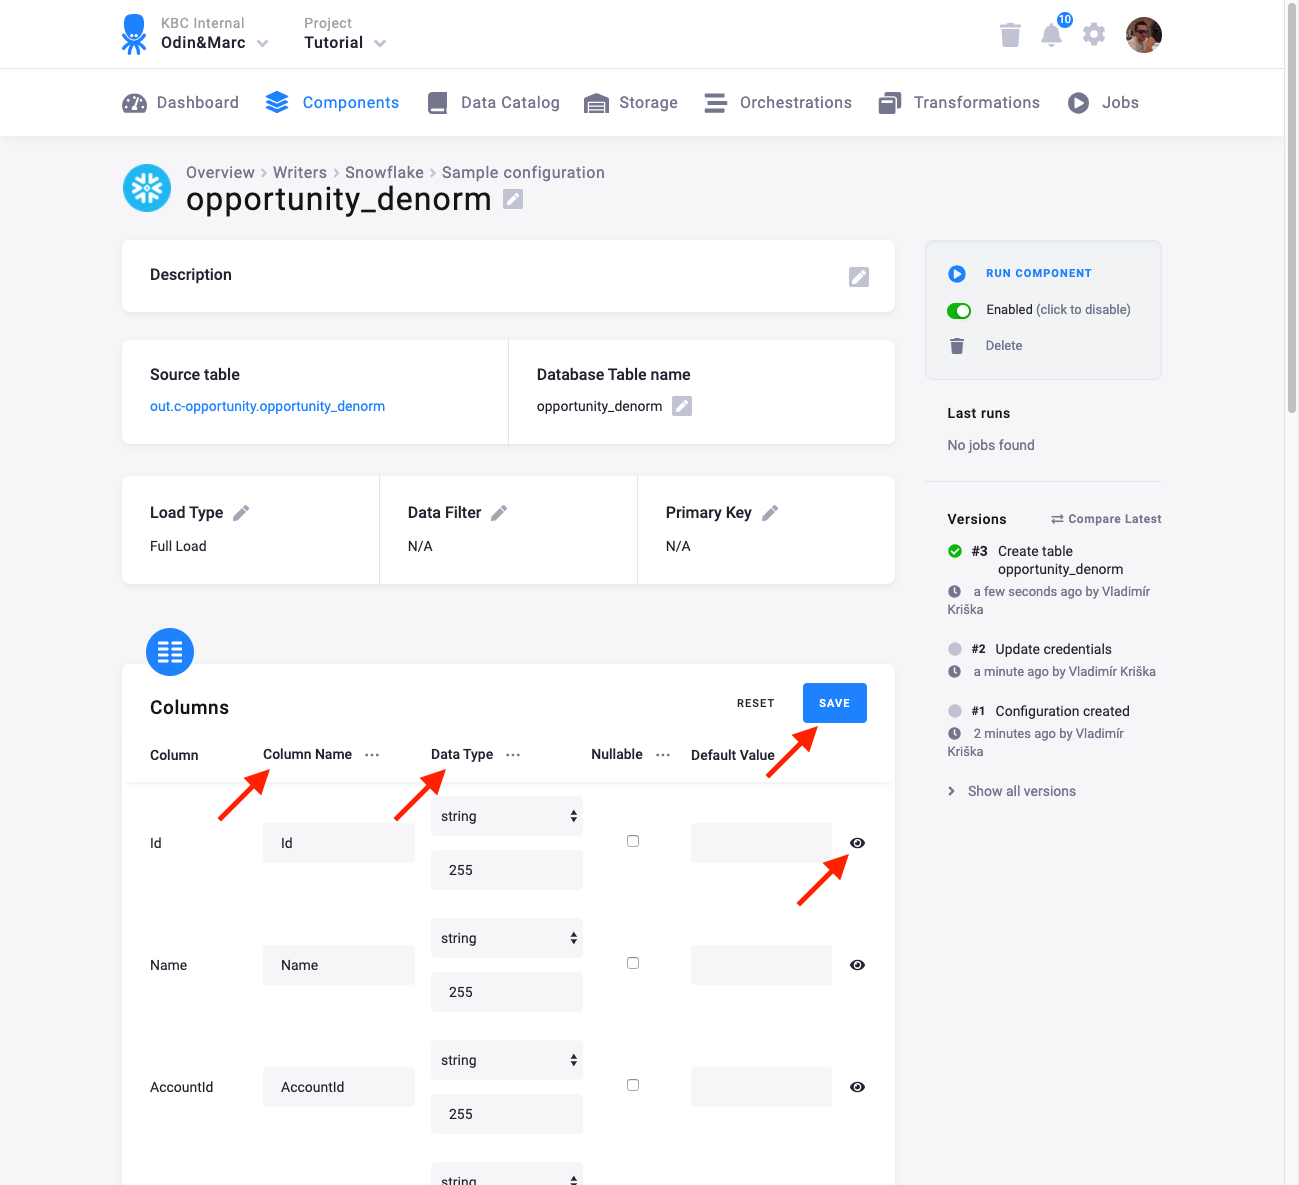
The next step is to specify table configuration. Use the preview icon to peek at the column contents.
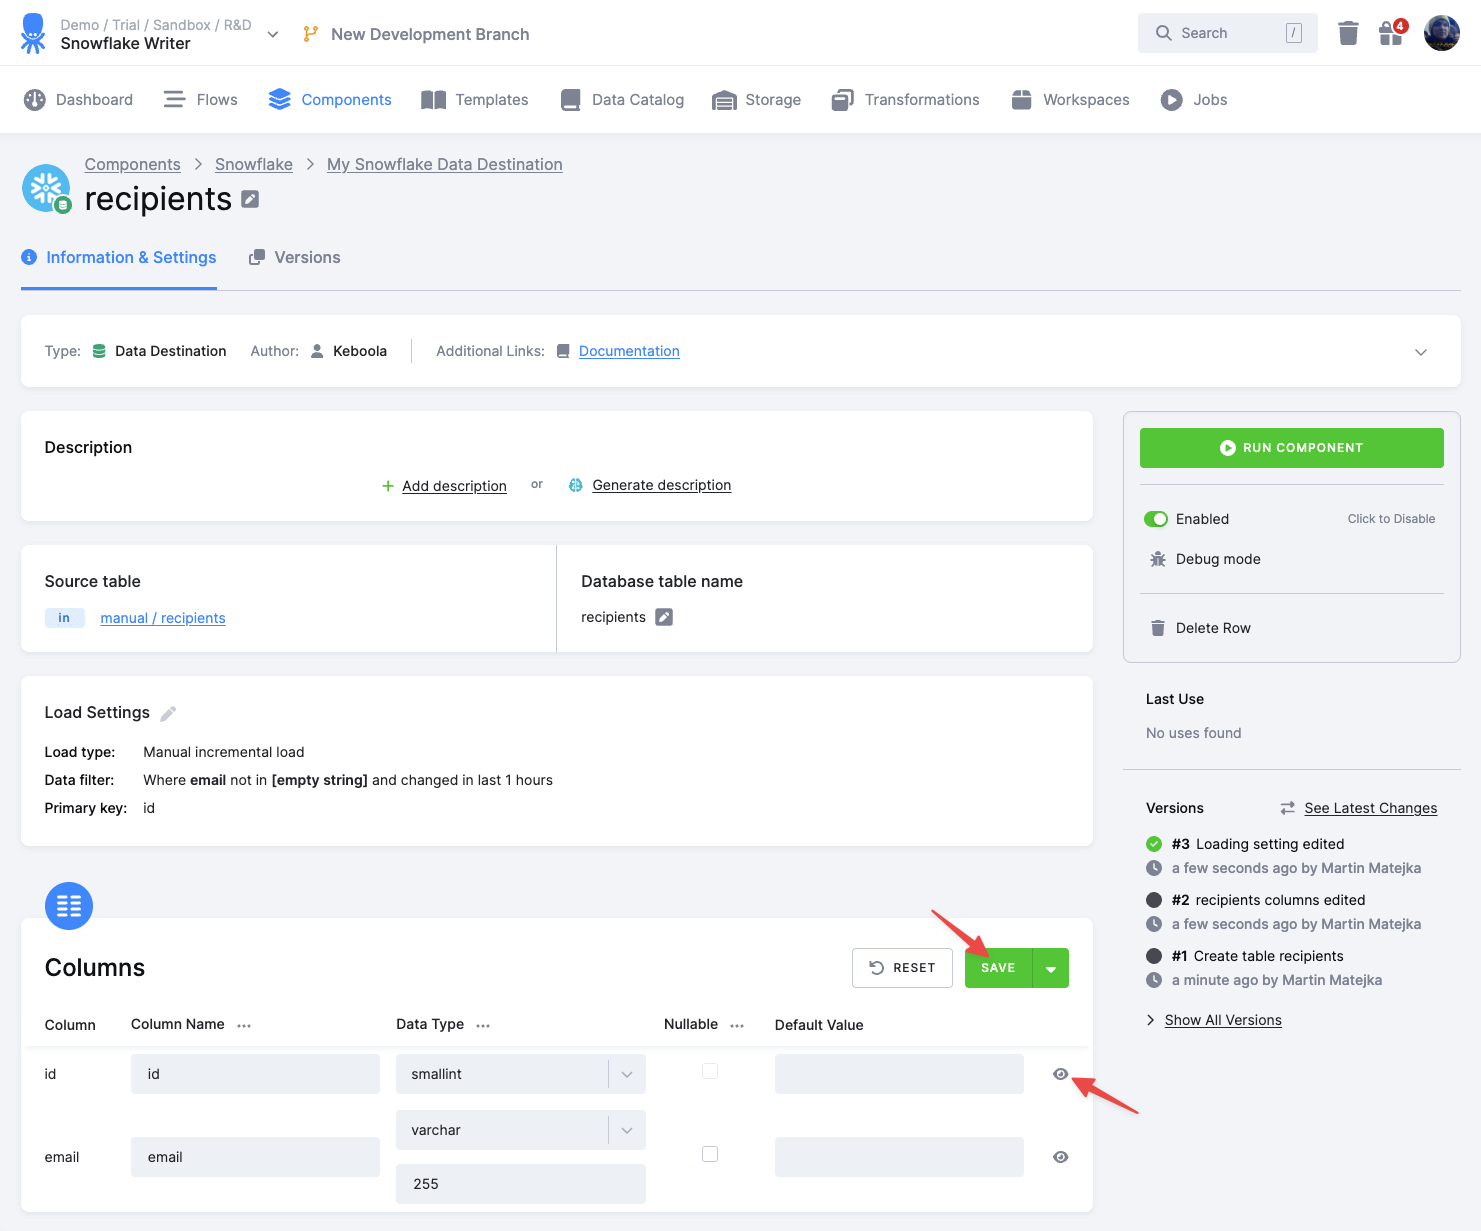
For each column you can specify its
- Column Name in the destination database; you can also use the select box in the table header to bulk convert the case of all names.
- Data Type (one of Snowflake data types); you can also use the select box in the table header to bulk set the type for all columns. Setting the data type to
IGNOREmeans that column will not be present in the destination table. - Nullable; when checked, the column will be marked as nullable and empty values (
'') in that column will be converted toNULL. Use this for non-string columns with missing data. - Default Value; the provided value will be set as the default value of the column in the target table.
The Snowflake connector can take advantage of the column metadata. If they are available, the column types are pre-filled automatically. Make sure to verify the suggested types, however. These data types are taken from the data source and may not be the best choice for the data destination.
When done configuring the columns, don’t forget to save the settings.
Load Settings
Section titled “Load Settings”At the top of the page, you can specify the target table name and additional load settings. There are two main options how the connector can write data to tables --- Full Load and Incremental Load.
In the Incremental load mode, the data are bulk inserted into the destination table and the table structure must match (including the data types). That means the structure of the target table will not be modified. If the target table doesn’t exist, it will be created. If a primary key is defined on the table, the data is upserted. If no primary key is defined, the data is inserted.
In the Full load mode, the table is completely overwritten including the table structure. The table is overwritten
using the ALTER SWAP command, which ensures
the shortest unavailability of the target table. However, this operation still drops the table.
Additionally, you can specify a Primary key of the table, a simple column Data filter, and a Data changed in last filter for incremental processing.
Data changed in last filter is not available when using Automatic incremental load, as the component will use the last run date to determine the data to be loaded.
Using Keboola Snowflake Database
Section titled “Using Keboola Snowflake Database”The connector offers the option to create a Keboola-provisioned database for you. You can use this database to connect Keboola to a wide range of consumers --- especially Business Intelligence tools and Analytics. The database can be queried in real time, but is still completely isolated from your project Storage. The database query execution time is limited to 900 seconds (15 minutes).
Of course, you can use your own Snowflake database for this purpose. And if you are using Multi-tenant Snowflake backend, you can use Data Gateway component instead.
Connect to Looker
Section titled “Connect to Looker”It is possible to use the Snowflake connector to share data with Looker. To share data between your Keboola project and Looker, choose the Keboola Snowflake database when configuring the credentials. The connector will create a dedicated database for you and give you credentials. Run the connector and when it is finished, connect the Looker data sources. Follow the official instructions. There are also some Snowflake specific settings. Note that you can skip a number of steps because a dedicated user is already created for you.
Connect to Power BI Desktop
Section titled “Connect to Power BI Desktop”It is possible to use the Snowflake connector to share data with Power BI Desktop. To share data between your Keboola project and PowerBI, choose the Keboola Snowflake database when configuring the credentials. The connector will create a dedicated database for you and give you credentials. Run the connector and when it is finished, connect the Power BI data sources. Follow the official instructions for Power BI Desktop.
Connect to Qlik
Section titled “Connect to Qlik”It is possible to use the Snowflake connector to share data with Qlik Sense and QlikView. To share data between your Keboola project and Qlik, choose the Keboola Snowflake database when configuring the credentials. The connector will create a dedicated database for you and give you credentials. Run the connector and when it is finished, connect the Qlik data sources. Follow the Qlik official integration guide.
Connect to Tableau
Section titled “Connect to Tableau”It is possible to use the Snowflake connector to share data with Tableau Desktop or Tableau Online. This is usually more efficient and faster than loading data through TDE files with the TDE data destination connector.
To share data between your Keboola project and Tableau, choose the Keboola Snowflake database when configuring the credentials. The connector will create a dedicated database for you and give you credentials. Run the connector and when it is finished, connect the Tableau data sources. Follow the official instructions for Tableau Desktop or for Tableau Online. Use the username/password authentication method.
Connect to Retool
Section titled “Connect to Retool”It is possible to use the Snowflake connector to share data with Retool. Retool requires specifying the User Role when creating the resource. The user role will always be the same as the USERNAME provided by the Keboola Snowflake database credentials. Read more about connecting Snowflake to Retool