Tableau TDE
There is a wide range of options for sending data to the Tableau ecosystem. This data destination connector creates Tableau Data Extract (TDE) files and optionally uploads them to a destination (Tableau Server, Dropbox, Google Drive). As such it is more suitable to be used together with Tableau Desktop or Tableau Server. An alternative approach is to send data using the Snowflake data destination connector through a Keboola-provisioned database. That is more suitable to be used together with Tableau Online and also for larger data sets. Both approaches are interchangeable though.
Our Getting Started tutorial will guide you through the process of writing data from Keboola to Tableau. You can also watch our Tableau Integration Demo on YouTube.
Configuration
Section titled “Configuration”Create a new configuration of the Tableau connector.
Then create a new table configuration by clicking the New Table button. Select a table from Storage.

When you start configuring a table, it is possible to set all columns to the prevailing data type, e.g., string and
then configure only the differing columns.
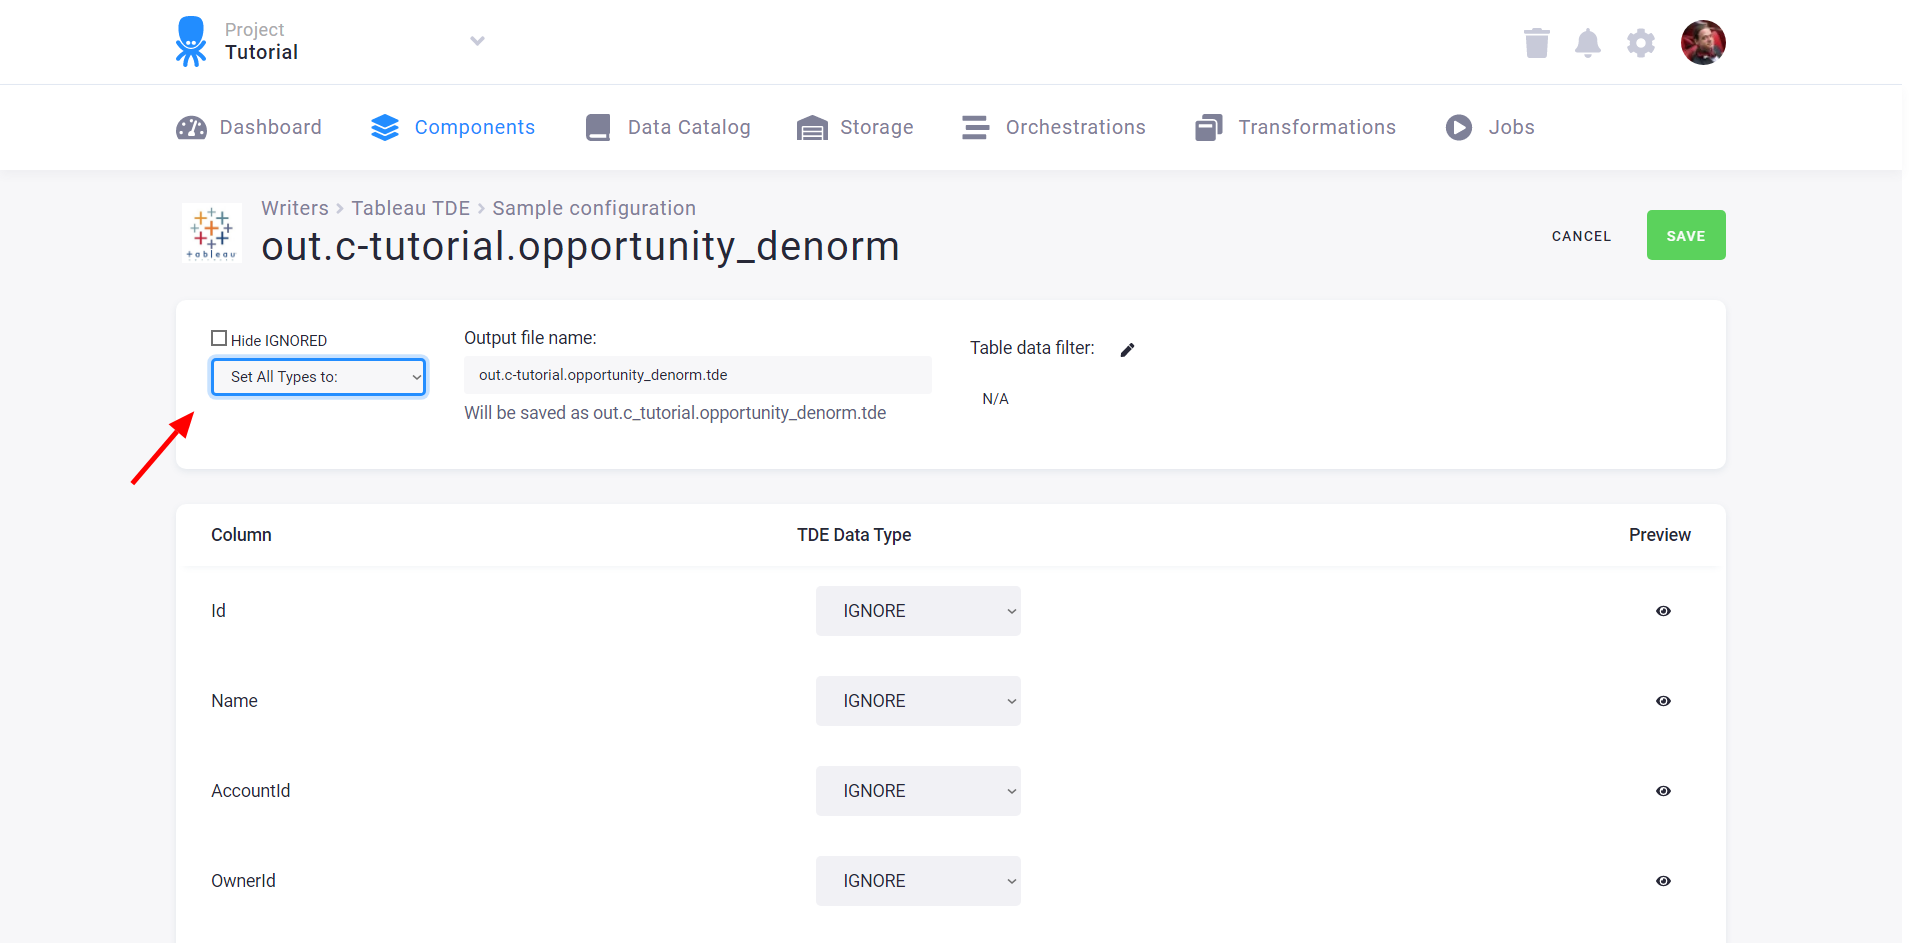
For each column you may select one of the data types supported by
TDE (string, boolean, number, decimal, date, datetime) or IGNORE, which means that the column will not
be part of the TDE file. When configuring the data types, use the Preview icon to peek at the data. For date and
datetime columns, you also have to specify the format in which dates are present in the table.

As optional last steps in table configuration, you can configure the name of the TDE file (useful for uploading to Dropbox or Google Drive) and Table data filter. The table data filter allows you to set a simple filter for one column or take advantage of Incremental processing by writing only recently modified data.
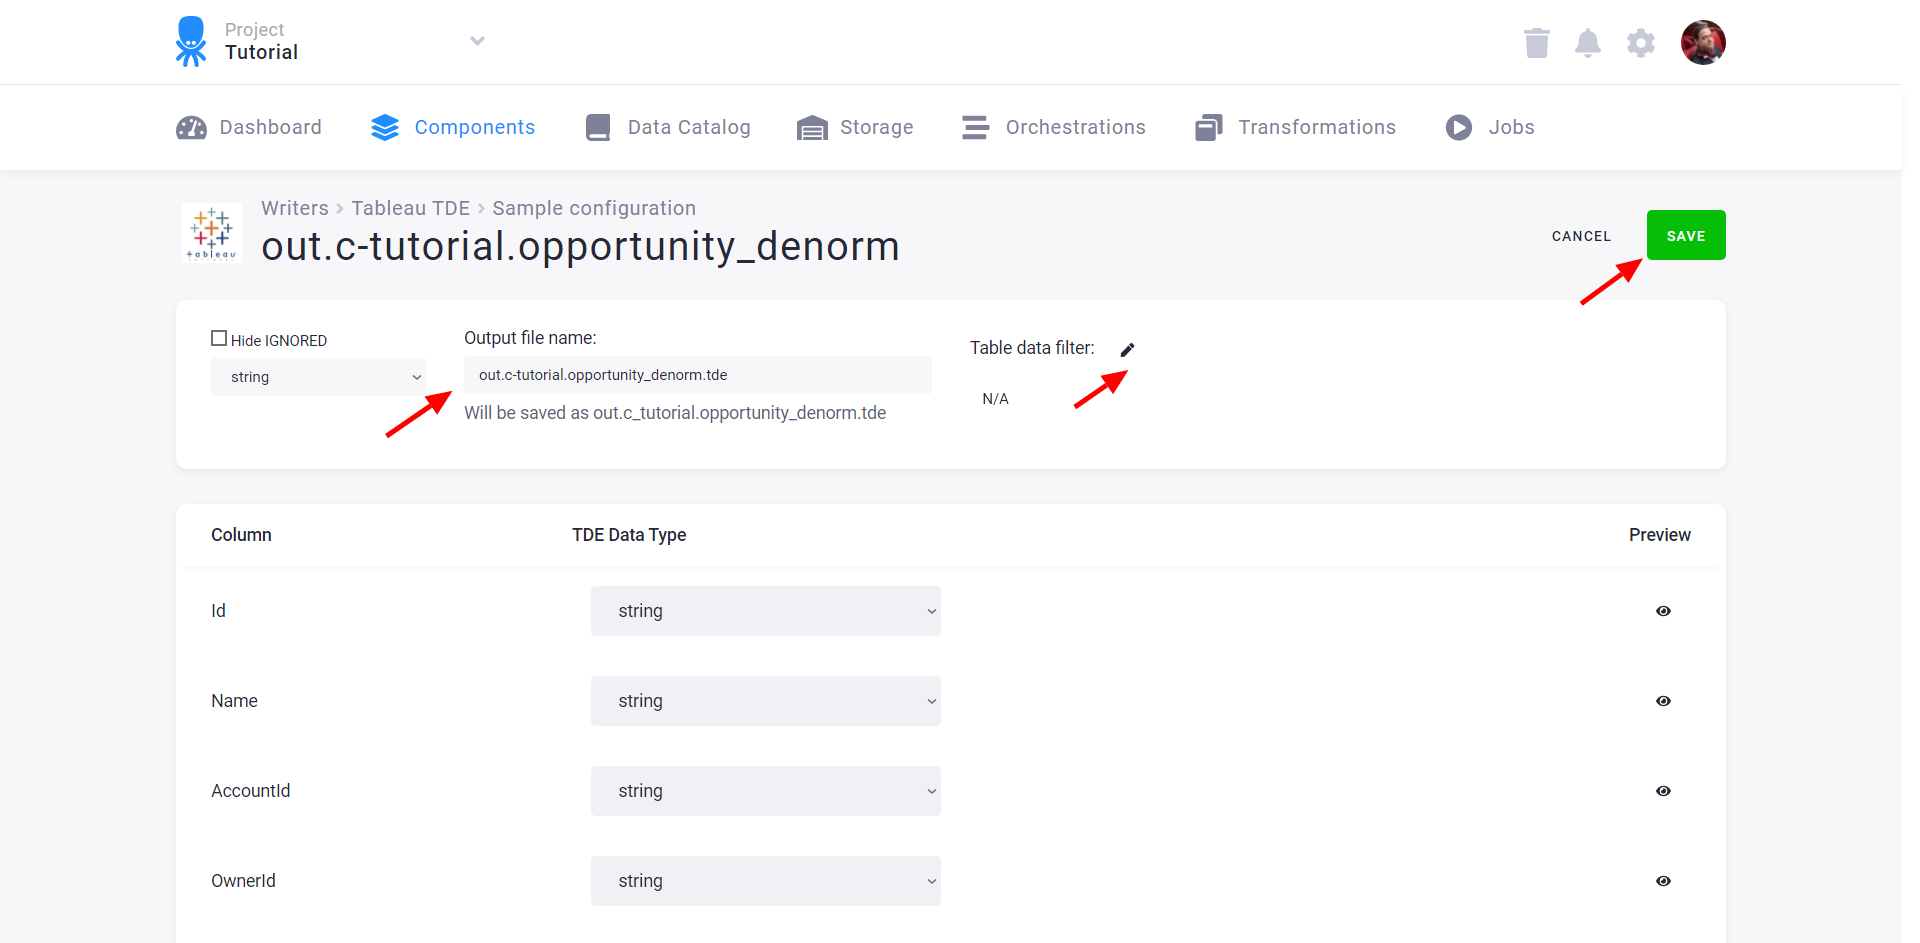
When done with configuring the table, don’t forget to Save the settings.
Downloading TDE File
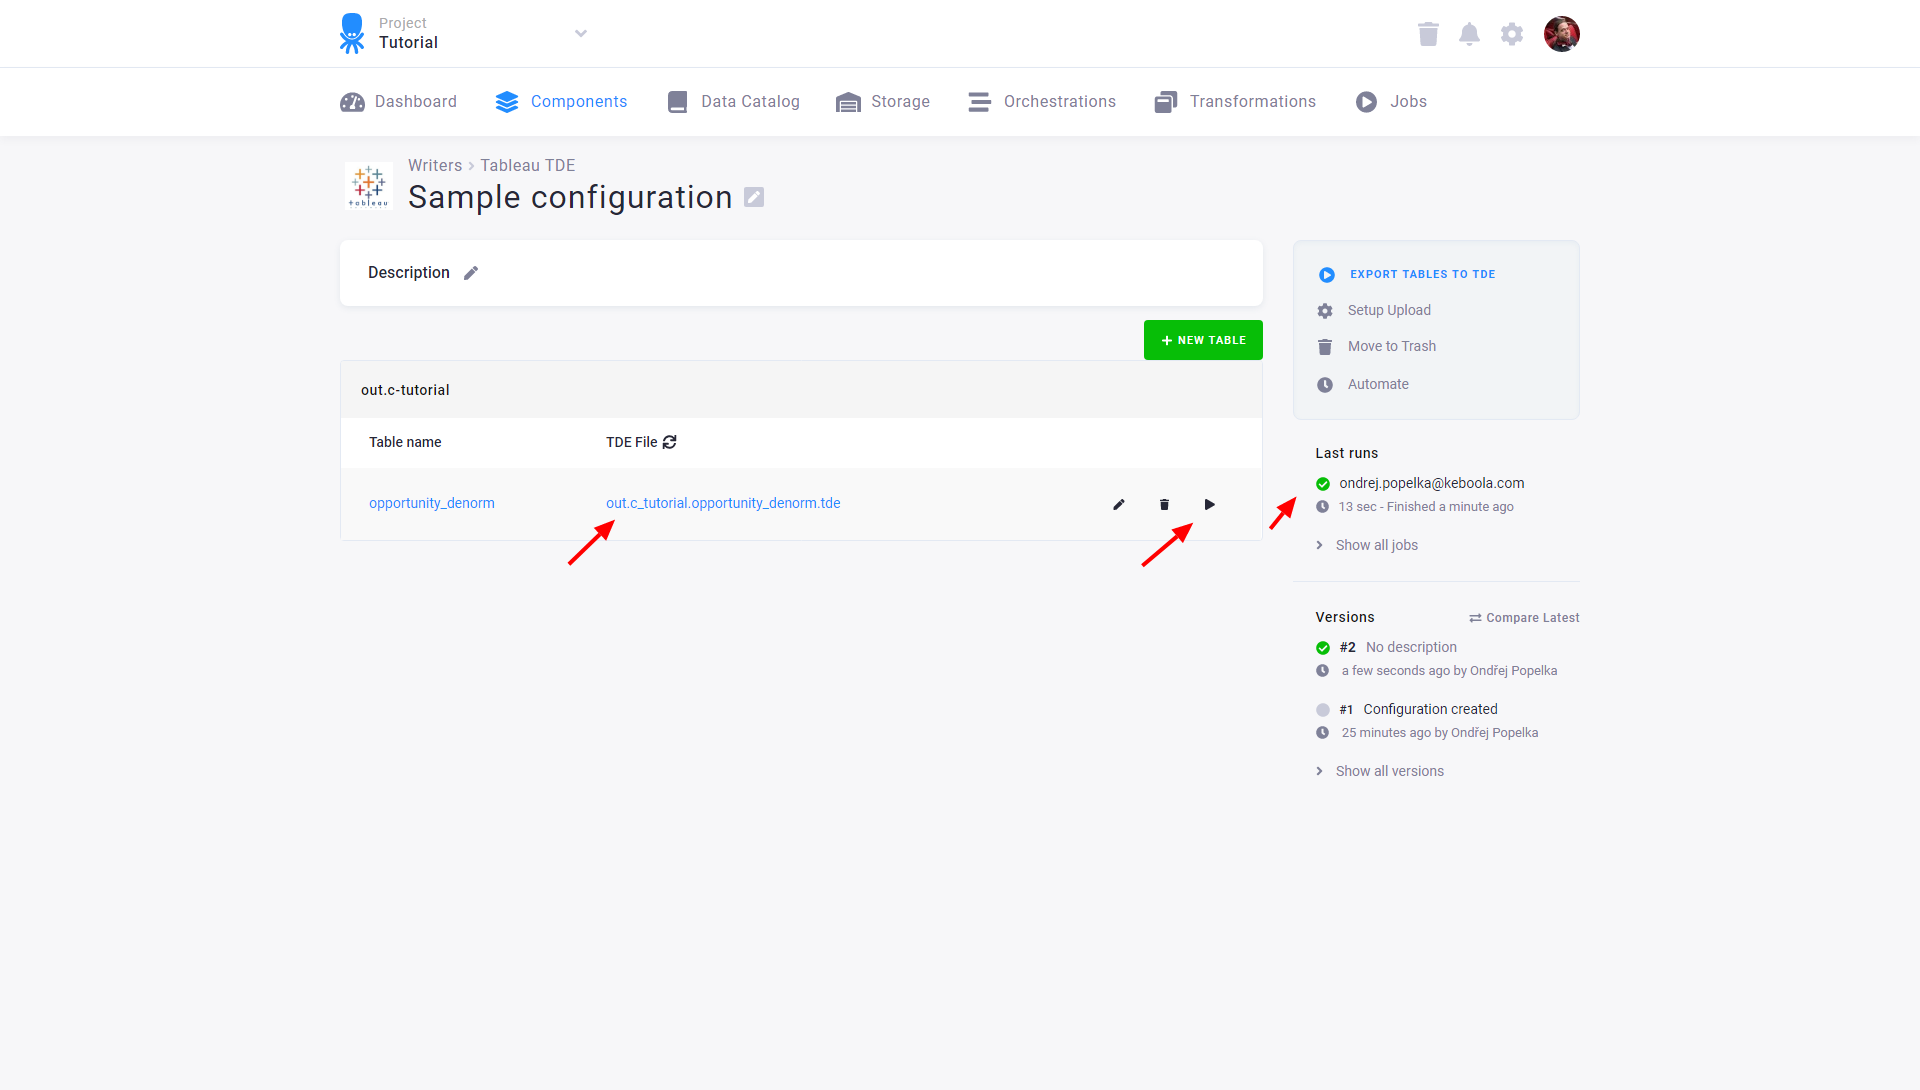
Section titled “Downloading TDE File”You can configure as many tables as you want for the data destination connector. Each table produces a separate TDE file, however. To download the TDE file, you have to Run the entire connector or a single table. Then the TDE file name will turn into a link through which you can download the TDE file to your computer.
Uploading TDE File
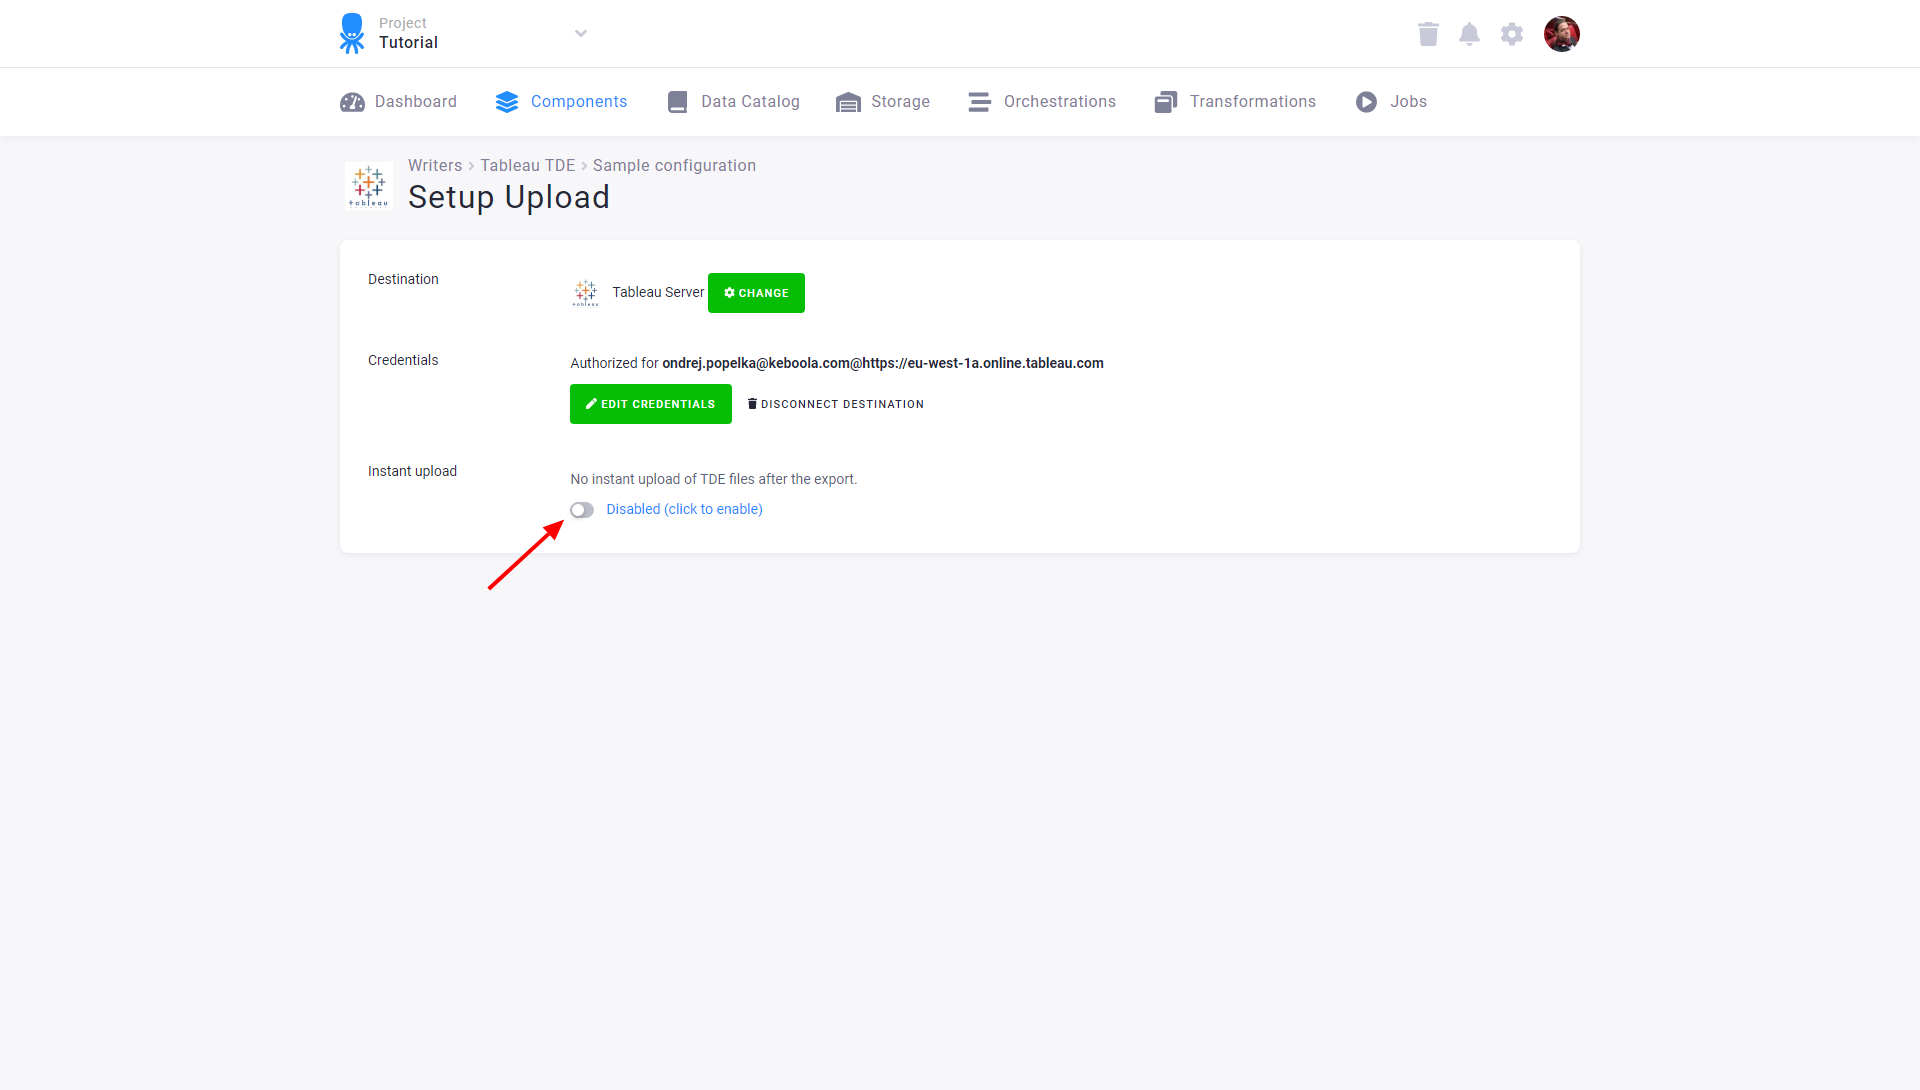
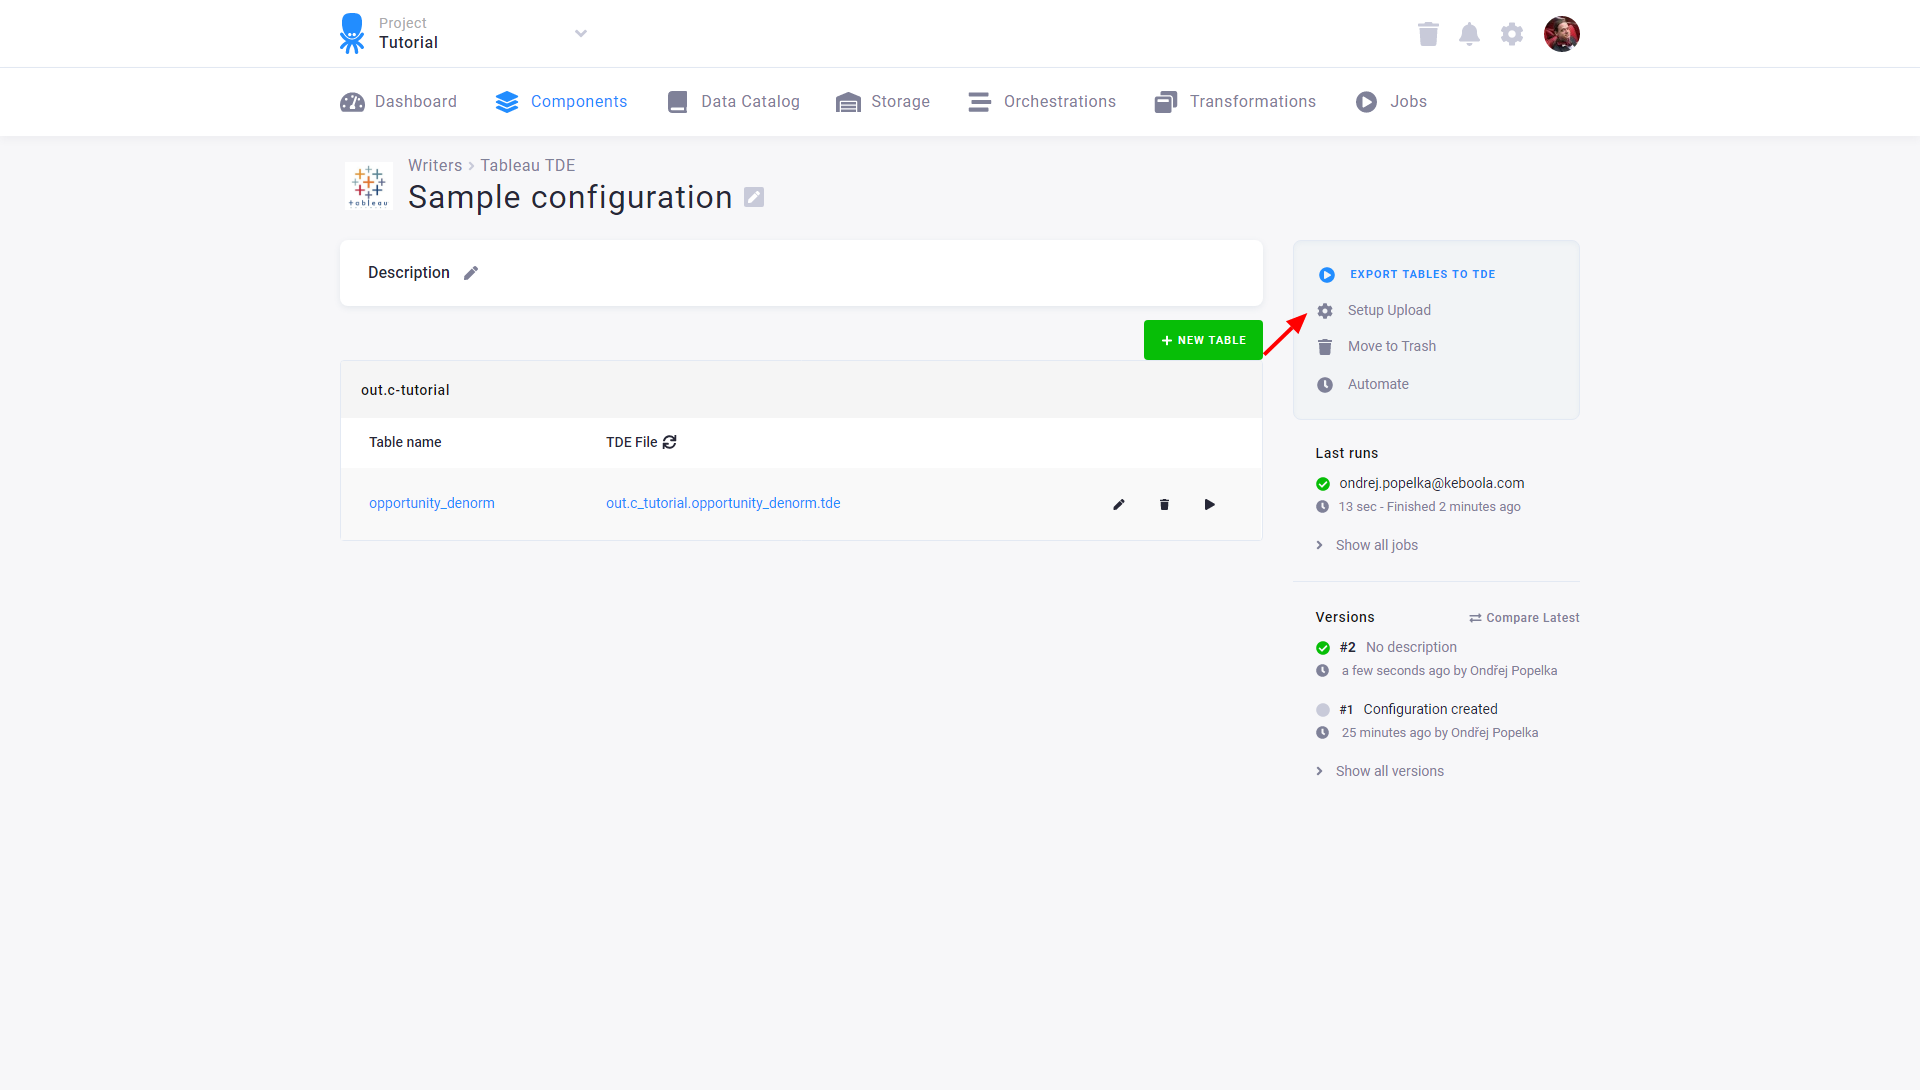
Section titled “Uploading TDE File”Apart from downloading the TDE files to your computer, you can also upload them to Tableau Server, Google Drive, or Dropbox. Start the upload configuration by clicking on the Set up Upload link:
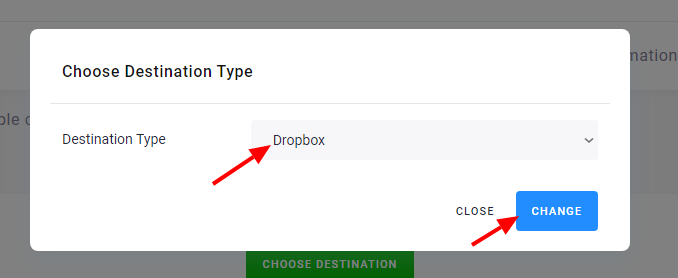
Then click Choose Destination and select the destination service. You can change the destination later, but only one destination can be used for one connector configuration.
For Dropbox and Google Drive configurations click the Authorize button to authorize the respective service.
For Google Drive, you may also select the destination
folder. For Dropbox, the destination folder is always Apps\Keboola Connection Writer V2\.
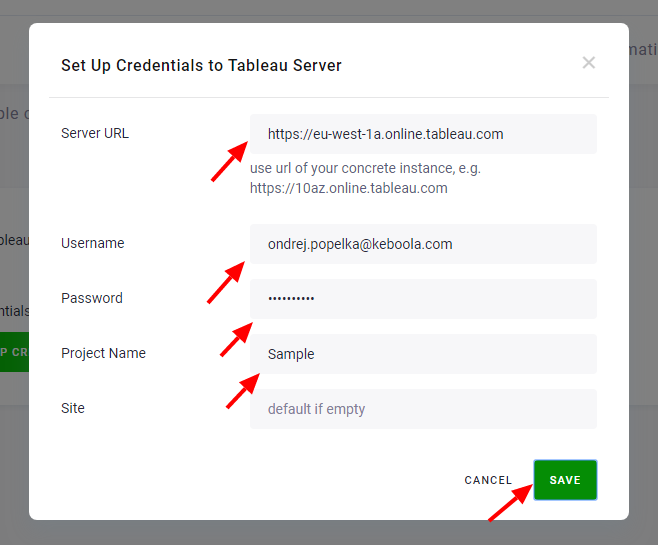
For writing to Tableau Server, you need to enter the credentials using the Set up Credentials button:
To activate the table upload, click the Enable instant upload link. Only when Instant Upload is enabled, the TDE files will be written to the selected destination.