Conditional Flows
Flows allow you to build automated data pipelines with conditional logic, branching, retries, and robust error handling. You can define flows that react to the outcome of previous steps, dynamically control their next action, or even skip tasks entirely.
Looking for Legacy Flows? To migrate an existing Legacy Flow to a new Conditional Flow, see the Migration Guide.
Access Flows
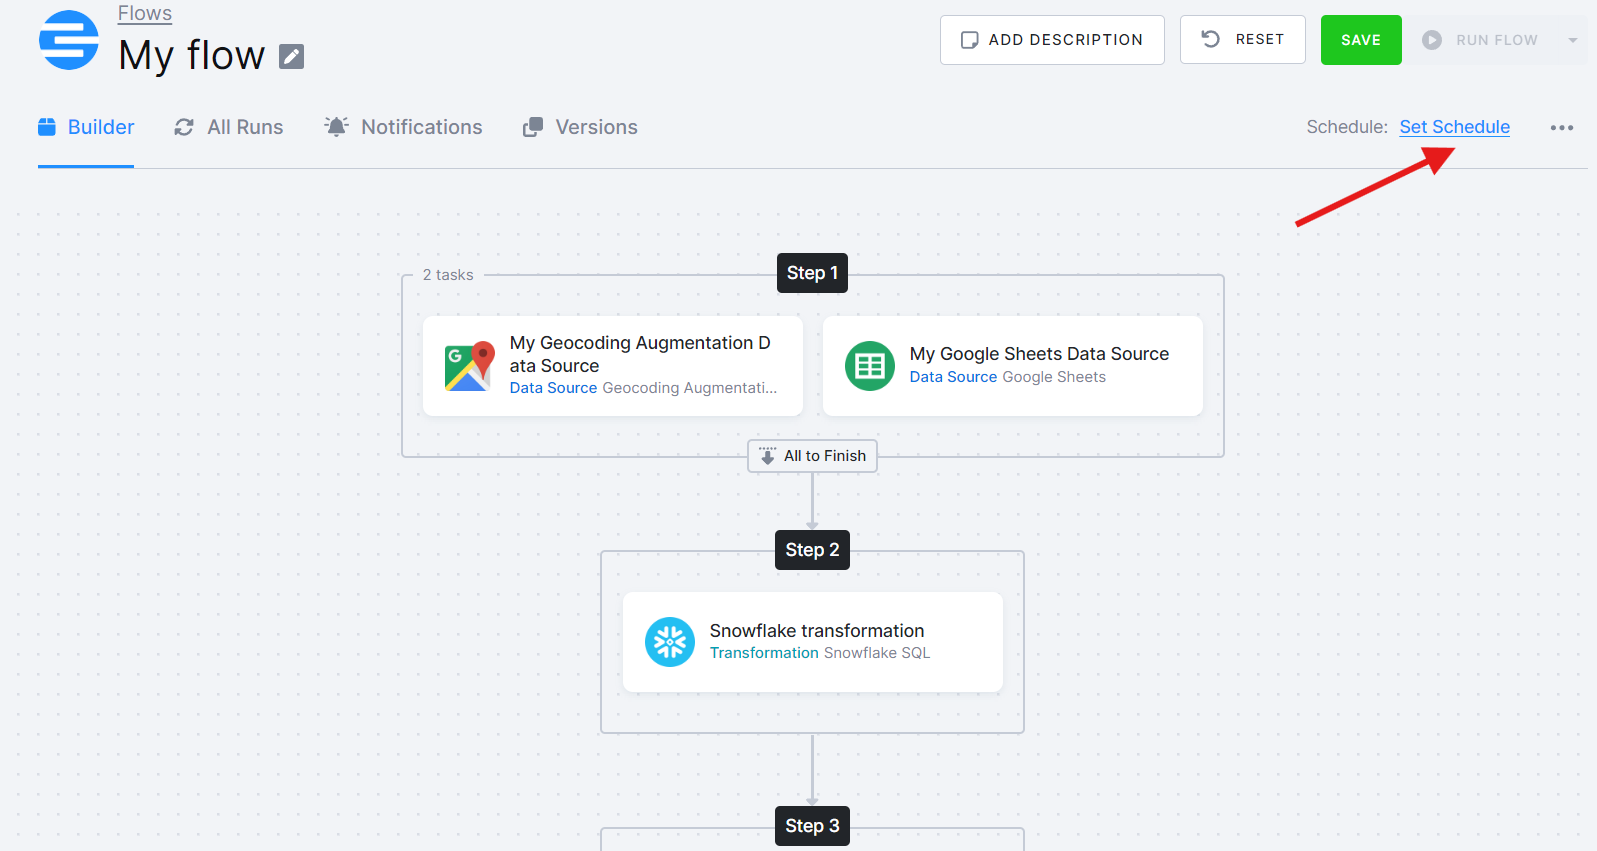
Section titled “Access Flows”Navigate to Conditional Flows > Create Flow. You’ll land directly in the Builder where you can start creating your first flow. Use the plus icon (+) to add different types of actions such as components, conditions, variables, notifications, and more — all of which are explained in detail later in this documentation.
Build the Flow
Section titled “Build the Flow”Phases and Tasks
Section titled “Phases and Tasks”- Phases group multiple tasks (components, variables, notifications).
- Tasks within a phase run in parallel.
- After all tasks in a phase complete, based on conditions it is determined which phase will be executed next.
- You can define multiple condition rules - only the first matched condition is executed.
- How to end a flow: You can stop a flow at any point using the End Flow option in the ELSE path of a conditional condition. This is especially useful when none of your IF conditions are met and you want to avoid continuing to another phase.
Execute Tasks in Parallel
Section titled “Execute Tasks in Parallel”You can group multiple tasks within one phase. These tasks then run independently in parallel, speeding up the execution. Phases execute sequentially, while tasks within a single phase run in parallel. If you have multiple data source connectors, you can include them all in a single phase, allowing them to run simultaneously.
The same applies to data destination connectors. Also, transformations independent of the connectors can be grouped within the same phase. Note that this does not reduce costs, as each job consumes credits independently.
You can also set up parallelization within a component (configuration), directly in the component’s UI for row-based components like database source connectors using the same credentials to run multiple tables concurrently.
Storage jobs have a parallel limit. They are typically capped at 10 parallel jobs but the Keboola Support team can help you adjust this.
Control Task Execution
Section titled “Control Task Execution”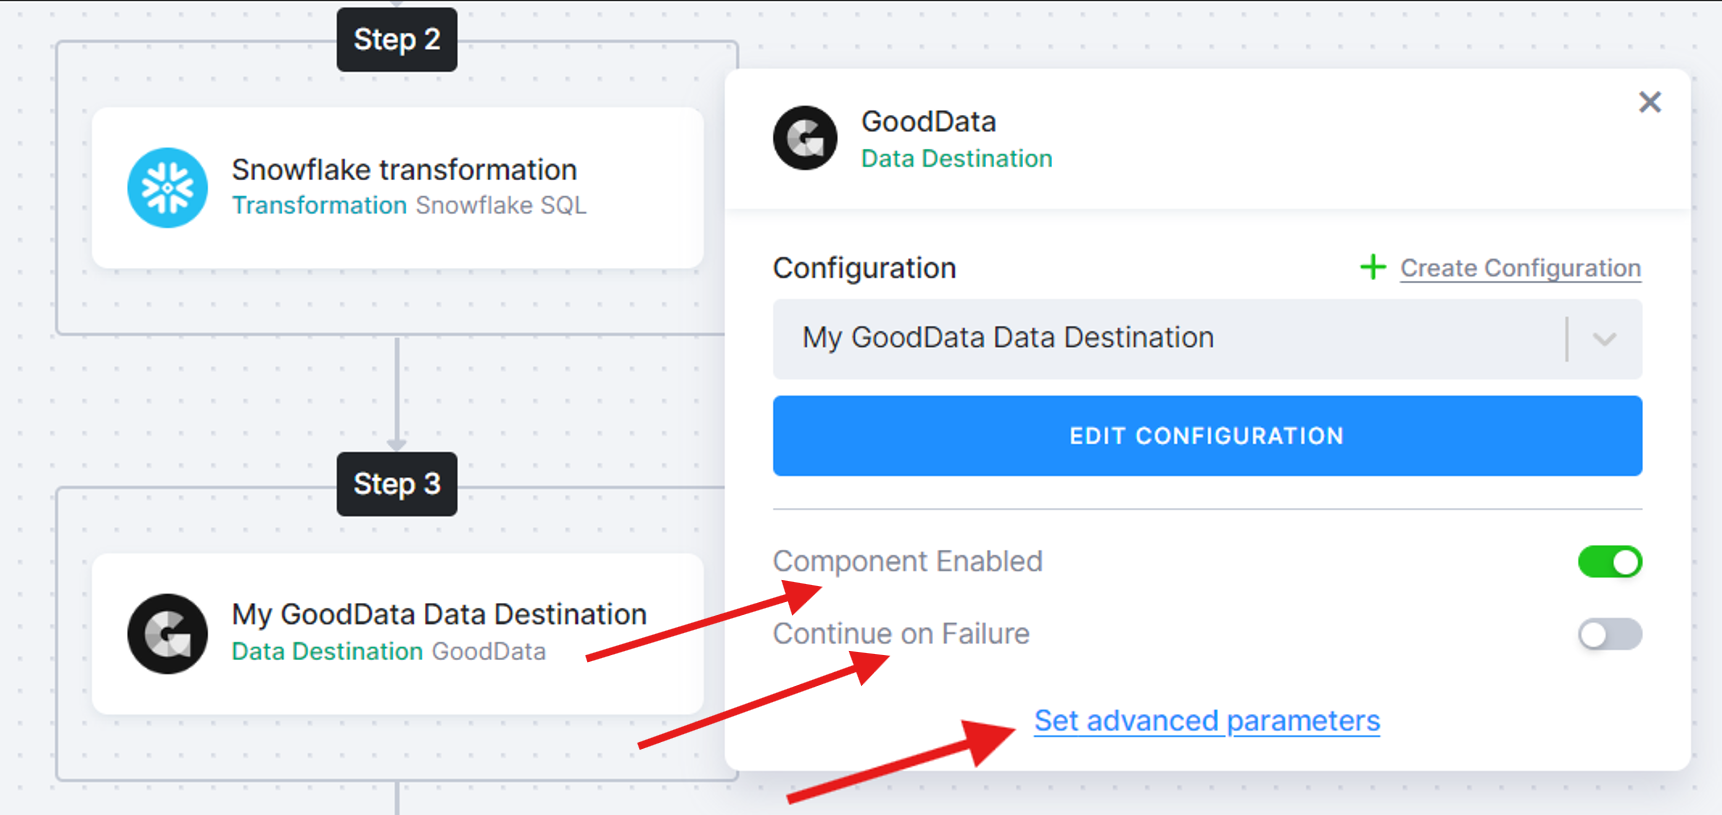
-
If you need to temporarily skip something, disable the task. The task will then be excluded from the flow.
-
Failure handling is expressed through conditions instead of a “Continue on Failure” toggle — you can branch on task or phase status (e.g.,
if status == 'error' then ...) to send notifications, run fallback logic, or end the flow. See also Retry for automatic retries of failed tasks. -
To modify the parameters sent to the underlying API call, you can set Task Parameters. Select the task and click Set advanced parameters. When finished, click Set.
Example of the advanced parameter: changing a variable in transformation:
{ "componentId": "keboola.snowflake-transformation", "configId": "0123abc", "mode": "run", "variableValuesData": { "values": [ { "name": "variables_name", "value": 12345 } ] }}Conditions
Section titled “Conditions”1. Conditional Logic (IF statements)
Section titled “1. Conditional Logic (IF statements)”Control the flow of execution based on conditions like:
- Task or phase status - such as success, failure, or warning. This is commonly used for handling errors, creating fallback branches, or sending alerts.
- Variable values (e.g. thresholds, results from previous tasks).
- Date and time logic (e.g. run only on Mondays, last day of the month).
- Number of Output Tables - control the flow based on how many output tables a task produces.
- Duration of Task - condition to trigger actions depending on how long a task runs. This is useful for detecting anomalies (e.g., unusually short or long runtimes).
Evaluation proceeds from top to bottom, and once a condition is true, the remaining conditions are ignored - even if others would also evaluate to be true.
Example: If you define 5 conditions and both the 3rd and 5th conditions are valid, only the 3rd will be used.
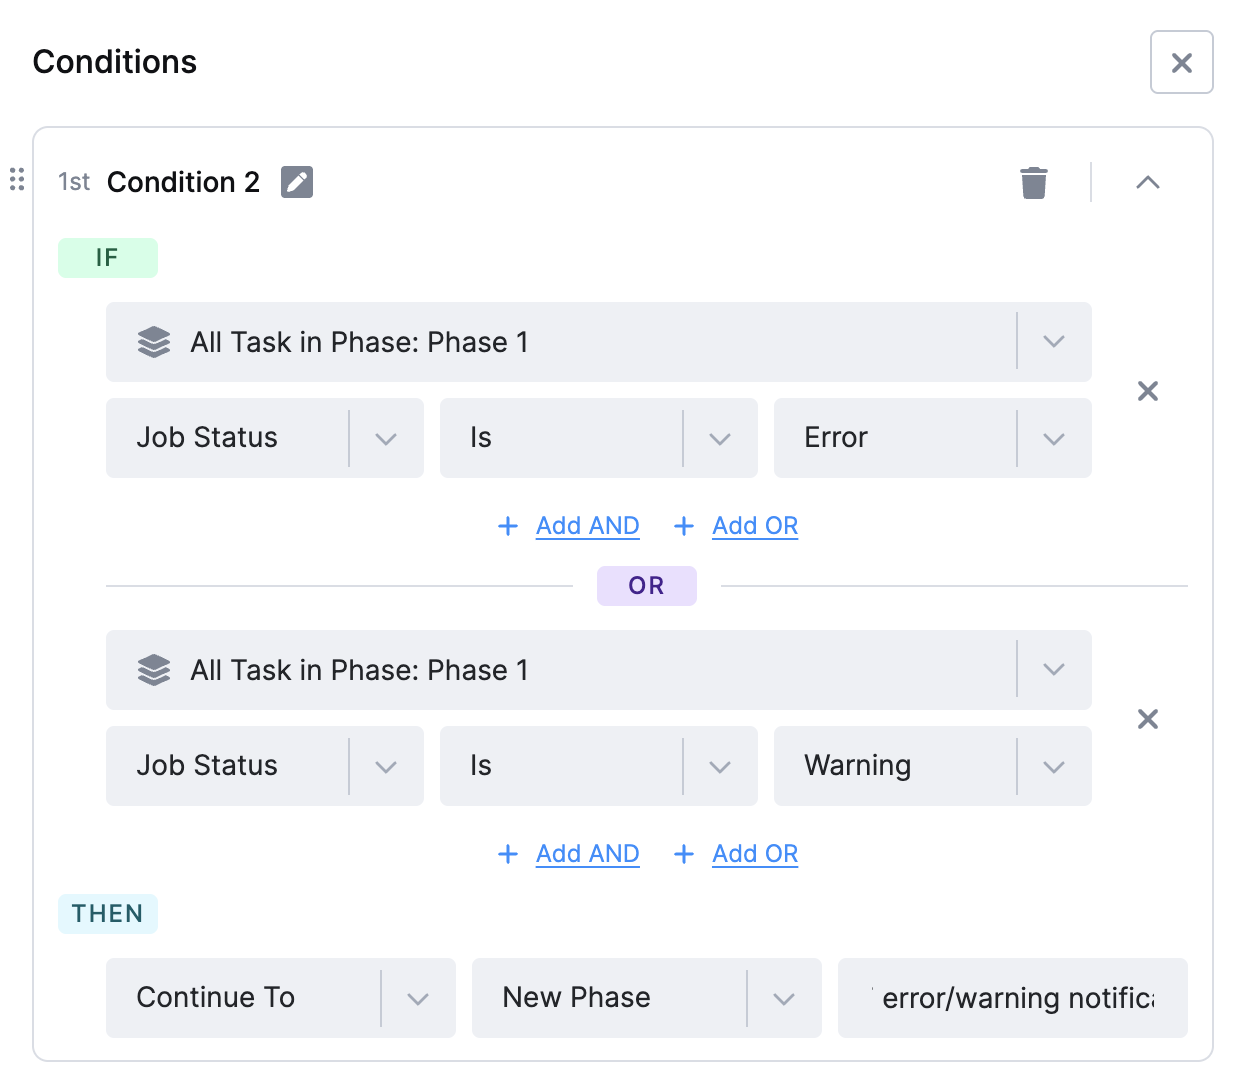
2. Logical AND / OR between conditions
Section titled “2. Logical AND / OR between conditions”You can use logical operators (AND) and (OR) to combine multiple statements within a single condition statement.
- Use (AND) when all statements must be true for the expression to pass.
- Use (OR) when any one statement being true is enough.
Variables
Section titled “Variables”Variables in Flows let you store and reuse values - like dates, task results, or custom inputs - throughout your flow. You can use them to make decisions, control flow logic, or pass dynamic values between tasks. The sections below walk through how to set up and use variables from the UI; each step also shows the JSON shape generated behind the scenes for template authors and API users.
Adding a Variable
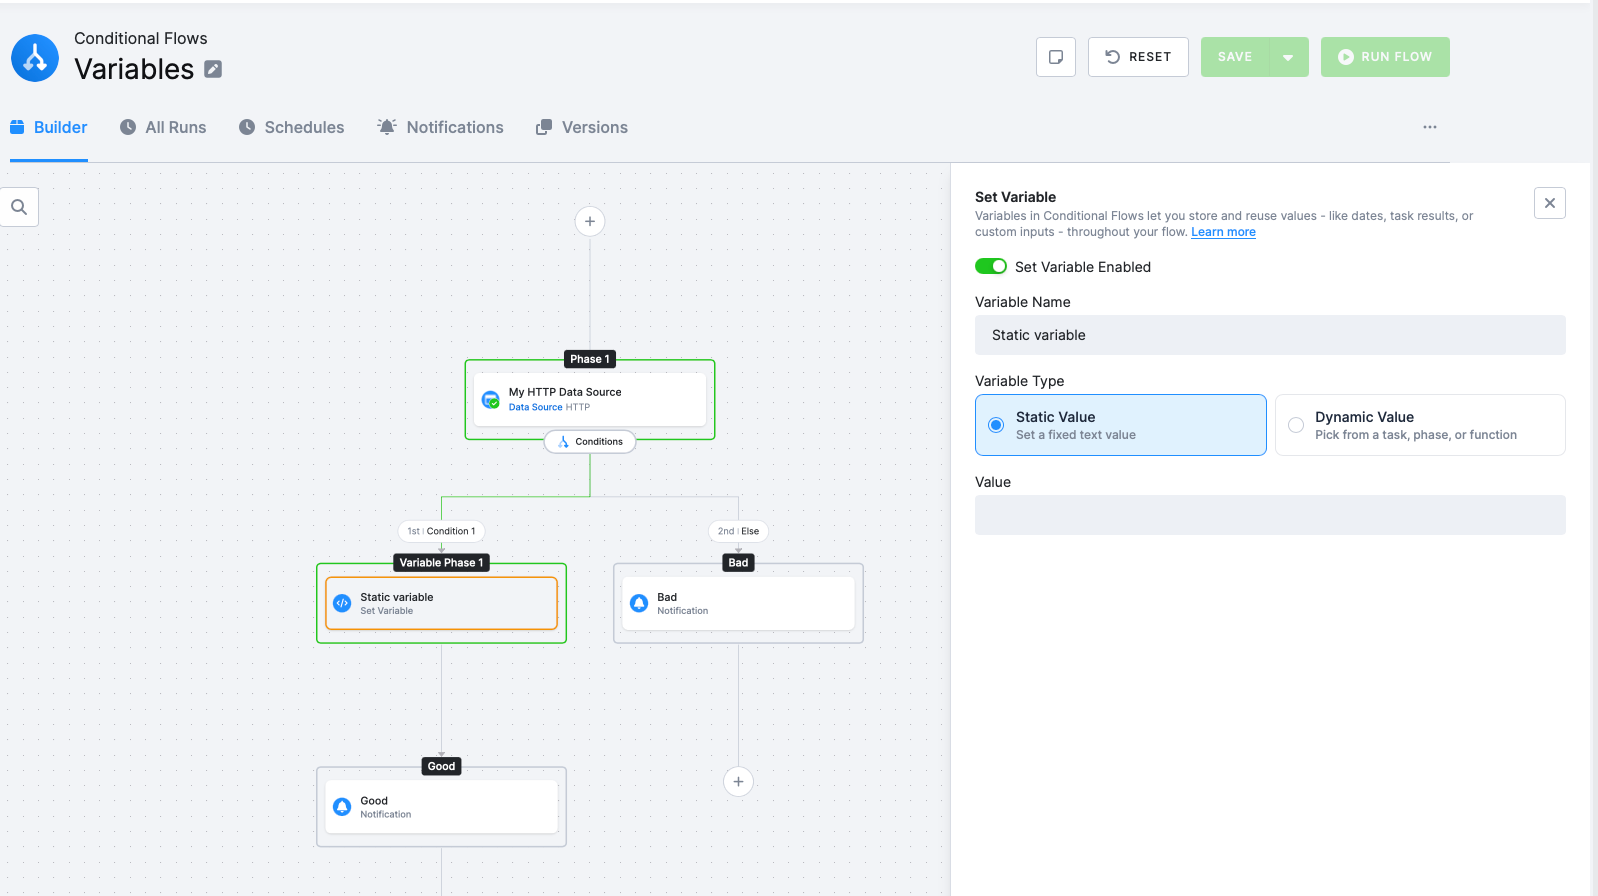
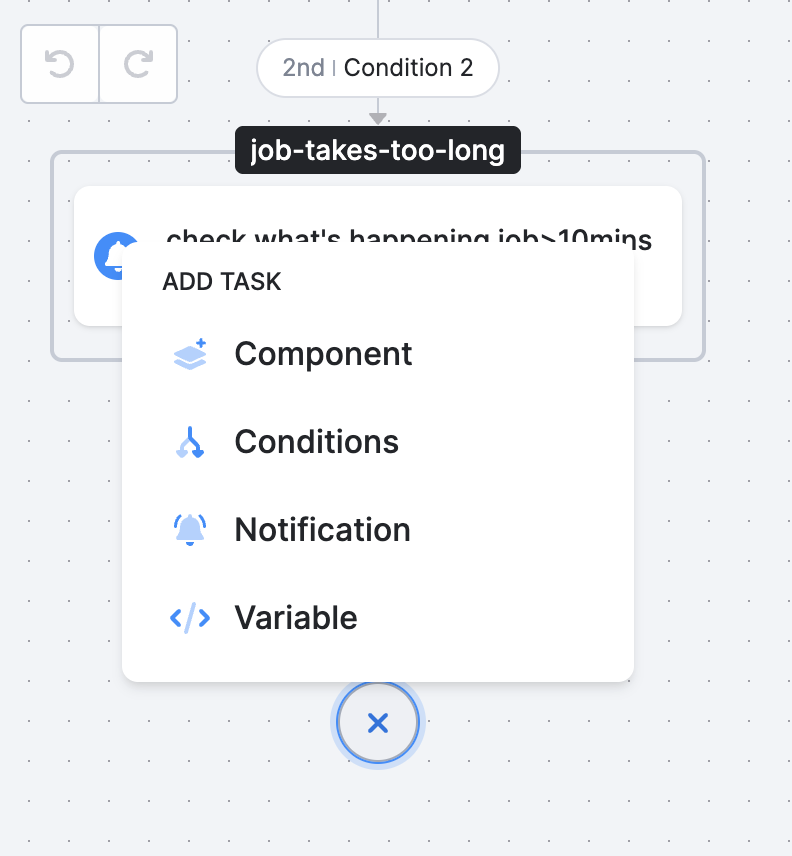
Section titled “Adding a Variable”- In a phase, click the + icon and choose Set Variable. The Set Variable panel opens on the right.
- Enter a Variable Name — this is the identifier other tasks will use to reference the value.
- Choose a Variable Type — either Static Value or Dynamic Value.
Static Value
Section titled “Static Value”A Static Value is a fixed text or number you enter directly. Useful for thresholds, IDs, or labels that don’t change between runs.
JSON equivalent (useful when authoring a flow as a template or via the API):
{ "type": "variable", "name": "max_duration", "value": 3600}Dynamic Value
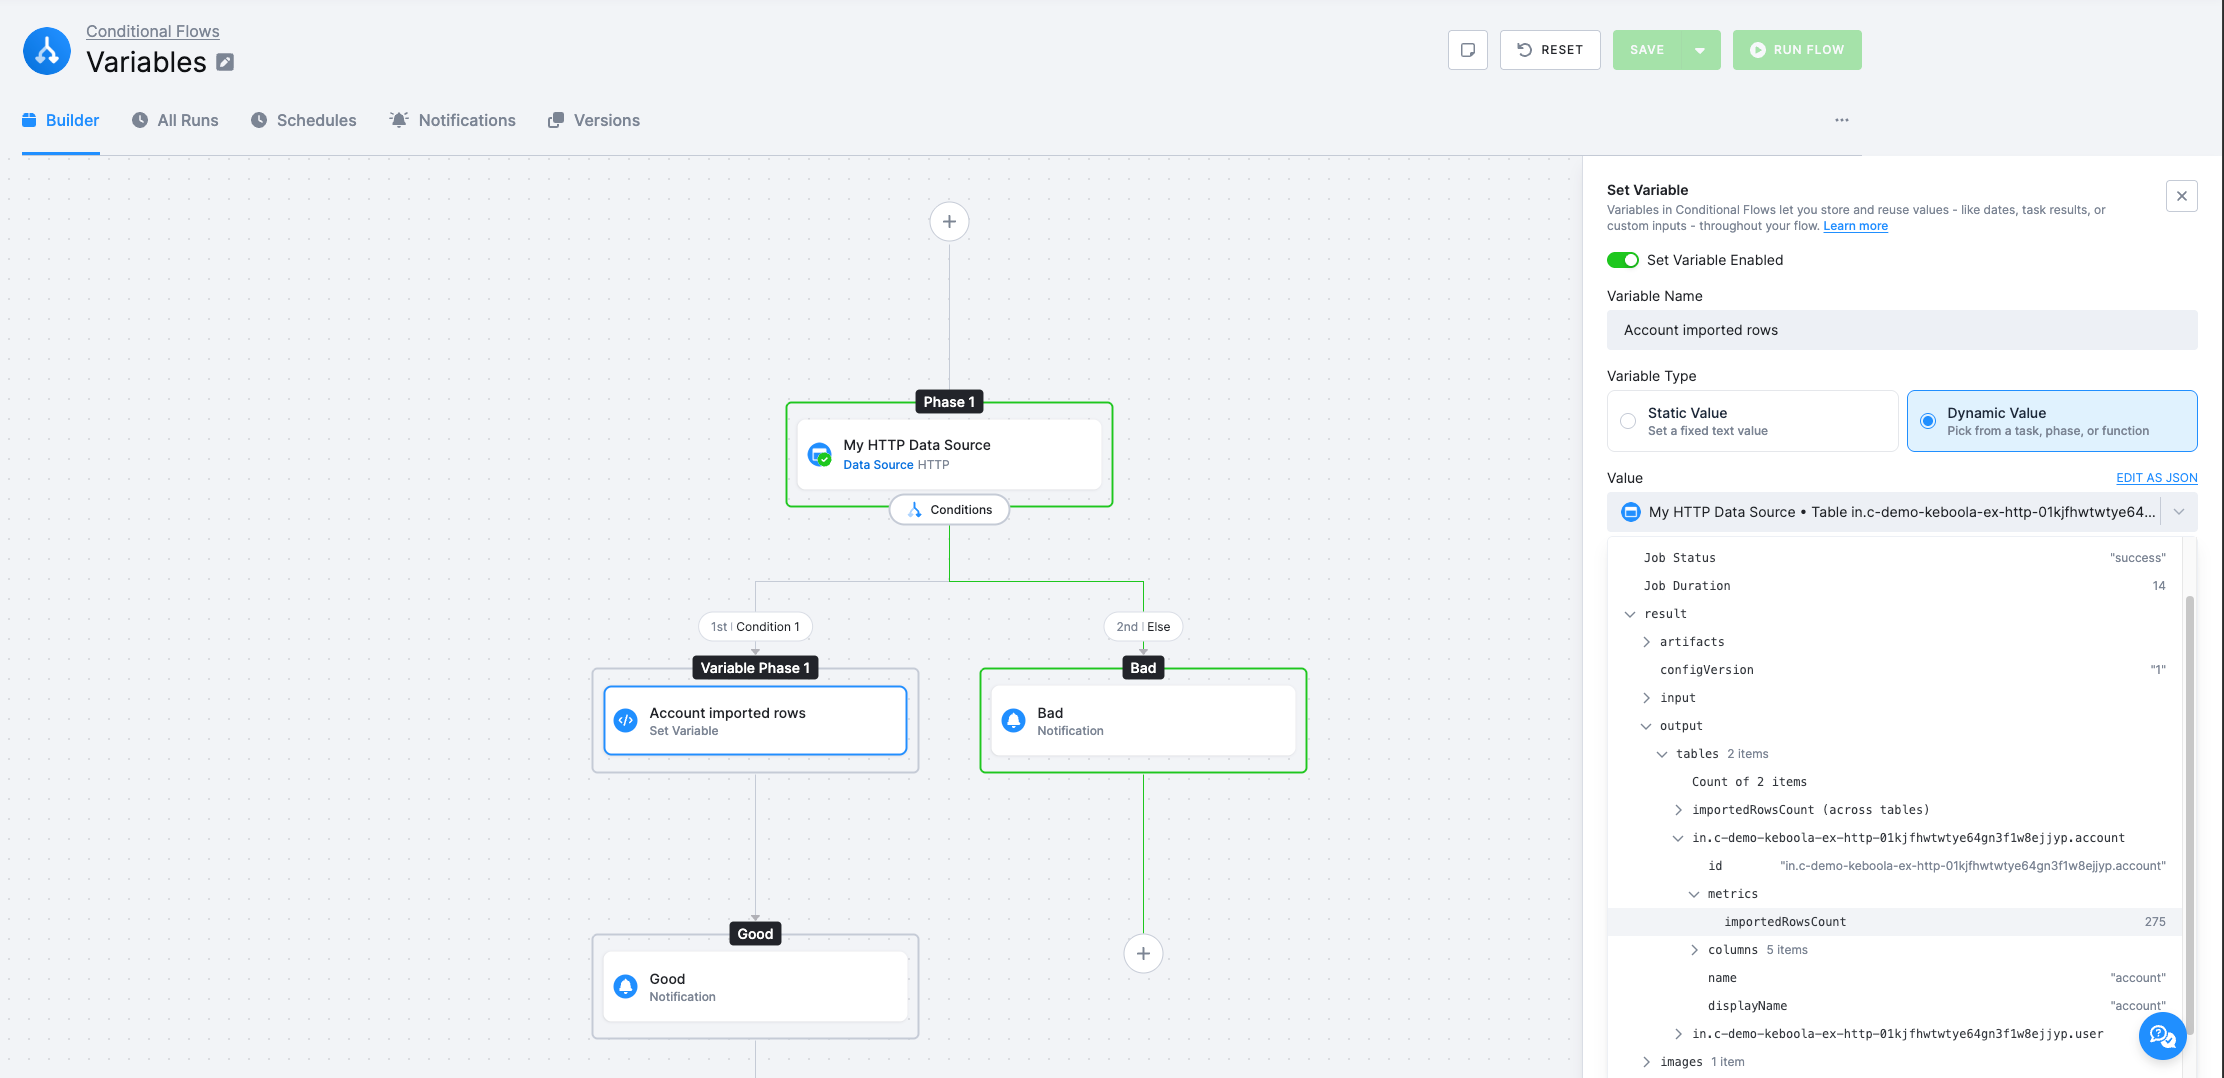
Section titled “Dynamic Value”A Dynamic Value is computed at run time from a task result, an earlier phase, or a built-in function (see Date & Time function below). When you pick this type, the value picker lets you browse the outputs of tasks that ran earlier in the flow. You can pick any field from the job’s result tree — for example result.output.tables, result.artifacts, result.images, result.configVersion, result.errorMessage, and many more.
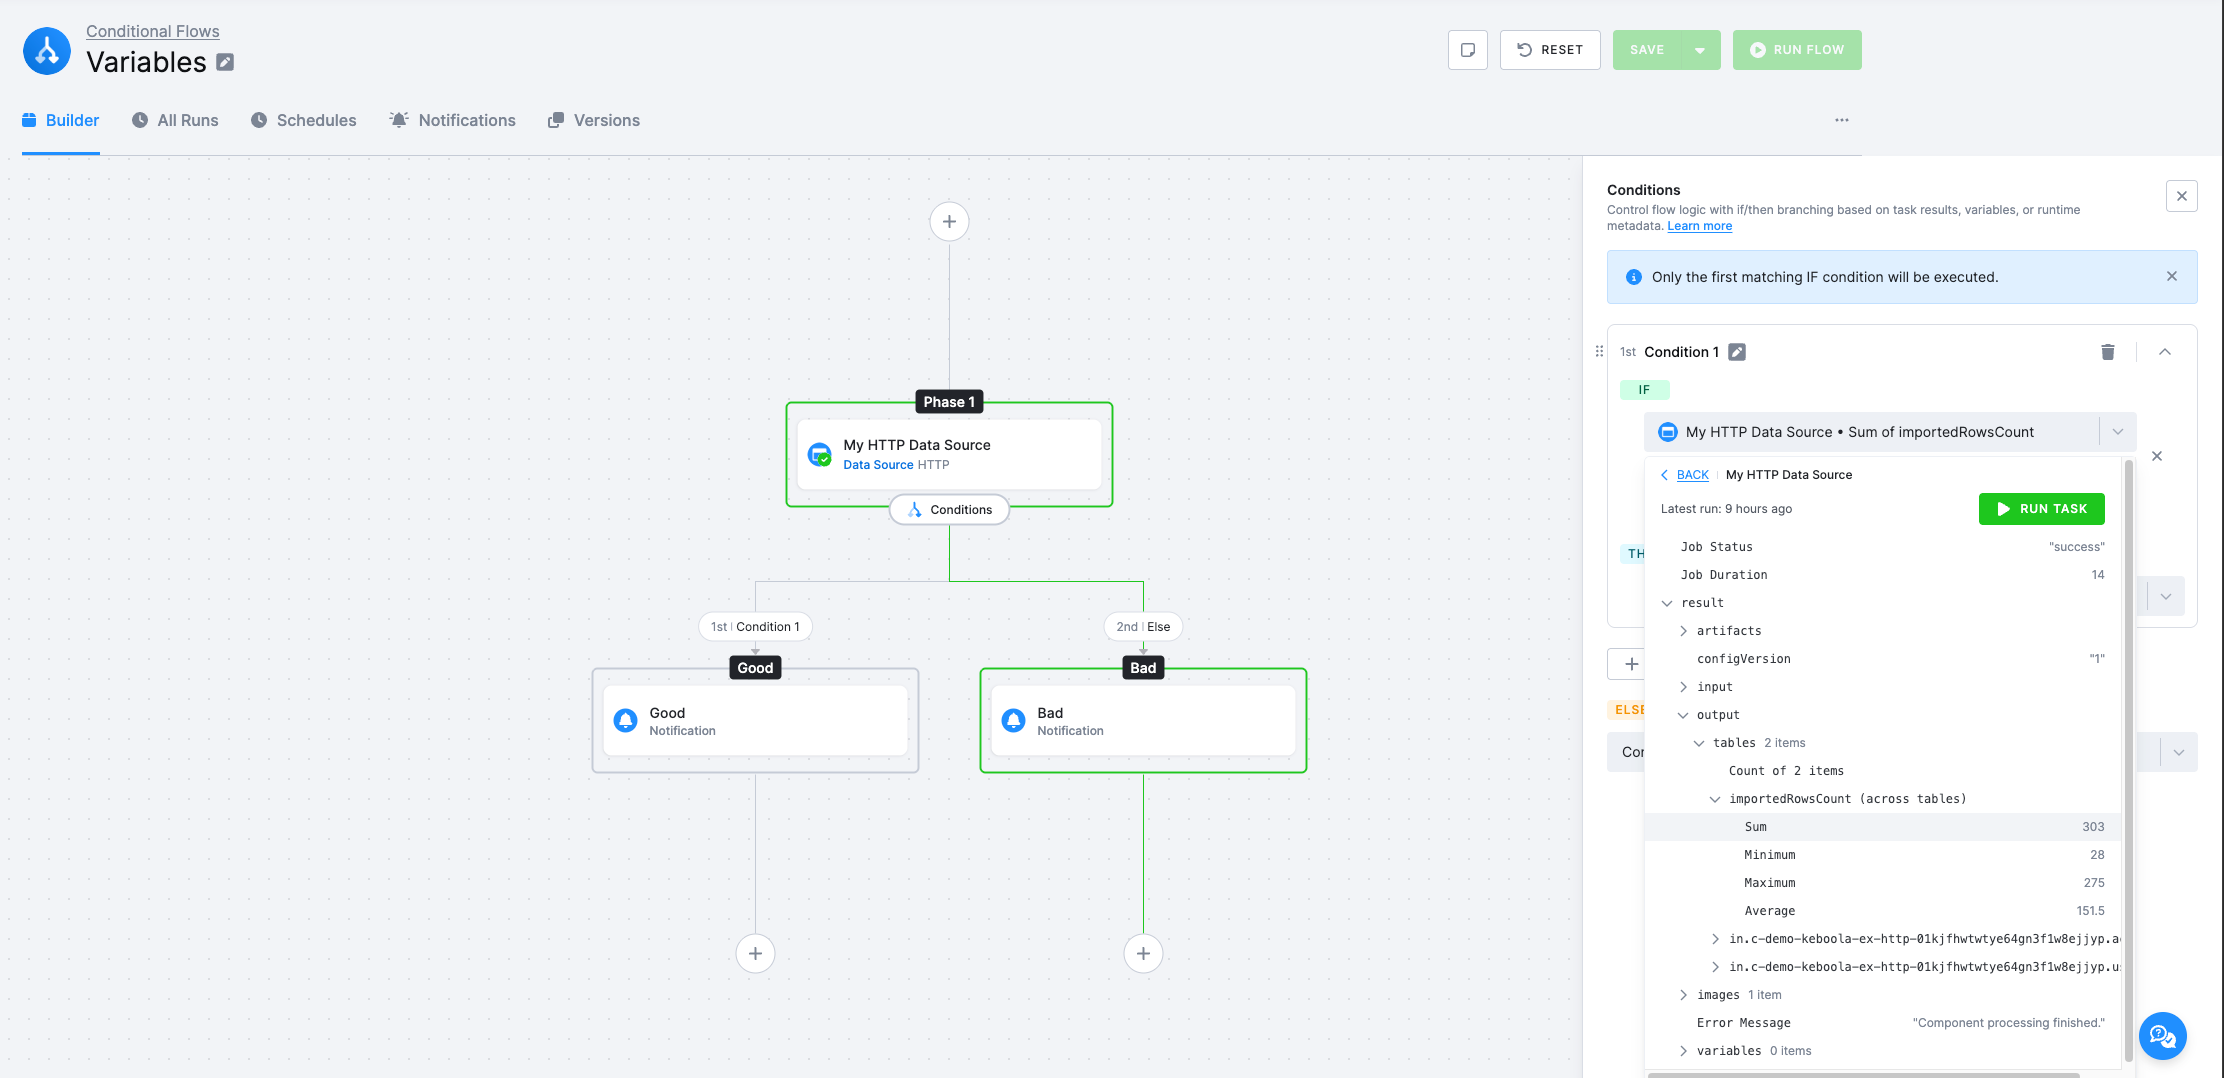
If a task produces multiple output tables, the picker also offers aggregations across all of them: Sum, Minimum, Maximum, and Average of a numeric field. For example, Sum of importedRowsCount returns the total number of rows imported by an HTTP data source across every output table.
JSON equivalent — behind the scenes the aggregation is stored as a source definition. For example, Sum of importedRowsCount can be expressed as a JMESPath aggregation in the task value. Note that the picker tree displays paths rooted at result.* (for example result.output.tables), while the generated value expression is rooted at job.result.*:
{ "type": "variable", "name": "total_imported_rows", "source": { "type": "task", "task": "extract-data", "value": "sum(job.result.output.tables[].importedRowsCount)" }}COUNT and DATE are the only functions exposed via the function block (see Date & Time function below); they take their inputs as operands. COUNT counts the items a JMESPath expression returns — for example, the number of output tables a task produced:
{ "type": "variable", "name": "table_count", "source": { "type": "function", "function": "COUNT", "operands": [ { "type": "task", "task": "extract-data", "value": "job.result.output.tables" } ] }}The value field accepts JMESPath expressions, so you can filter and extract specific items from the task result instead of just walking the tree. For example, picking the name of a particular output table by its ID:
{ "type": "task", "task": "97288", "value": "job.result.output.tables[?id=='out.c-test.example'][].name | [0]"}Date & Time function
Section titled “Date & Time function”Returns the date/time formatted according to the specified format string, available formats: https://www.php.net/manual/en/datetime.format.php.
This example returns the full textual representation of the current month, such as “July” or “August”.
{ "type": "function", "function": "DATE", "operands": [ { "type": "const", "value": "F" } ]}Example of creating a variable with the current timestamp:
{ "id": "set-timestamp", "name": "Set Timestamp Variable", "phase": "init", "task": { "type": "variable", "name": "current_timestamp", "source": { "type": "function", "function": "DATE", "operands": [ { "type": "const", "value": "U" } ] } }}Using Variables in Conditions
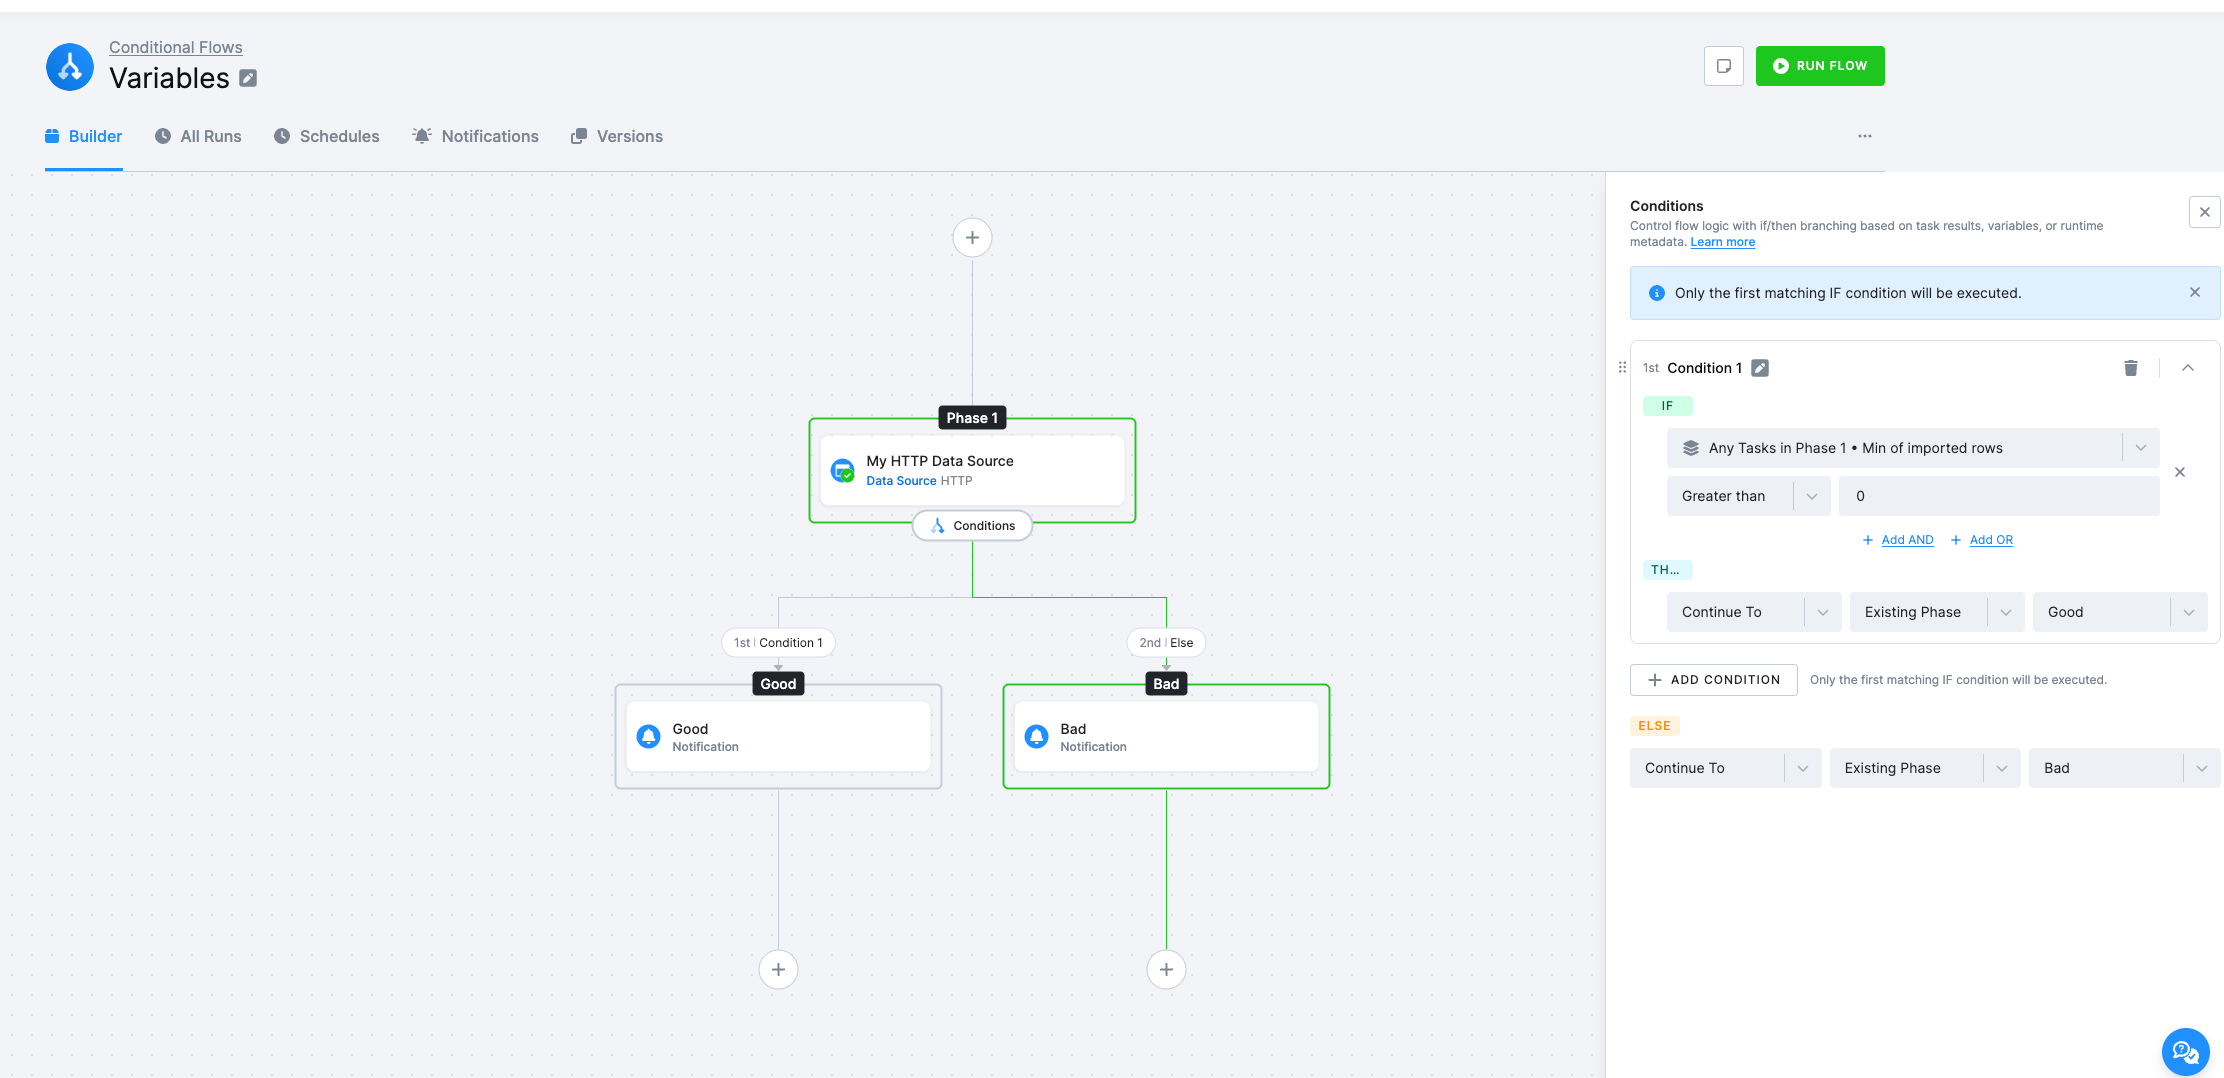
Section titled “Using Variables in Conditions”Once a variable has been set in an earlier phase, any later Condition can compare its value against a constant, against another variable, or against a task result.
- In the IF row, click the value picker and choose a variable, a task result, or a phase result from an earlier phase.
- Choose an operator (Greater than, Equals, Contains, …).
- Provide a comparison value — a constant, or another value picked from the tree.
- Set the THEN and ELSE actions: Continue To an existing phase, or end the flow.
Only the first matching IF condition is executed; subsequent IFs in the same Conditions block are skipped.
See also the Conditions section above for the full list of operators and condition types.
How Variables Reach Component Jobs
Section titled “How Variables Reach Component Jobs”When a phase runs a component (a job task), the variables you set earlier in the flow are merged into the component’s own variables. A flow variable replaces a component variable only if both have the same name — flow variables whose names the component does not declare are silently ignored. This means: to let a flow drive a value inside a component, declare a variable with the matching name in the component’s configuration; the flow will fill it in when the job runs.
For finer control on a specific job task, an advanced variableOverrides field on the task can restrict which flow variables are merged in.
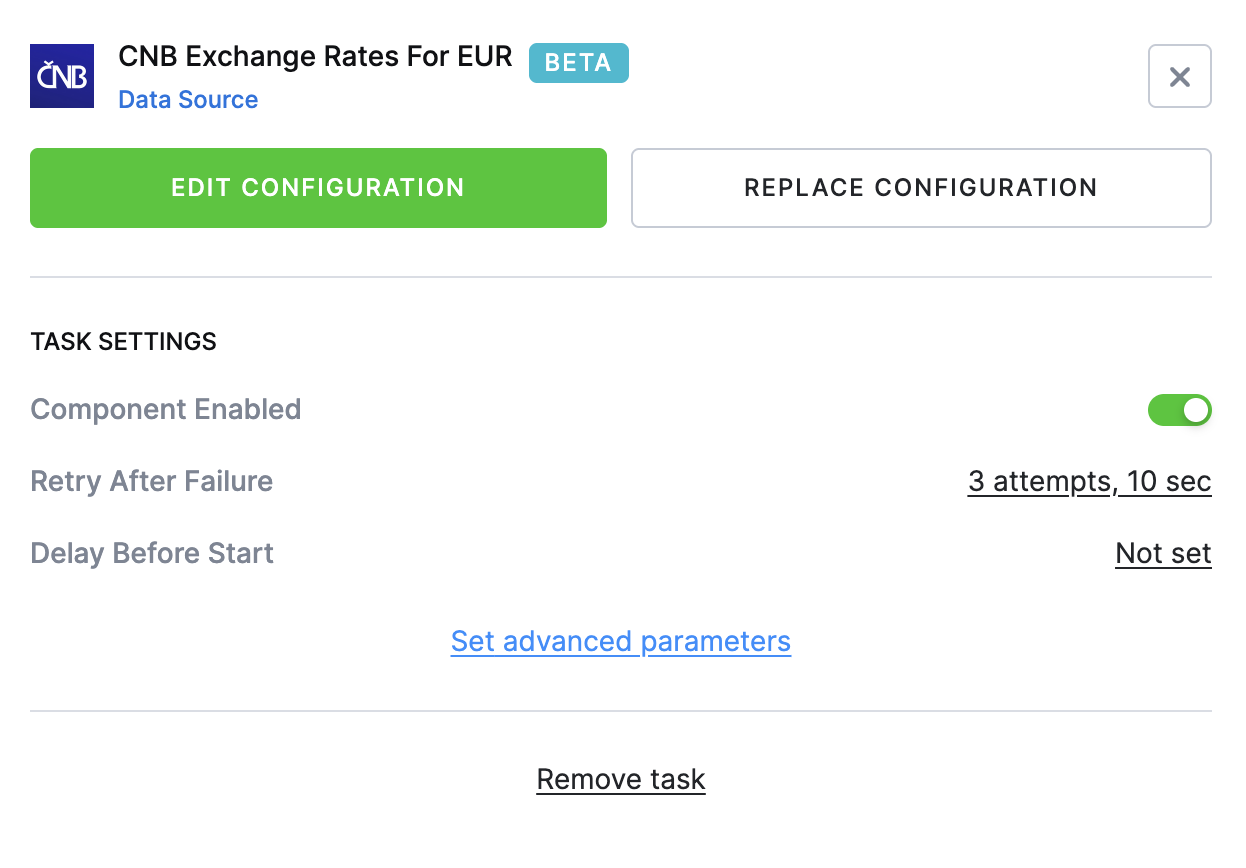
You can retry failed tasks automatically and optionally choose to retry based on specific failure messages.
By default, the system retries up to 3 times with a 10-second delay between attempts. Both the number of attempts and the delay can be customized to fit your workflow.
To access the retry settings, click on task to open the configuration.
Example: If you set 3 retries with 10 seconds delay between attempts, it means the task will run 4x total.
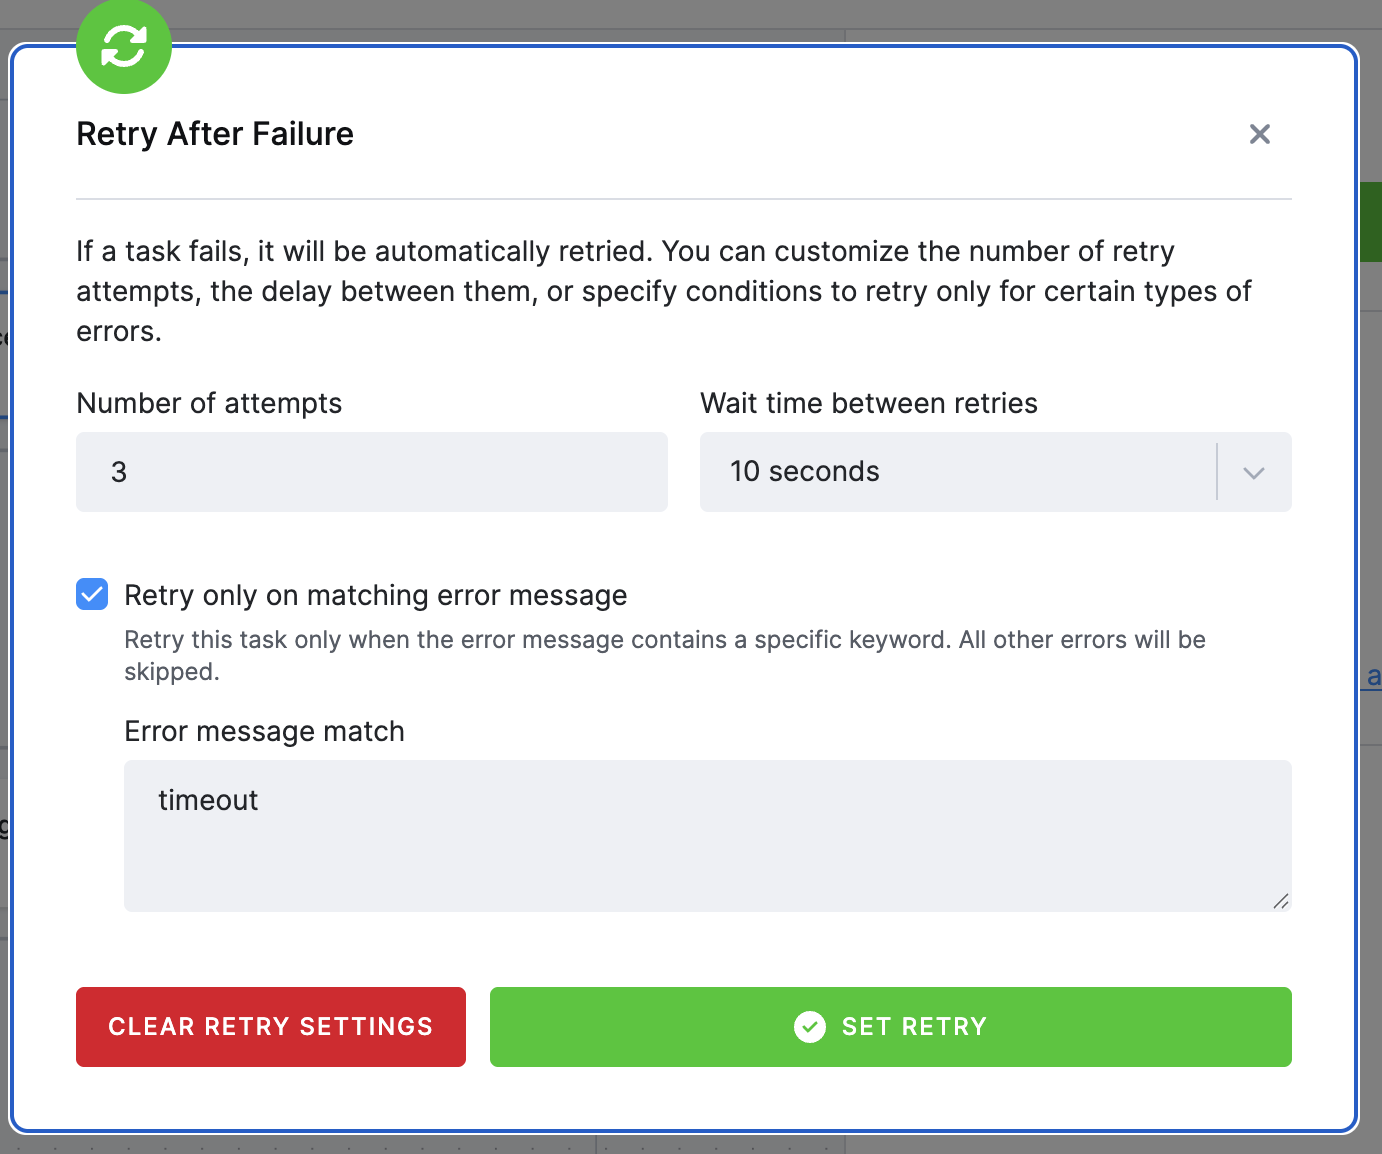
Problem: Pipeline fails due to API timeout.
Solution: Configure retry logic for that task.
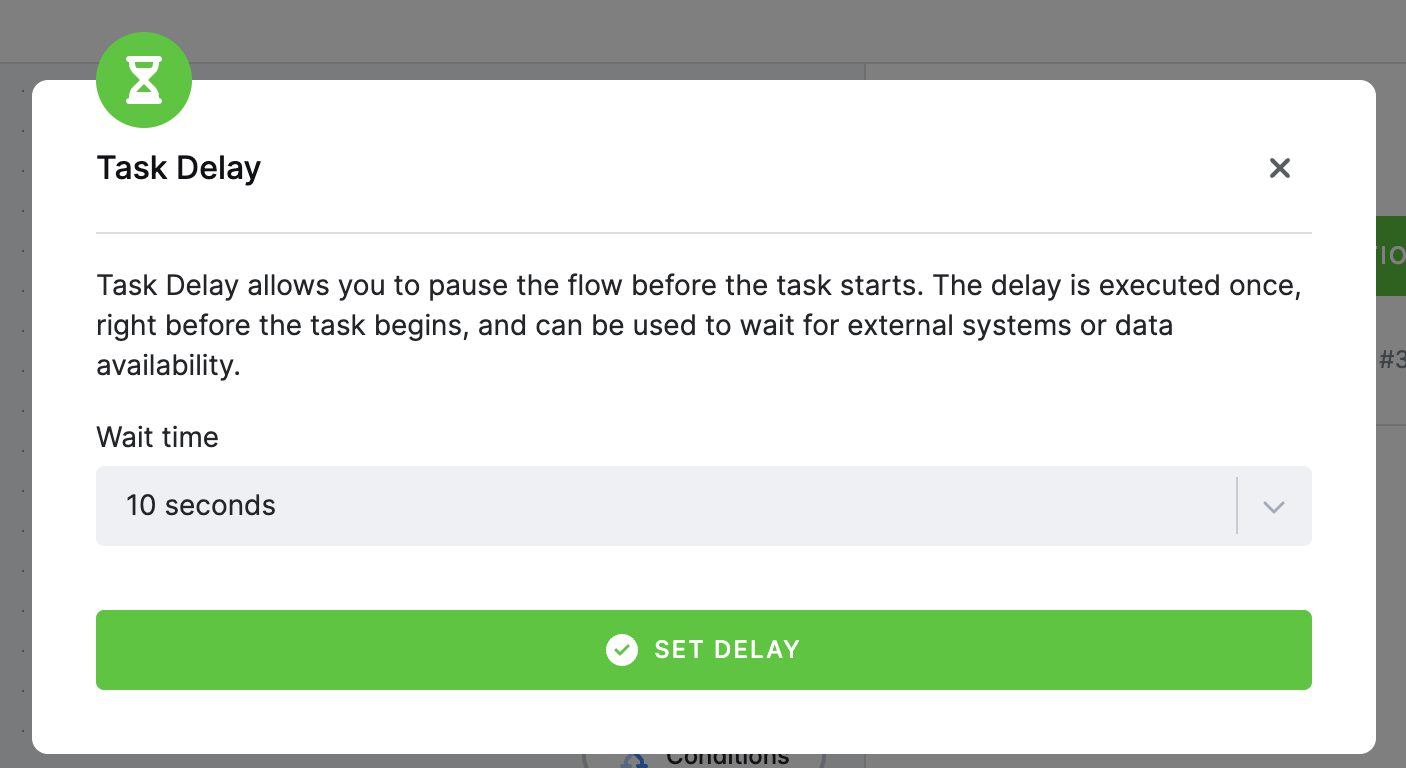
Delay between tasks
Section titled “Delay between tasks”Introduce a delay (in seconds) before executing a task - useful for waiting for external systems or data availability.
To access the delay settings, click on task to open the configuration.
Notifications
Section titled “Notifications”Send alerts directly from the flow and conditions using email(s) or webhook(s). Use the plus icon (+) and select Notification.
You can also create the notification inside of condition as a New Phase, name it and once the condition is all set, use the Use the plus icon (+) and select Notification.

Schedule and Automate
Section titled “Schedule and Automate”Click on Set Schedule in your flow and select when you want the flow to run. You can select predefined intervals or set your own. Another option is to use triggers to initiate the run.
Scheduling: Commonly, flows are set to run at specific times. To avoid busy periods in a shared environment, consider scheduling slightly off-peak for smoother execution.
Triggers: Set flows to automatically start when certain Storage tables are updated (ideal for managing dependencies across projects). Your projects will stay synchronized and run efficiently.
Note on Triggers: If table updates happen during the cool-down period, the trigger is suppressed, but the tables are marked as ready. Therefore, if all configured tables are updated during the cool-down period, the flow is not scheduled at that time — but once the cool-down expires and any table is updated (causing the trigger to be evaluated), the system recognizes that all tables are already up to date and runs the flow immediately.
Check Run History
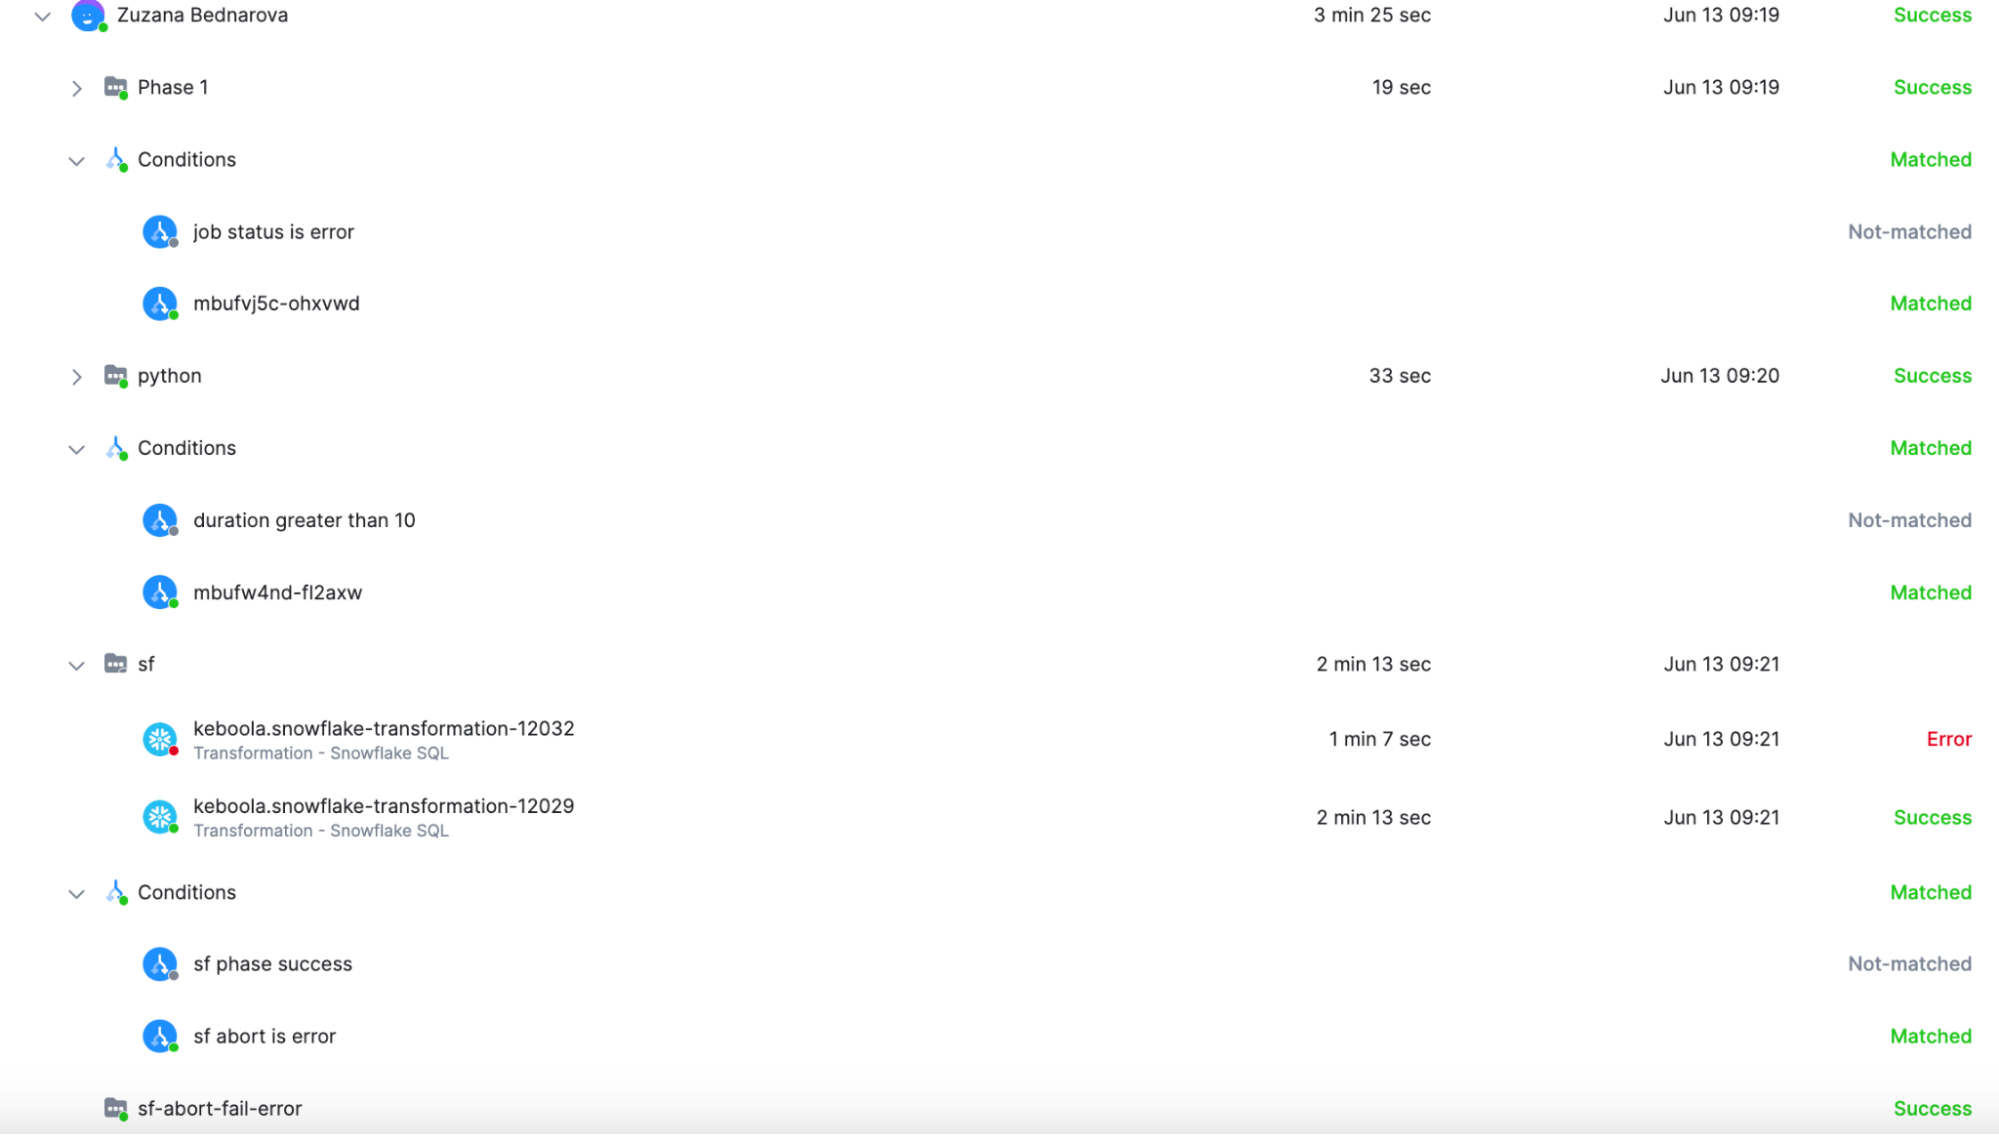
Section titled “Check Run History”Once your flow is running, you can track its progress and debug issues using the All Runs tab.
In this tab, you will find a complete list of all past executions of your flow. Click into any run to see:
- Which phases were executed
- Which tasks ran successfully, failed, or were skipped
- Which conditional branch was taken after each phase (this is especially helpful when debugging conditional logic)
- The values of variables (if used in the flow)
- Number of retries and its status.
You can use this overview to validate whether your conditions behaved as expected - e.g. if the flow correctly skipped a phase on the weekend or retried a failing task.