OneDrive Excel Sheets
This data destination connector exports tables from your Storage tables as Excel sheets to Microsoft OneDrive.
Microsoft OneDrive cloud storage integrates Office365 and SharePoint sites, so with this connector you can write to any Excel sheet on your personal or business account.
The contents of the sheet can be overwritten or new lines can be added at the end.
Configuration
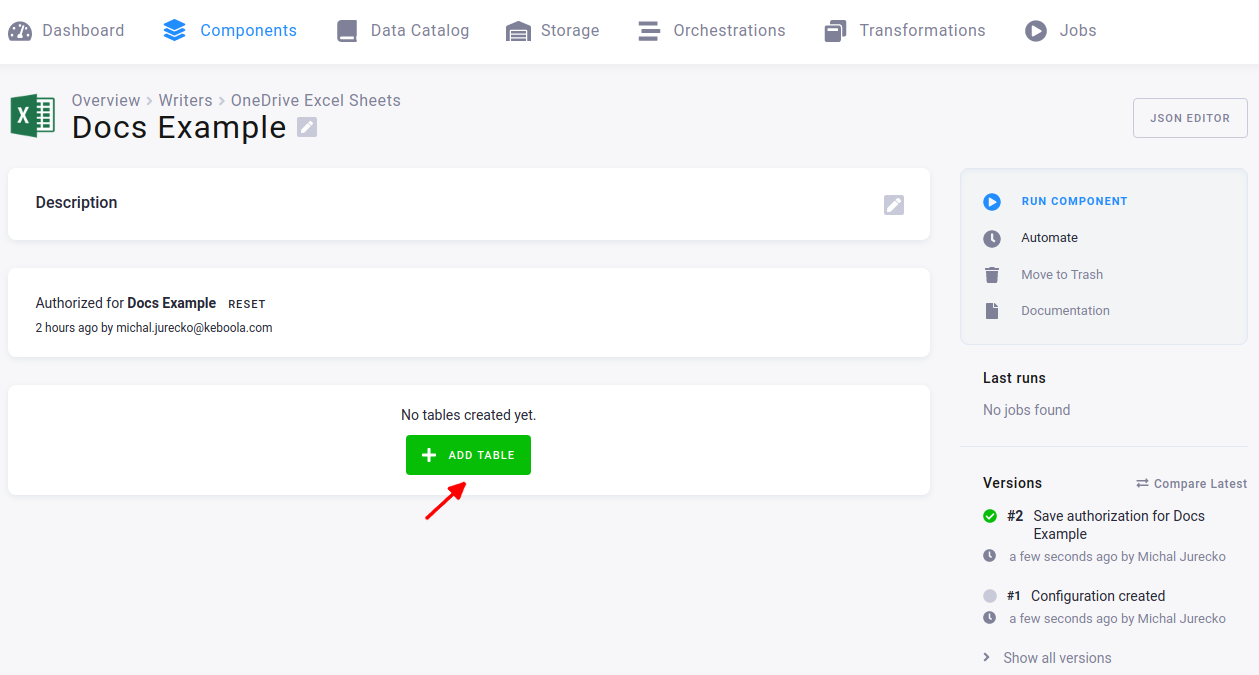
Section titled “Configuration”Create a new configuration of the OneDrive Excel Sheets data destination connector.
Then, click Authorize Account to authorize the configuration.
Click Add Table to configure the export.
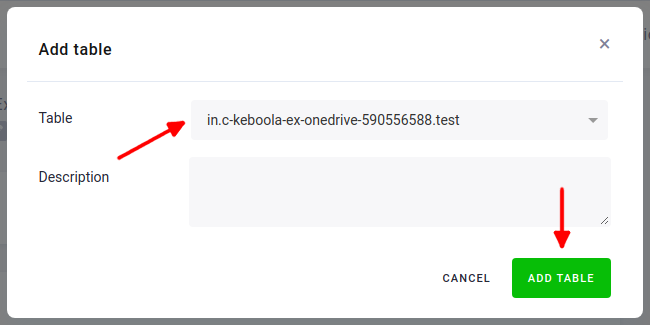
Select a Table from your buckets and click Add Table.
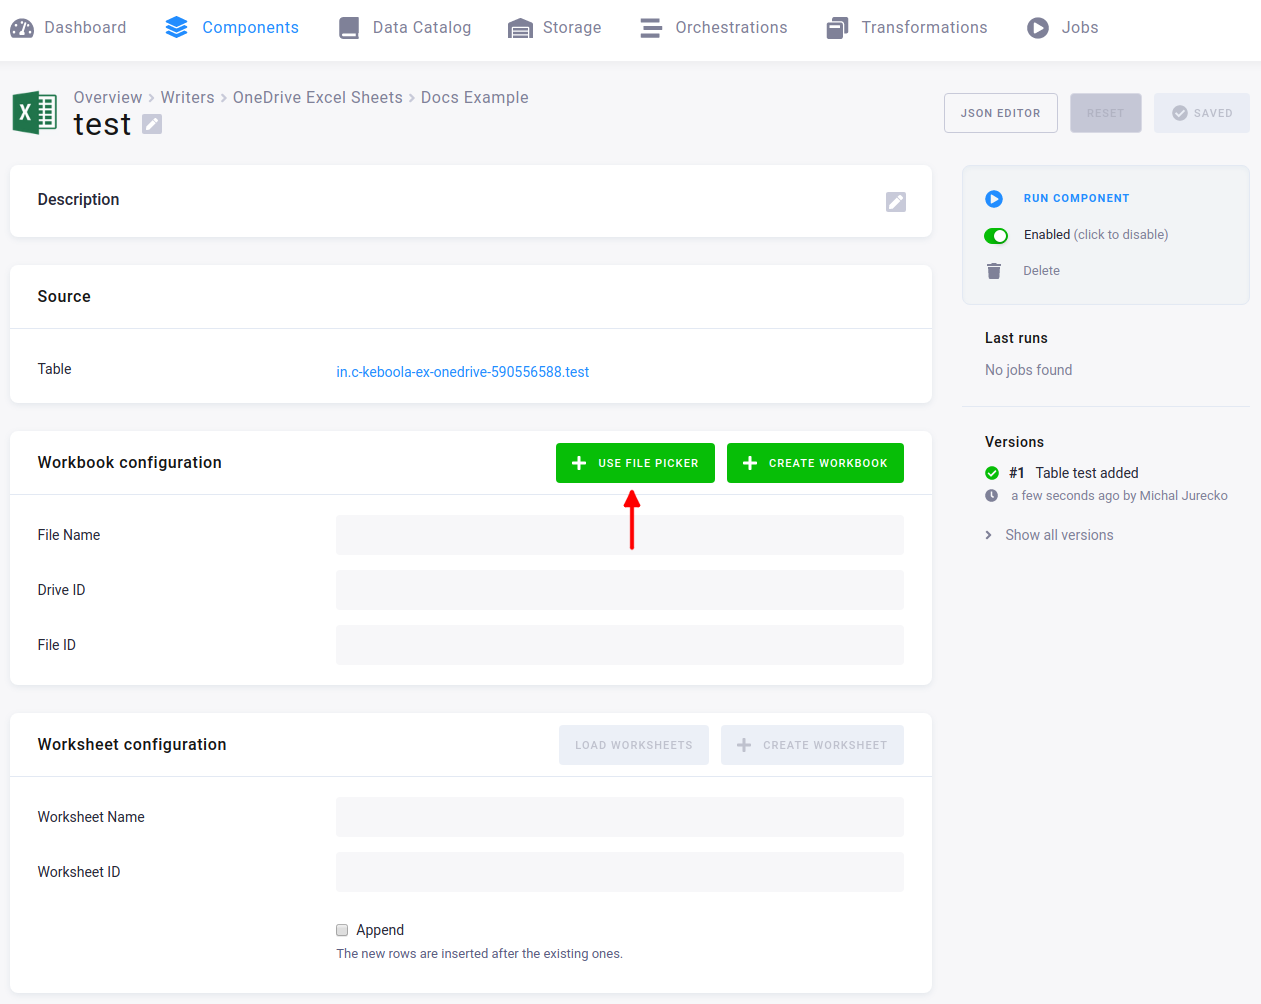
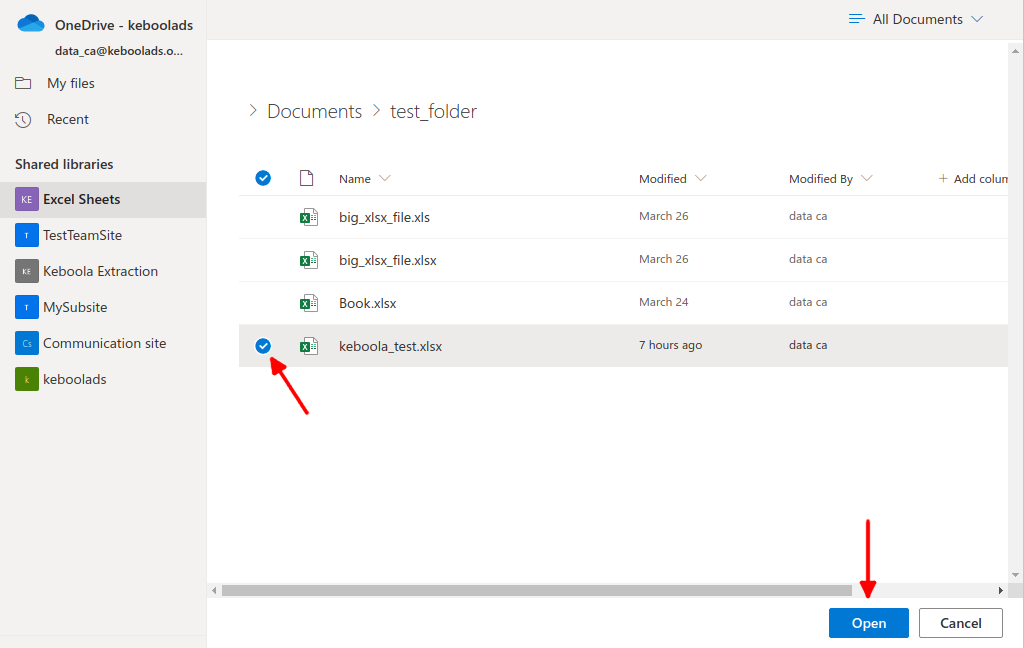
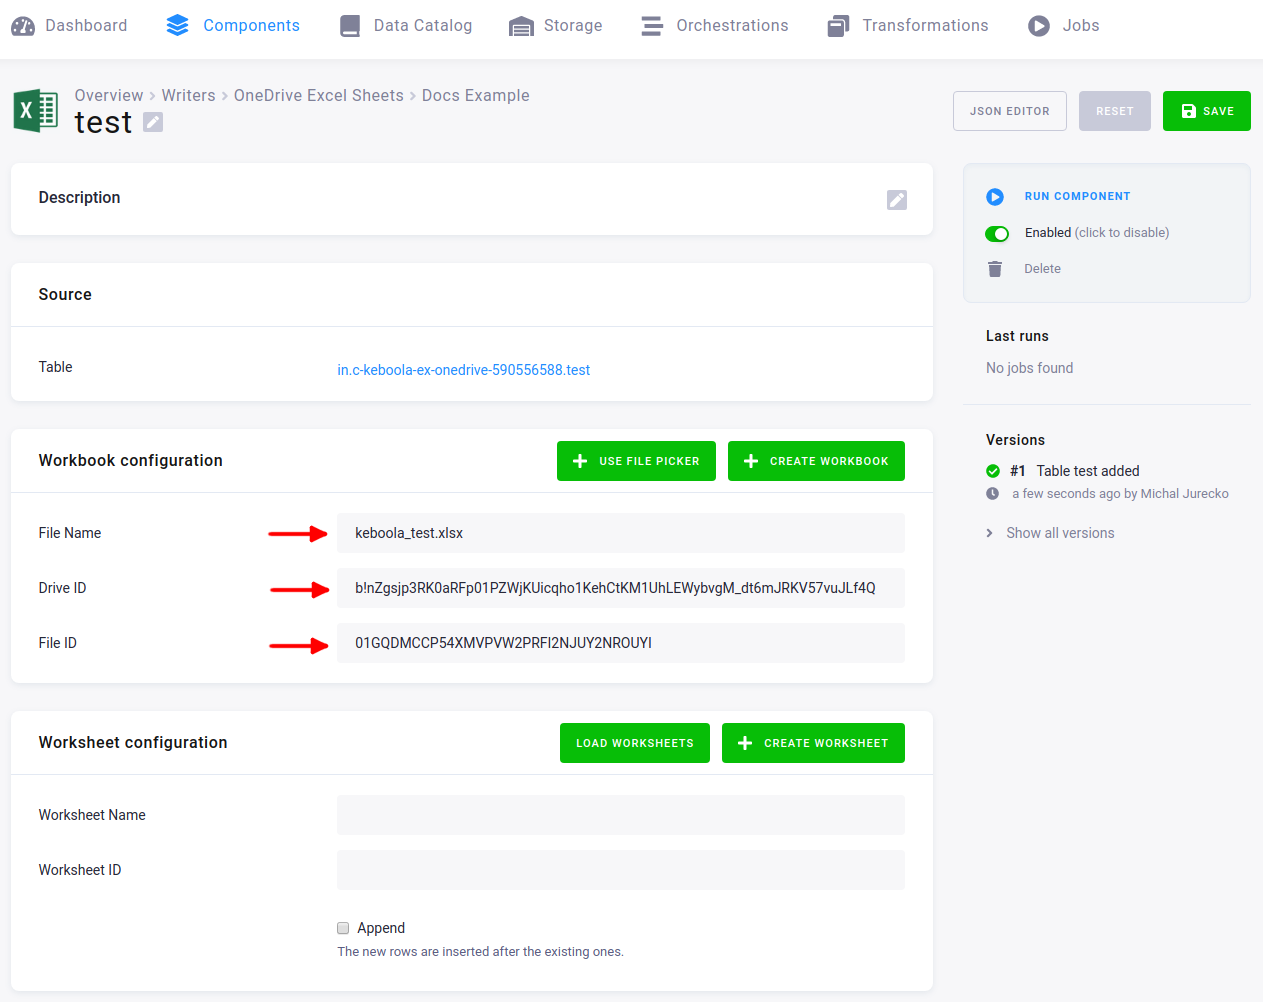
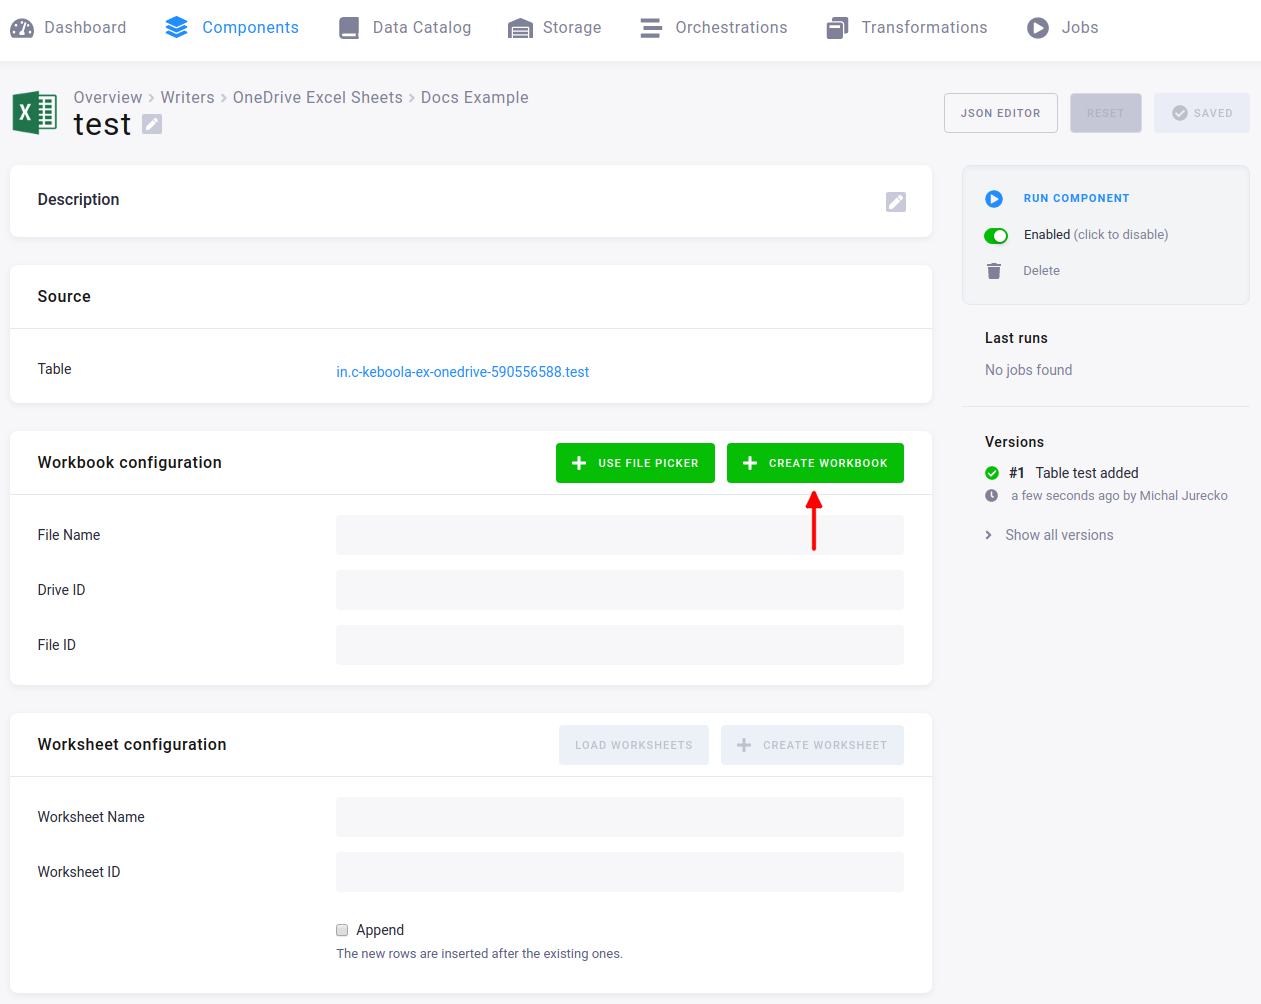
Use the file picker to list accessible Excel files – workbooks.
Alternatively, you can create a new workbook.
Go through the list and select a file. Click Open to confirm the file you want to write to.
The target file is specified by Drive ID and File ID. They are automatically filled in.
File Name is for your information only and its change doesn’t affect functionality.
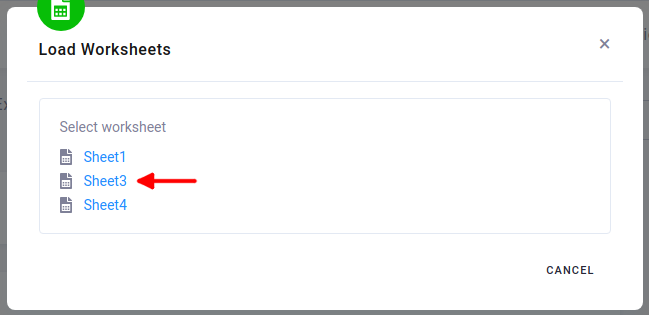
Click Load Worksheets to select a worksheet from the workbook configured in the previous step.
Alternatively, you can create a new worksheet.

In the list that appeared, click the name of the worksheet you want to set as the target.
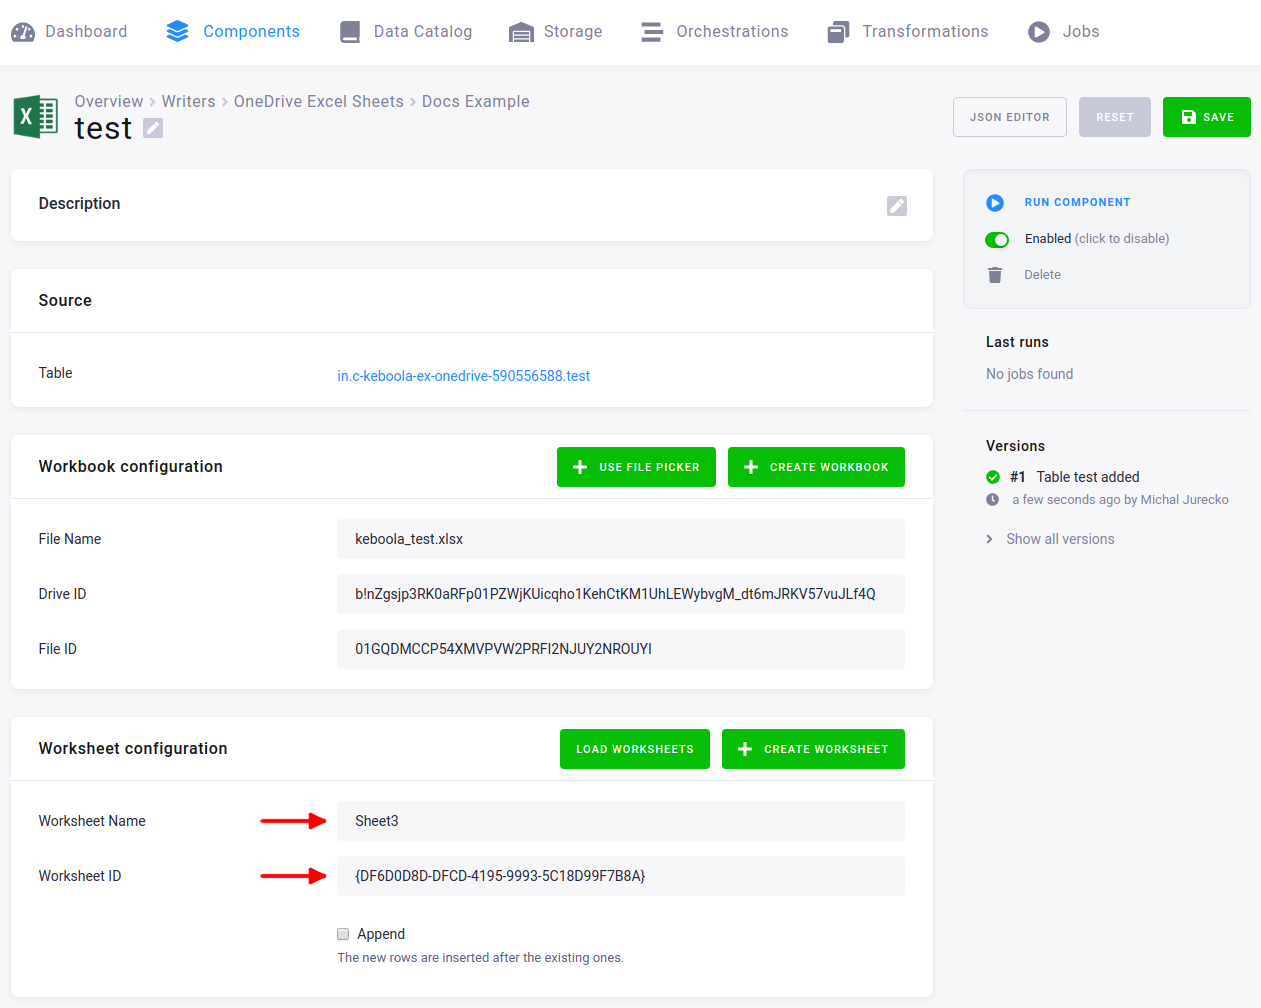
The worksheet is specified by Worksheet ID. It is automatically filled in.
Worksheet Name is for your information only and its change doesn’t affect functionality.
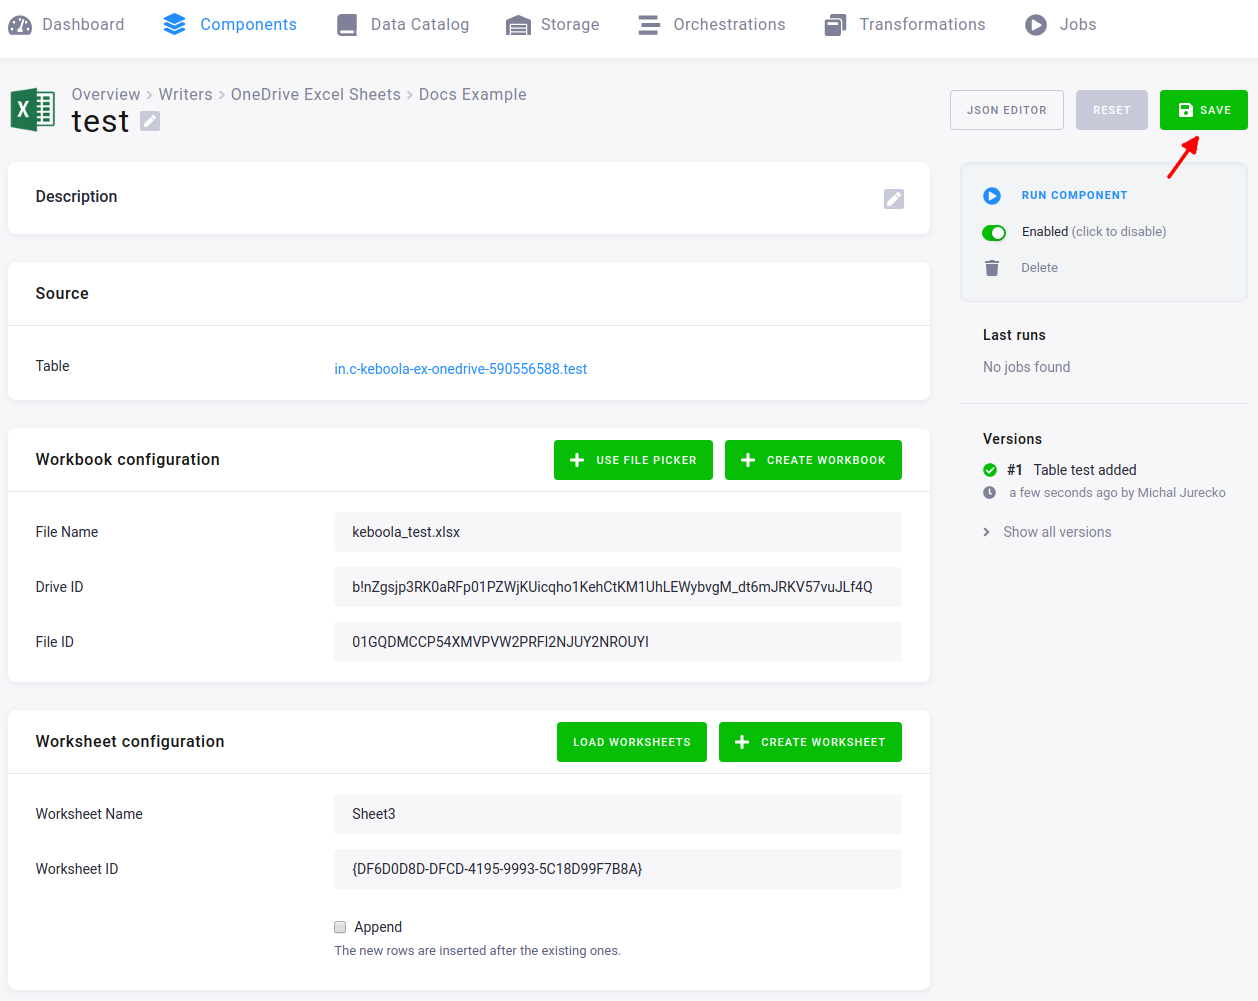
You can check the Append checkbox to append new rows after the existing ones;
otherwise, the contents of the worksheet will be overwritten.
Click Save when you’re done.
Modify Configuration
Section titled “Modify Configuration”When a table is added to the connector, it is displayed in the list of tables.
Configured tables are stored as configuration rows.
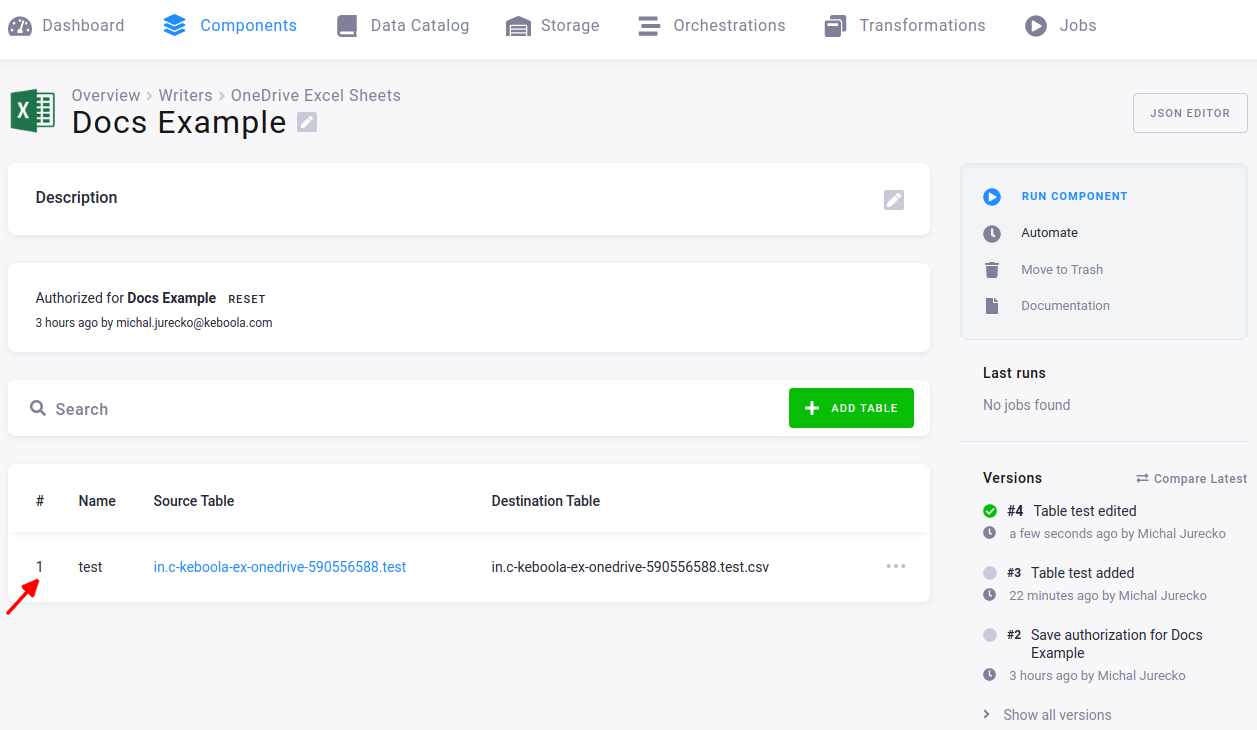
Each table has a different setting, but all tables share the same authorization to OneDrive account.
The list shows the row name, and the source table in Storage.
You can click the row to modify the configuration.
Create a New Workbook
Section titled “Create a New Workbook”You can create a new workbook instead of using the existing one.
Click Create Workbook.
Specify the full file Path and click Create.
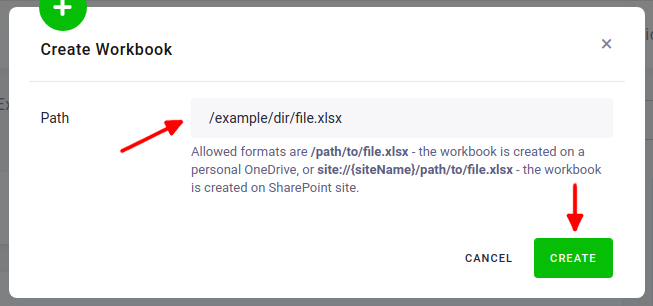
File Name, Drive ID, and File ID are automatically filled in.
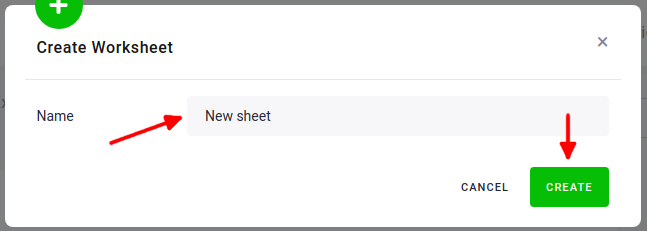
Create a New Worksheet
Section titled “Create a New Worksheet”You can create a new worksheet instead of using an existing one.
Click Create Worksheet.
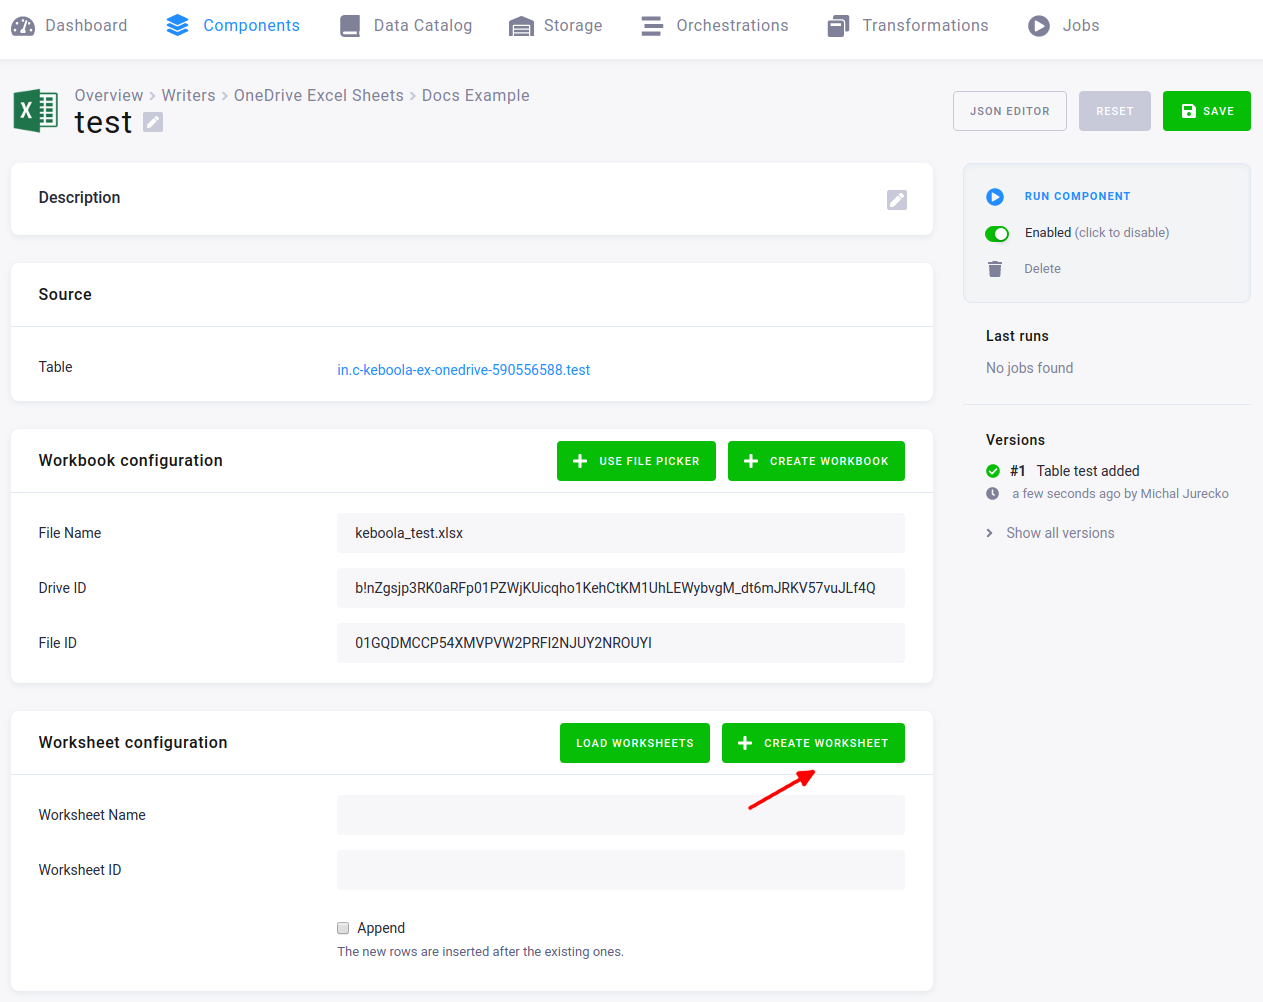
Specify the worksheet’s Name and click Create.
Worksheet Name, and Worksheet ID are automatically filled in.