Google Ad Manager
This data source connector allows you to export report data from Google Ad Manager.
Authorization Configuration
Section titled “Authorization Configuration”Create a new configuration of the Google Ad Manager connector. To authenticate the component you must create a Google Service Account and link it to the Google Ad Manager account in the API settings. Next fill in the authorization parameters into the corresponding fields in the user interface: the client email, private key, network code, and token URI that are specified in the JSON service account key.
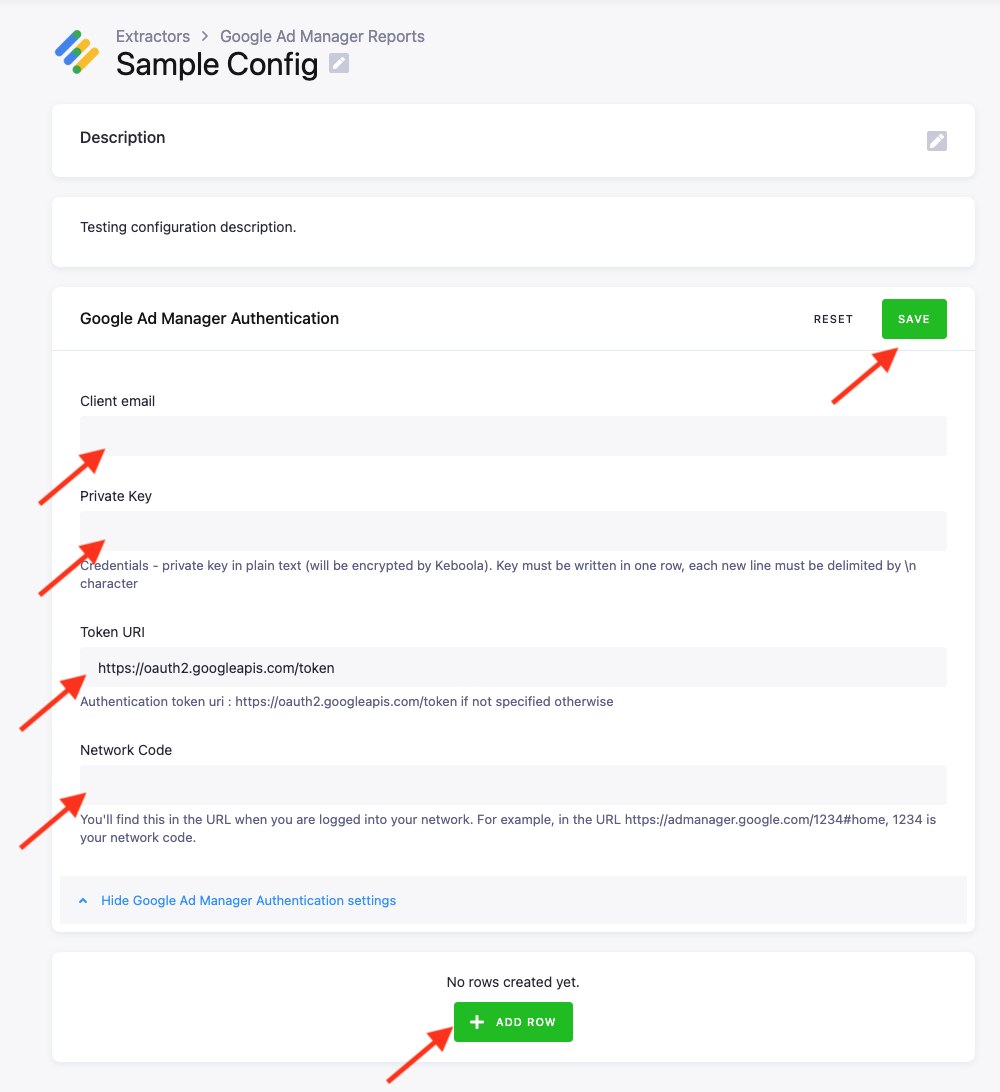
Once the authorization is set up, click Save to save the authorization parameters and then click Add Row to create a new report.
Report Configuration
Section titled “Report Configuration”It is recommended to first create a report on the Google Ad Manager report page to test whether all dimension and metric combinations are available for the given report type, as well as the date ranges matching the dimensions (e.g., WEEK dimension must have one or more week sun-sat. If a date range of mon-fri is given, it will result in an error).
After you create a valid report on the Google Ad Manager report page, go to the API docs to find the proper names of the dimensions and metrics for the API. E.g., CTR in the Ad exchange report type is AD_EXCHANGE_CTR in the API.
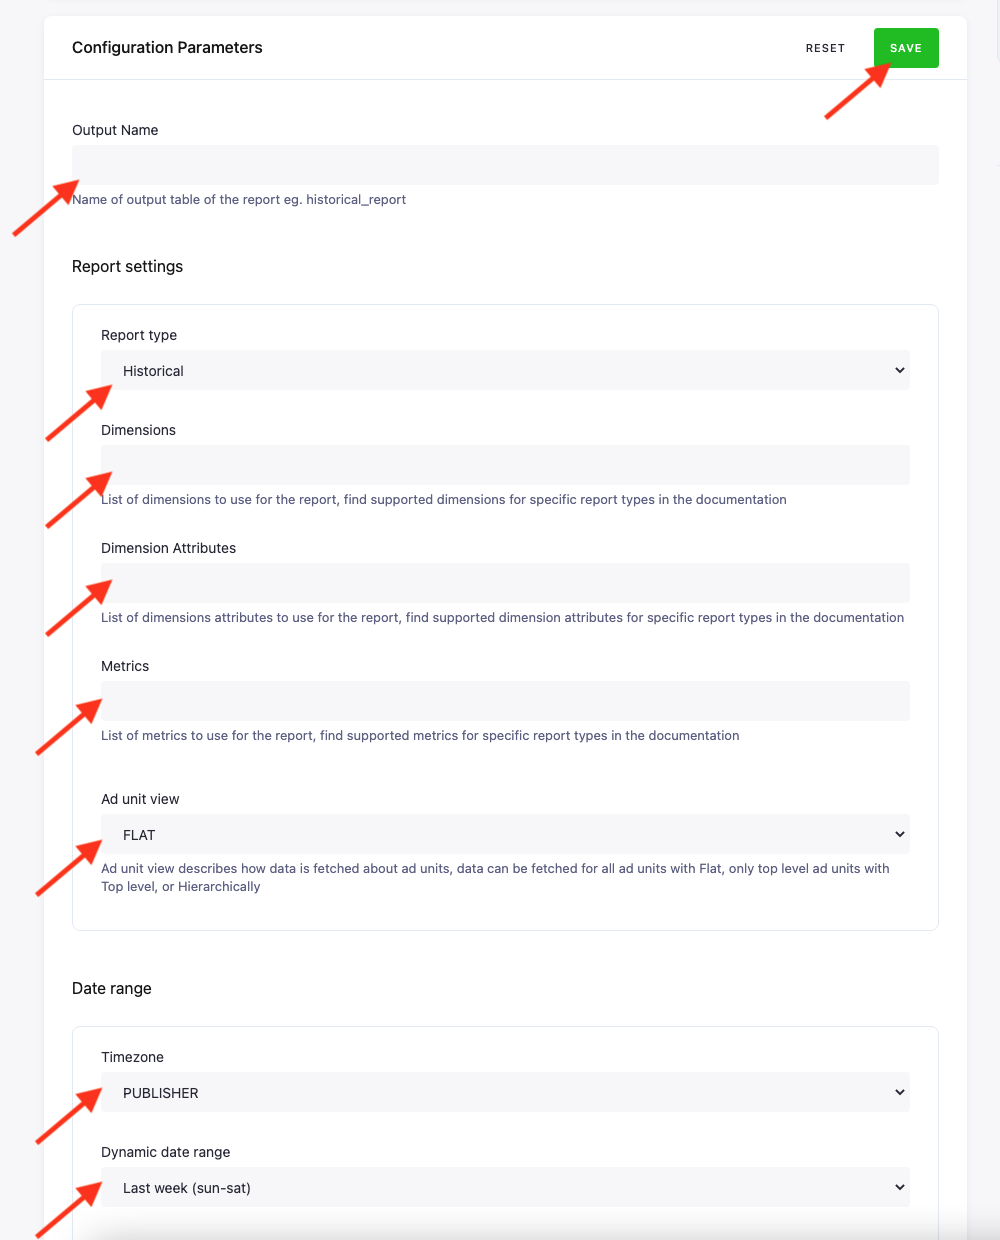
Once you have all the parameters of your report, fill them in to the corresponding fields. First set the Output name, which will be the name of the report in Keboola Storage, e.g., historical_report. Then fill in the report settings. Start by selecting the type of report you wish to download in the dropdown menu. Fill in the dimensions, dimension attributes, and metrics, they should be written comma separated (no quotation marks), e.g., DIMENSION1, DIMENSION2 … After that fill in the ad-unit view based on the granularity you wish to download. Finally, in the date settings select the timezone and the dynamic date range type. You can either select a pre-set date range like last week, or last month, or set a custom date range. In the custom date range you can set a start date: Date from and an end date: Date to. In both you can add either a relative date, such as 4 days ago, 1 week ago, or yesterday, or you can set an exact day like August 14, 2020 EST.
When all settings are filled in, click Save to save the configuration row parameters.