Python Transformation
Python transformations complement SQL transformations where computations or other operations are too difficult. Common data operations like joining, sorting, or grouping are still easier and faster to do in SQL Transformations.
Environment
Section titled “Environment”The Python script is running in an isolated environment. The Python version is updated regularly, few weeks after the official release. The update is always announced on the status page.
Memory and Processing Constraints
Section titled “Memory and Processing Constraints”A Python transformation has a limit of 8GB of allocated memory and the maximum running time is 6 hours. The CPU is limited to the equivalent of two 2.3 GHz processors.
File Locations
Section titled “File Locations”The Python script itself will be compiled to /data/script.py. To access your
mapped input and output tables, use
relative (in/tables/file.csv, out/tables/file.csv) or absolute (/data/in/tables/file.csv, /data/out/tables/file.csv) paths.
To access downloaded files, use the in/files/ or /data/in/files/ path. If you want to dig really deep,
have a look at the full Common Interface specification.
Temporary files can be written to a /tmp/ folder. Do not use the /data/ folder for those files you do not wish to exchange with Keboola.
Python Script Requirements
Section titled “Python Script Requirements”Python is sensitive to indentation. Make sure not to mix tabs and spaces. All files are assumed to be in UTF;
# coding=utf-8 at the beginning of the script is not needed. You don’t need to have
any main function, e.g., this is a valid script:
print("Hello Keboola")If you define a main function, do not wrap it within the if __name__ == '__main__': block as it will not be run.
Simply calling it from within the script is enough:
def main():    print("Hello Keboola")
main()
You can organize the script into blocks.
Packages
Section titled “Packages”You can list extra packages in the UI. These packages are installed using pip.
Generally, any package available on PyPI can be installed. However, some packages have external dependencies,
which might not be available. Feel free to contact us if you run into problems. When the
package is installed, you still need to import from it.
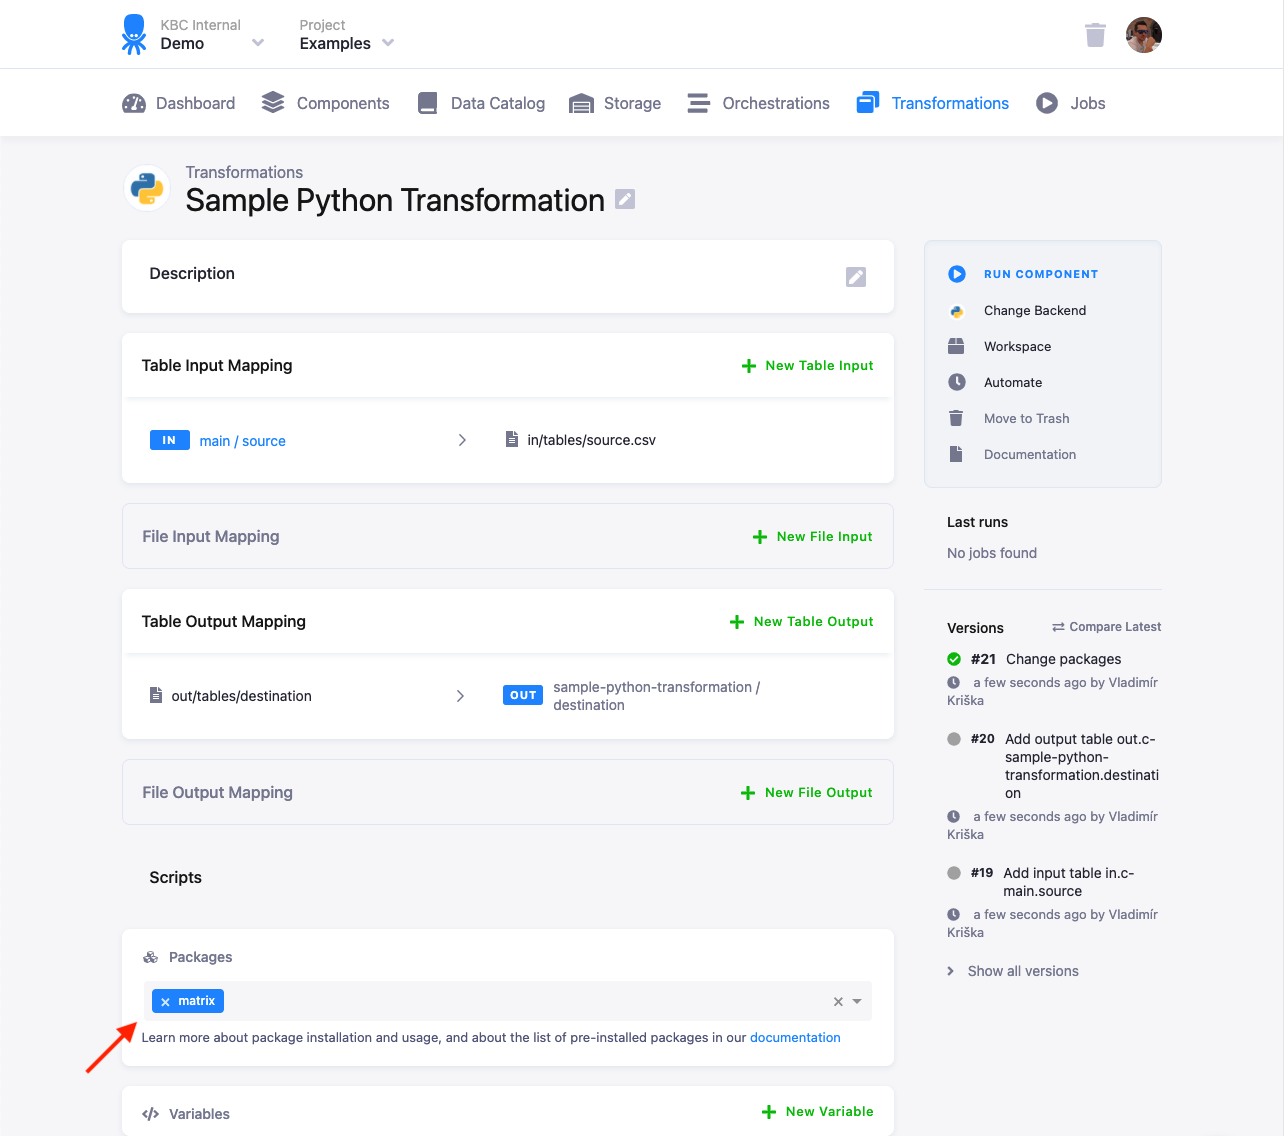
The latest versions of packages are always installed at the time of the release (you can check that in the repository). In case your code relies on a specific package version, you can override the installed version by calling, e.g.:
import subprocessimport syssubprocess.call([sys.executable, '-m', 'pip', 'install', '--disable-pip-version-check', '--no-cache-dir', '--force-reinstall', 'pandas==0.20.0'])Some packages are already installed in the environment (see their full list), and they do not need to be listed in the transformation.
CSV Format
Section titled “CSV Format”Tables from Storage are imported to the Python script from CSV files. CSV files can be read by standard Python functions
from the CSV packages. It is recommended to explicitly specify the formatting options.
You can read CSV files either to vectors (numbered columns), or to dictionaries (named columns).
Your input tables are stored as CSV files in in/tables/, and your output tables in out/tables/.
If you can process the file line-by-line, then the most effective way is to read each line, process it and write it immediately. The following two examples show two ways of reading and manipulating a CSV file.
Dynamic Backends
Section titled “Dynamic Backends”If you have a large amount of data in databases and complex queries, your transformation might run for a couple of hours. To speed it up, you can change the backend size in the configuration. Python transformations support the following sizes:
- XSmall
- Small (default)
- Medium
- Large
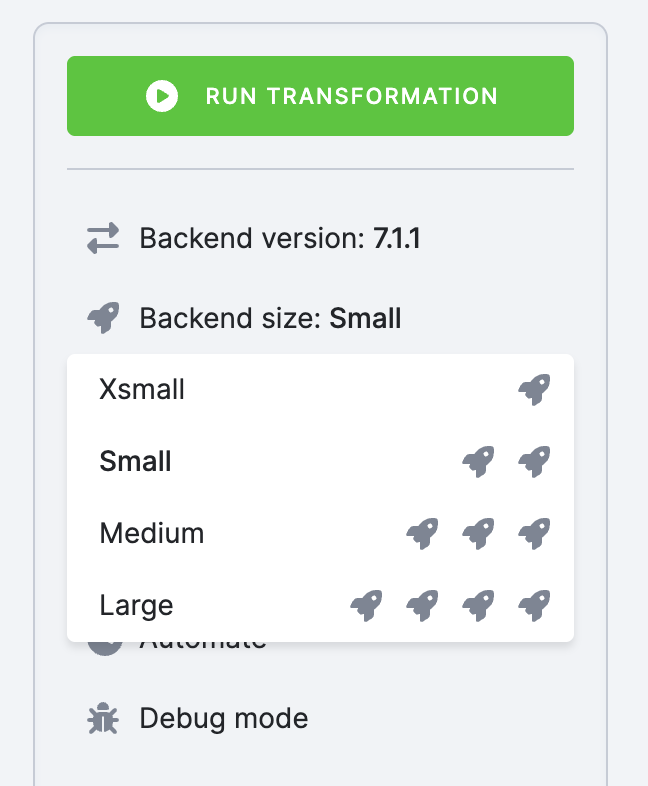
Scaling up the backend size allocates more resources to speed up your transformation, which impacts time credits consumption.
Development Tutorial
Section titled “Development Tutorial”To develop and debug Python transformations, you can use a Python workspace or you can develop the transformation script locally.
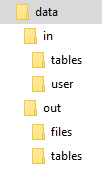
The script itself is expected to be in the data directory. The script name is arbitrary. The data directory name
is also arbitrary, we use it as general reference to the above folder structure. It is possible to use relative
directories --- the current directory of the transformation is always the data directory. That means you can move
the script to a Keboola transformation with no changes. To develop a Python transformation
that takes a sample CSV file locally, follow these steps:
- Put the Python code into a file, for example, script.py in the working directory.
- Put all the input mapping tables inside the
in/tablessubdirectory of the working directory. - Store the result CSV files inside the
out/tablessubdirectory.
Use this sample script:
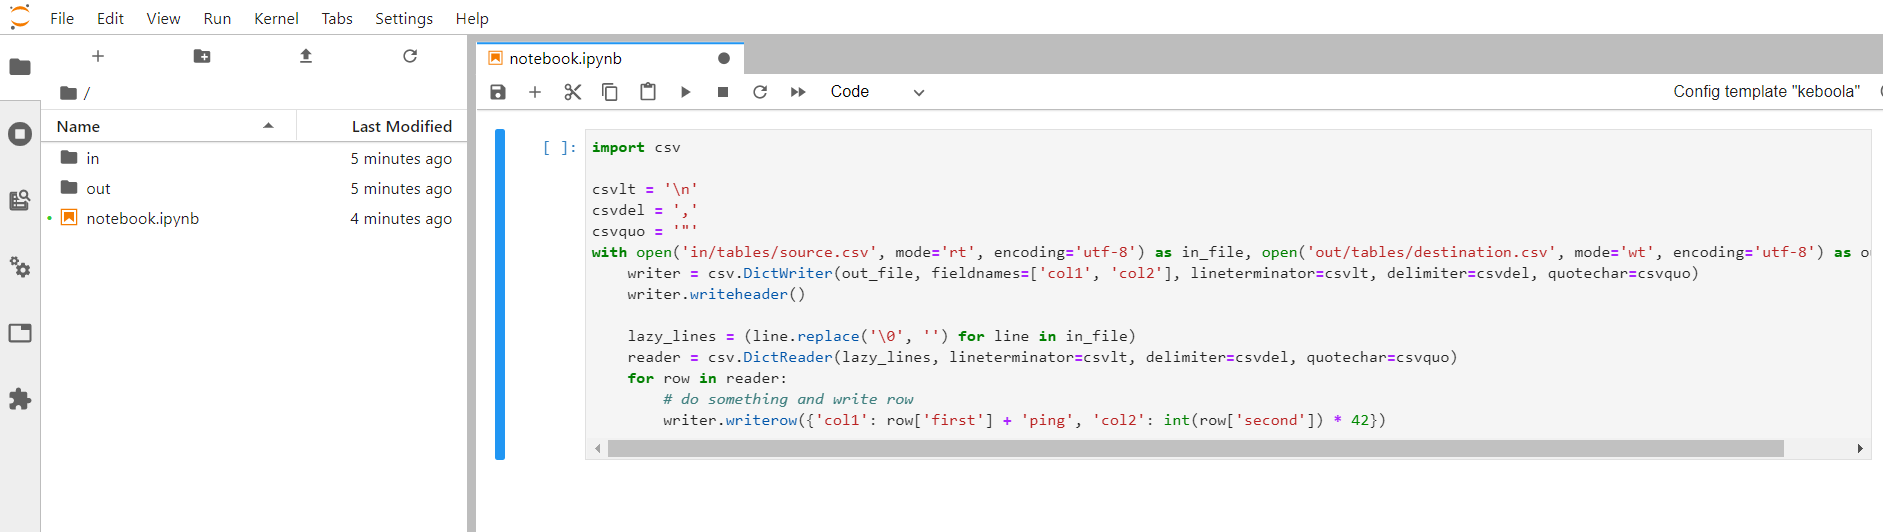
import csv
csvlt = '\n'csvdel = ','csvquo = '"'with open('in/tables/source.csv', mode='rt', encoding='utf-8') as in_file, open('out/tables/result.csv', mode='wt', encoding='utf-8') as out_file:    writer = csv.DictWriter(out_file, fieldnames=['col1', 'col2'], lineterminator=csvlt, delimiter=csvdel, quotechar=csvquo)    writer.writeheader()
    lazy_lines = (line.replace('\0', '') for line in in_file)    reader = csv.DictReader(lazy_lines, lineterminator=csvlt, delimiter=csvdel, quotechar=csvquo)    for row in reader:        # do something and write row        writer.writerow({'col1': row['first'] + 'ping', 'col2': int(row['second']) * 42})
Development Using Workspace
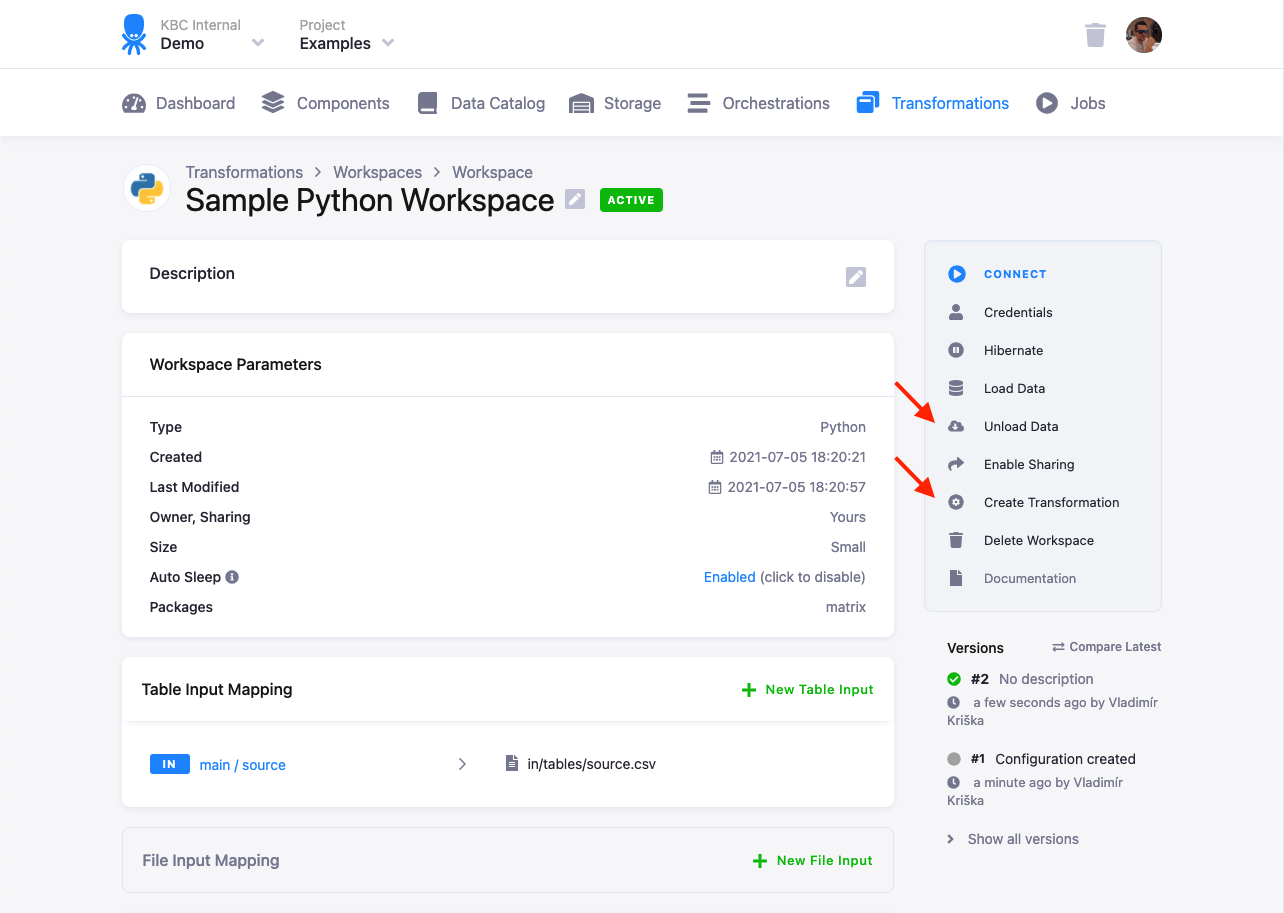
Section titled “Development Using Workspace”To develop a transformation using a workspace, configure the input (and optionally output) mapping. Load Data and Connect to the workspace:
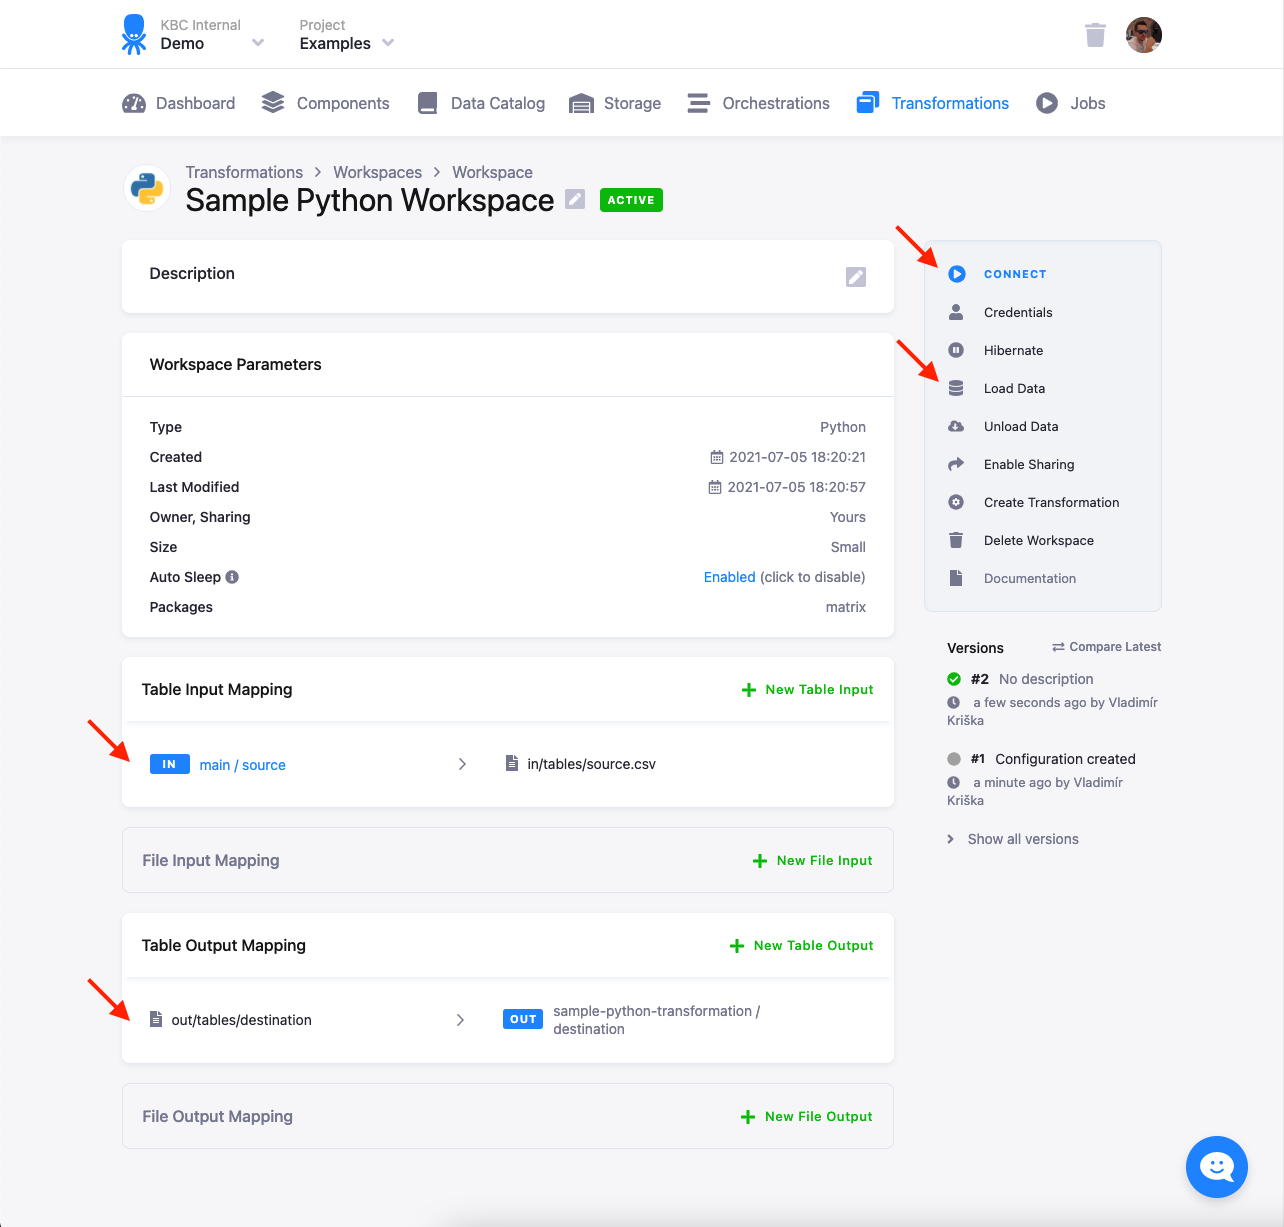
When you connect to the workspace, you can paste the above sample script in the prepared notebook. The directory structure and input files will be already prepared in the JupyterLab environment:
You can run the script and, optionally, also Unload Data from the workspace to get the results immediately into project Storage. You can also Create Transformation to prepare a transformation skeleton with the configured input and output mapping into which you can paste the transformation script.
Local Development
Section titled “Local Development”If you want to replicate the execution environment on your local machine, you need to have Python installed.
To simulate the input and output mapping, all you need to do is create the right directories with the right files.
You can get a finished example of the above script
setup in data.zip.
Download it and test the script in your local Python installation. The result.csv output file will be created
in the output folder. This script can be used in your transformations without any modifications. All you need to do is
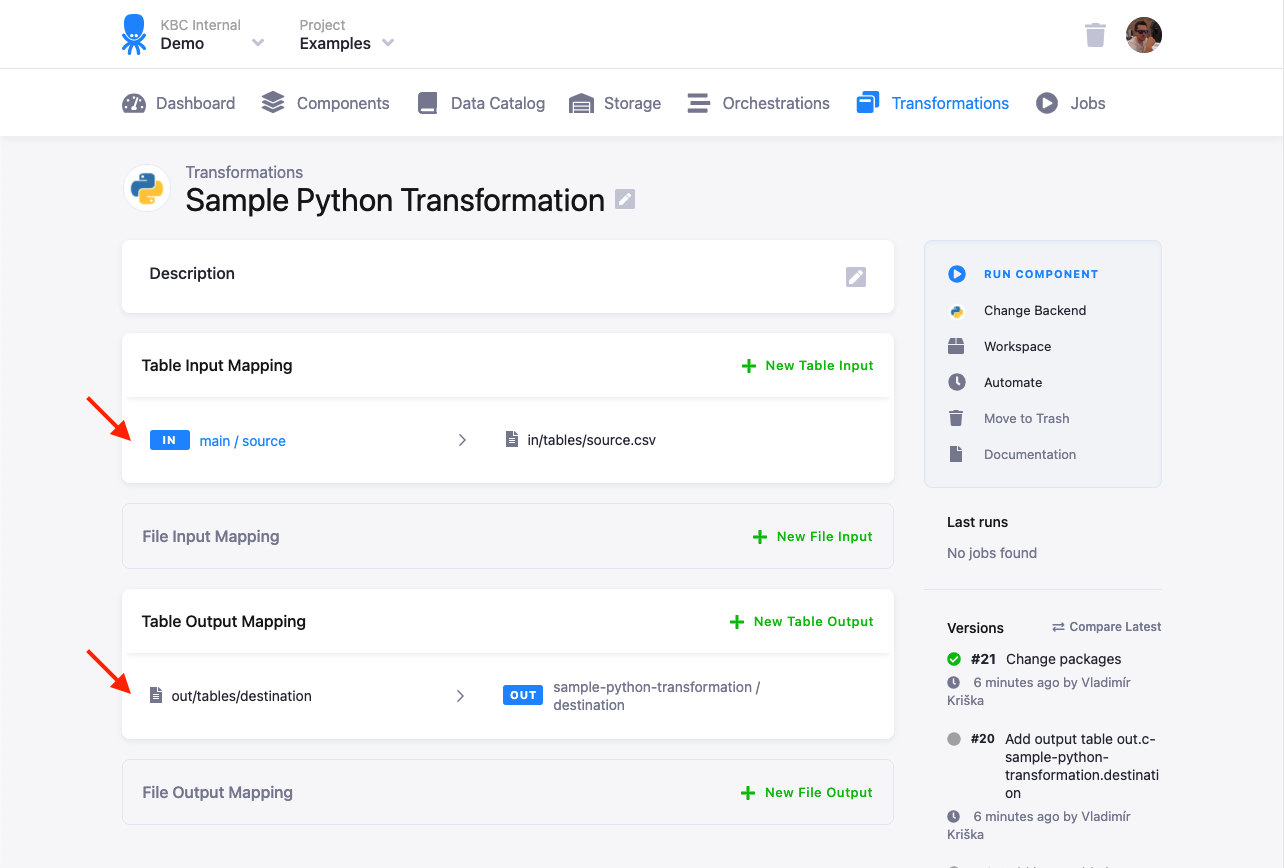
- Create a table in Storage by uploading the sample CSV file.
- Create an input mapping from that table, setting its destination to
source(as expected by the Python script). - Create an output mapping from
result.csv(produced by the Python script) to a new table in your Storage, - Copy & paste the script into the transformation code.
- Save and run the transformation.
The above steps are usually sufficient for daily development and debugging of moderately complex Python transformations, although they do not reproduce the transformation execution environment exactly. You can also create a development environment with the exact same configuration using our Docker image.
Example 1 — Using Dictionaries
Section titled “Example 1 — Using Dictionaries”The following piece of code reads a table with two columns, named first and second,
from the source.csv input mapping file into the row dictionary using csvReader.
It then adds ping to the first column and multiplies the second column by 42.
After that, it saves the row to the result.csv output mapping file.
import csv
csvlt = '\n'csvdel = ','csvquo = '"'with open('in/tables/source.csv', mode='rt', encoding='utf-8') as in_file, open('out/tables/result.csv', mode='wt', encoding='utf-8') as out_file:    writer = csv.DictWriter(out_file, fieldnames=['col1', 'col2'], lineterminator=csvlt, delimiter=csvdel, quotechar=csvquo)    writer.writeheader()
    lazy_lines = (line.replace('\0', '') for line in in_file)    reader = csv.DictReader(lazy_lines, lineterminator=csvlt, delimiter=csvdel, quotechar=csvquo)    for row in reader:        # do something and write row        writer.writerow({'col1': row['first'] + 'ping', 'col2': int(row['second']) * 42})
The above example shows how to process the file line-by-line; this is the most memory-efficient way
which allows you to process data files of any size.
The expression lazy_lines = (line.replace('\0', '') for line in in_file)
is a Generator which makes sure that
Null characters are properly handled.
It is also important to use encoding='utf-8' when reading and writing files.
Example 2 — Using Lists
Section titled “Example 2 — Using Lists”The following piece of code reads a table with some of its columns from the source.csv input mapping file into the row list of strings.
It then adds ping to the first column and multiplies the second column by 42. After that, it saves the row to the result.csv output mapping file.
import csv
csvlt = '\n'csvdel = ','csvquo = '"'with open('/data/in/tables/source.csv', mode='rt', encoding='utf-8') as in_file, open('/data/out/tables/result.csv', mode='wt', encoding='utf-8') as out_file:    writer = csv.writer(out_file, lineterminator=csvlt, delimiter=csvdel, quotechar=csvquo)    lazy_lines = (line.replace('\0', '') for line in in_file)    reader = csv.reader(lazy_lines, lineterminator=csvlt, delimiter=csvdel, quotechar=csvquo)    for row in reader:        # do something and write row        writer.writerow([row[0] + 'ping', int(row[1]) * 42])
Example 3 — Using CSV Dialect
Section titled “Example 3 — Using CSV Dialect”You can simplify the above code using our pre-installed Keboola dialect.
import csv
with open('/data/in/tables/source.csv', mode='rt', encoding='utf-8') as in_file, open('/data/out/tables/result.csv', mode='wt', encoding='utf-8') as out_file:    lazy_lines = (line.replace('\0', '') for line in in_file)    reader = csv.DictReader(lazy_lines, dialect='kbc')    writer = csv.DictWriter(out_file, dialect='kbc', fieldnames=reader.fieldnames)    writer.writeheader()    for row in reader:        # do something and write row        writer.writerow({"first": row['first'] + 'ping', "second": int(row['second']) * 42})
The kbc dialect is automatically available in the transformation environment. If you want it in your local environment,
it is defined as csv.register_dialect('kbc', lineterminator='\n', delimiter = ',', quotechar = '"').