- Home
- Keboola Overview
- Getting Started Tutorial
- Kai - AI Assistant
-
Components
-
Data Source Connectors
- Communication
- Databases
- ERP
-
Marketing/Sales
- Adform DSP Reports
- Babelforce
- BigCommerce
- ChartMogul
- Criteo
- Customer IO
- Facebook Ads
- GoodData Reports
- Google Ads
- Google Ad Manager
- Google Analytics (UA, GA4)
- Google Campaign Manager 360
- Google Display & Video 360
- Google My Business
- Linkedin Pages
- Mailchimp
- Market Vision
- Microsoft Advertising (Bing Ads)
- Pinterest Ads
- Pipedrive
- Salesforce
- Shoptet
- Sklik
- TikTok Ads
- Zoho
- Social
- Storage
-
Other
- Airtable
- AWS Cost Usage Reports
- Azure Cost Management
- Ceps
- Dark Sky (Weather)
- DynamoDB Streams
- ECB Currency Rates
- Generic Extractor
- Geocoding Augmentation
- GitHub
- Google Search Console
- Okta
- HiBob
- Mapbox
- Papertrail
- Pingdom
- ServiceNow
- Stripe
- Telemetry Data
- Time Doctor 2
- Weather API
- What3words Augmentation
- YourPass
- Data Destination Connectors
- Applications
- Data Apps
- Development Branches
- IP Addresses
-
Data Source Connectors
-
Templates
- Advertising Platforms
- AI SMS Campaign
- Customer Relationship Management
- DataHub
- Data Quality
- eCommerce
- eCommerce KPI Dashboard
- Google Analytics 4
- Interactive Keboola Sheets
- Mailchimp
- Media Cashflow
- Project Management
- Repository
- Snowflake Security Checkup
- Social Media Engagement
- Surveys
- UA and GA4 Comparison
- Data Catalog
- Storage
- Flows
- Orchestrations
- Transformations
- Workspace
- Management
- AI Features
- External Integrations
- Home
- Getting Started Tutorial
- Part 6: Development Branches
- Files in Branch
Working with Files in Branch
Now that you have created a branch from configurations in production and tested how tables behave in development branches, let’s do the same with files.
Run Transformation in Branch
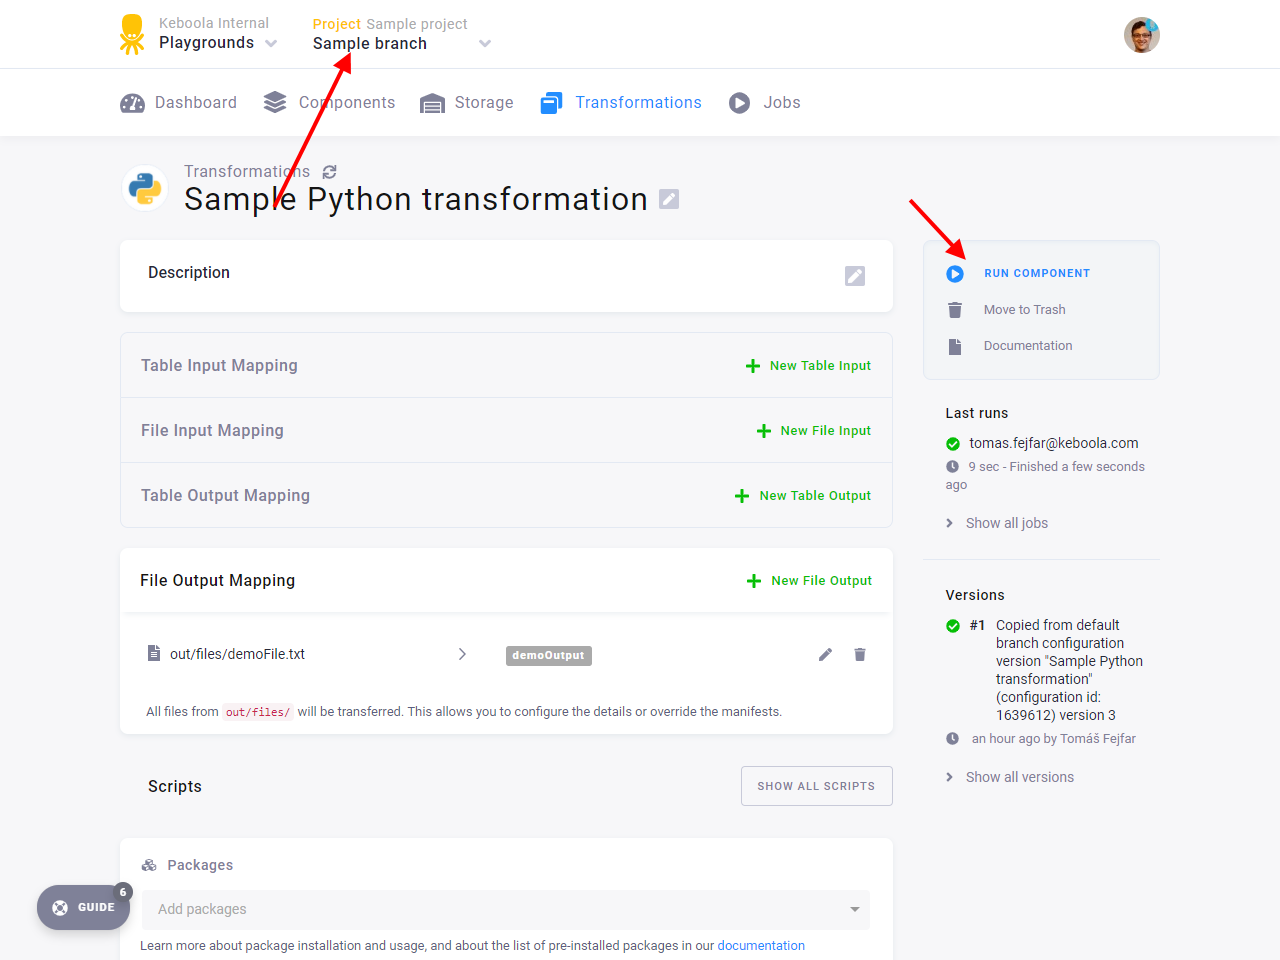
In your development branch, go to Transformations, select the transformation Sample Python transformation and run it.
File Tags
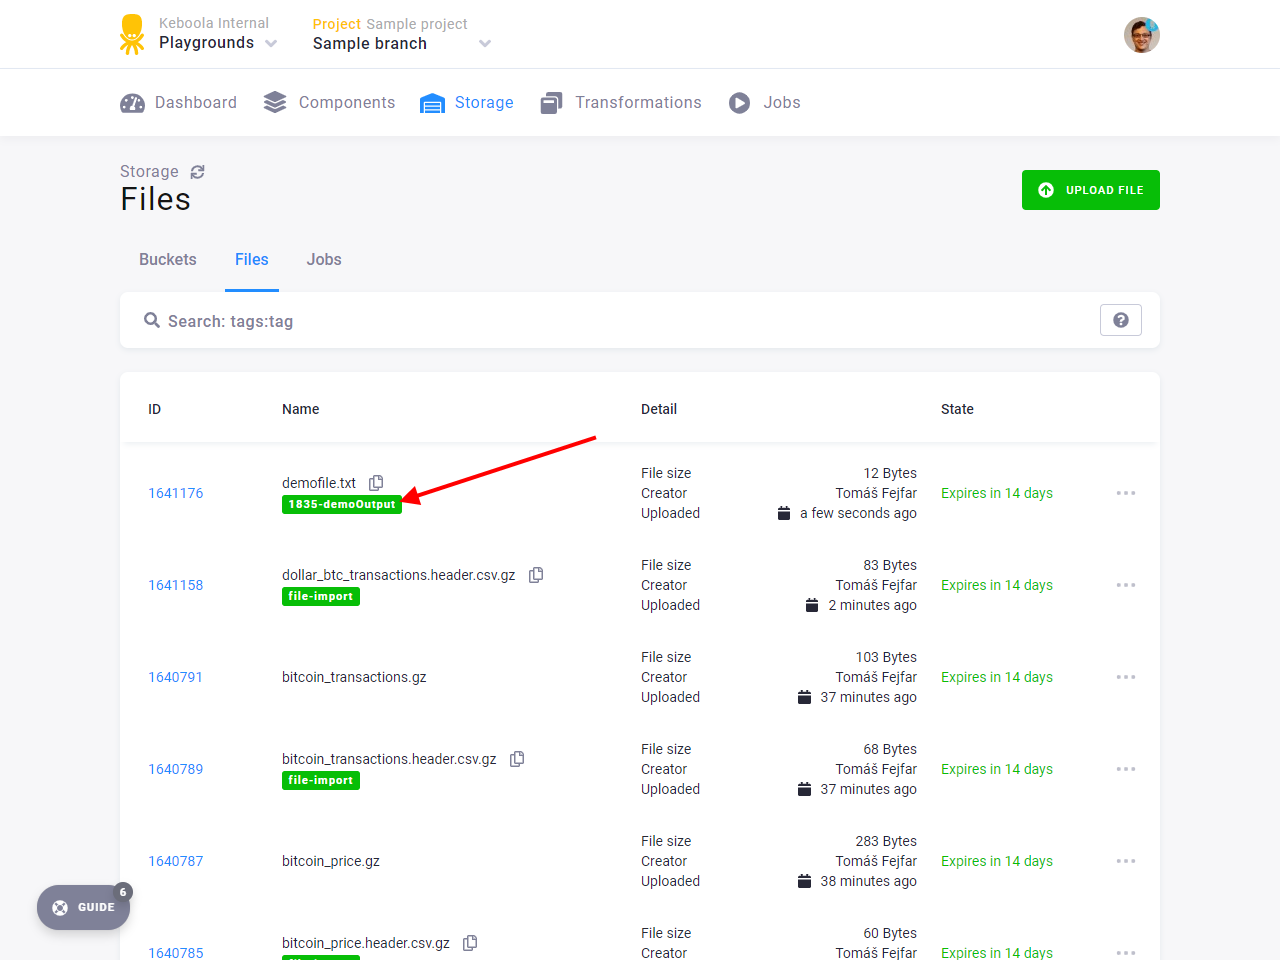
When the job finishes, go to Storage – Files. You can see that the demoFile.txt was created but is was not
assigned the tag demoOutput. It was assigned the tag 1835-demoOutput instead. The prefix 1835 is the ID of
this branch. You can also see the ID in the URL. This is how the development branch files are distinguished from
the files that were created in the production environment.
Change Configuration
Now it is time to make the changes to the transformation and test them. Go to Transformations, find Sample Python
transformation and change the Hello world code in Block 1 as follows:
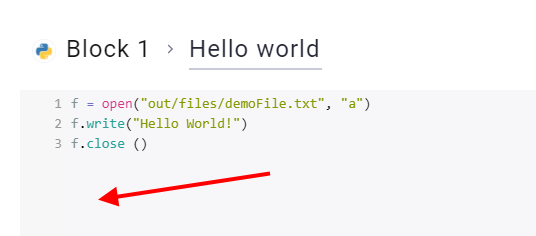
f = open("out/files/demoFile.txt", "a")
f.write("Hello World!")
f.close ()

print("Output written to demoFile.txt")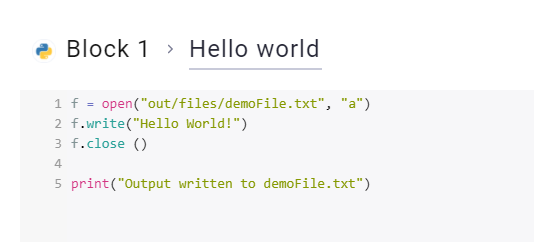
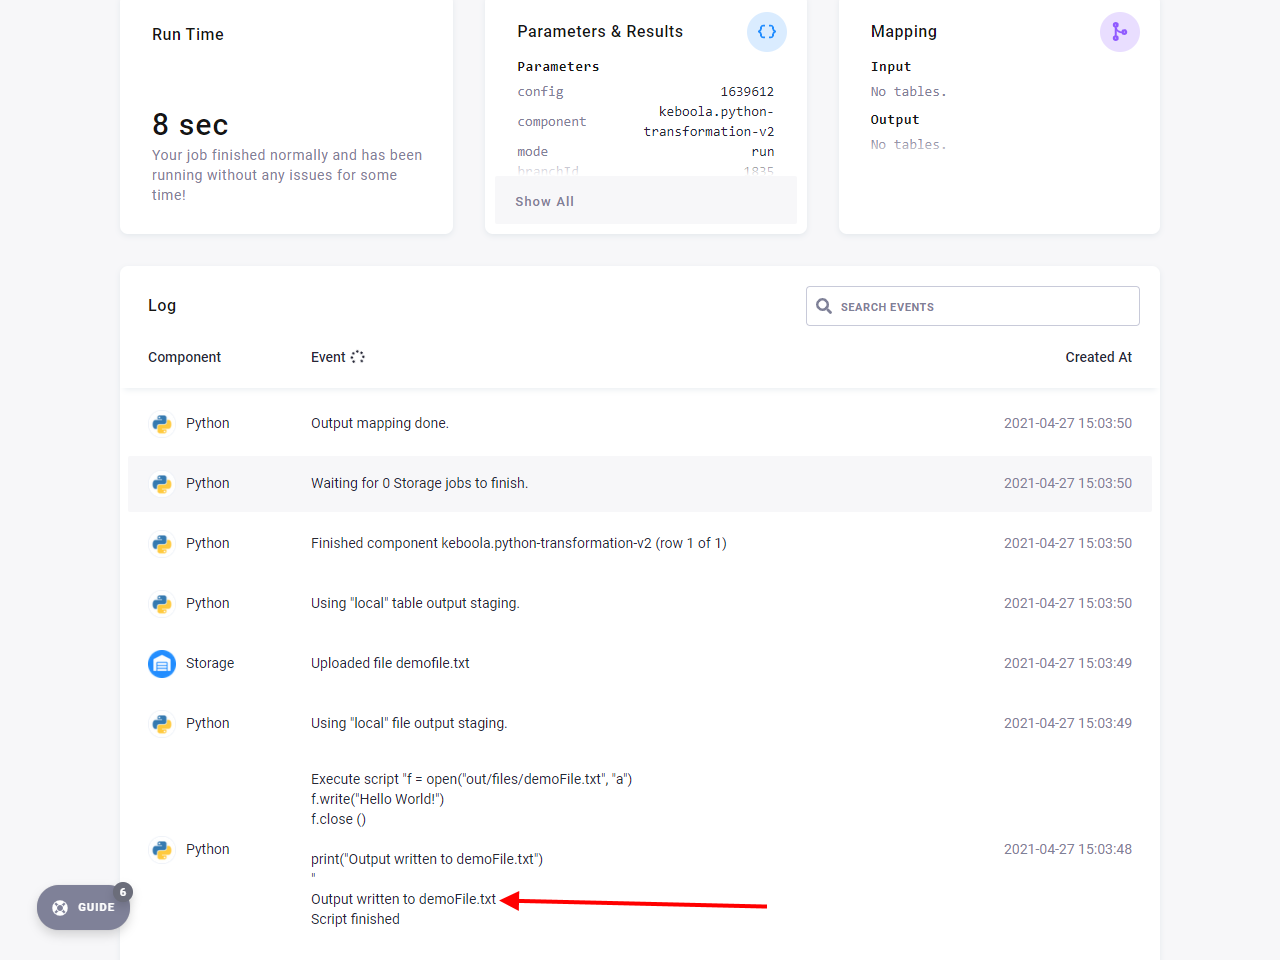
The transformation will do exactly the same as before, but it will add Output written to demoFile.txt message to
the output log. Save the code block and run the transformation again. You can see in the job log that it did indeed output the log message.
The file was uploaded to Storage again.
Switch Back to Production
Let’s go back to production to see that by changing the transformation in the development branch, we did not affect the production transformation in any way.
Go to Transformations, open the Sample Python transformation transformation and check the code block to see that there is still the original version without the log output that we created at the beginning. It was not overwritten by the changes we made in the development
branch.
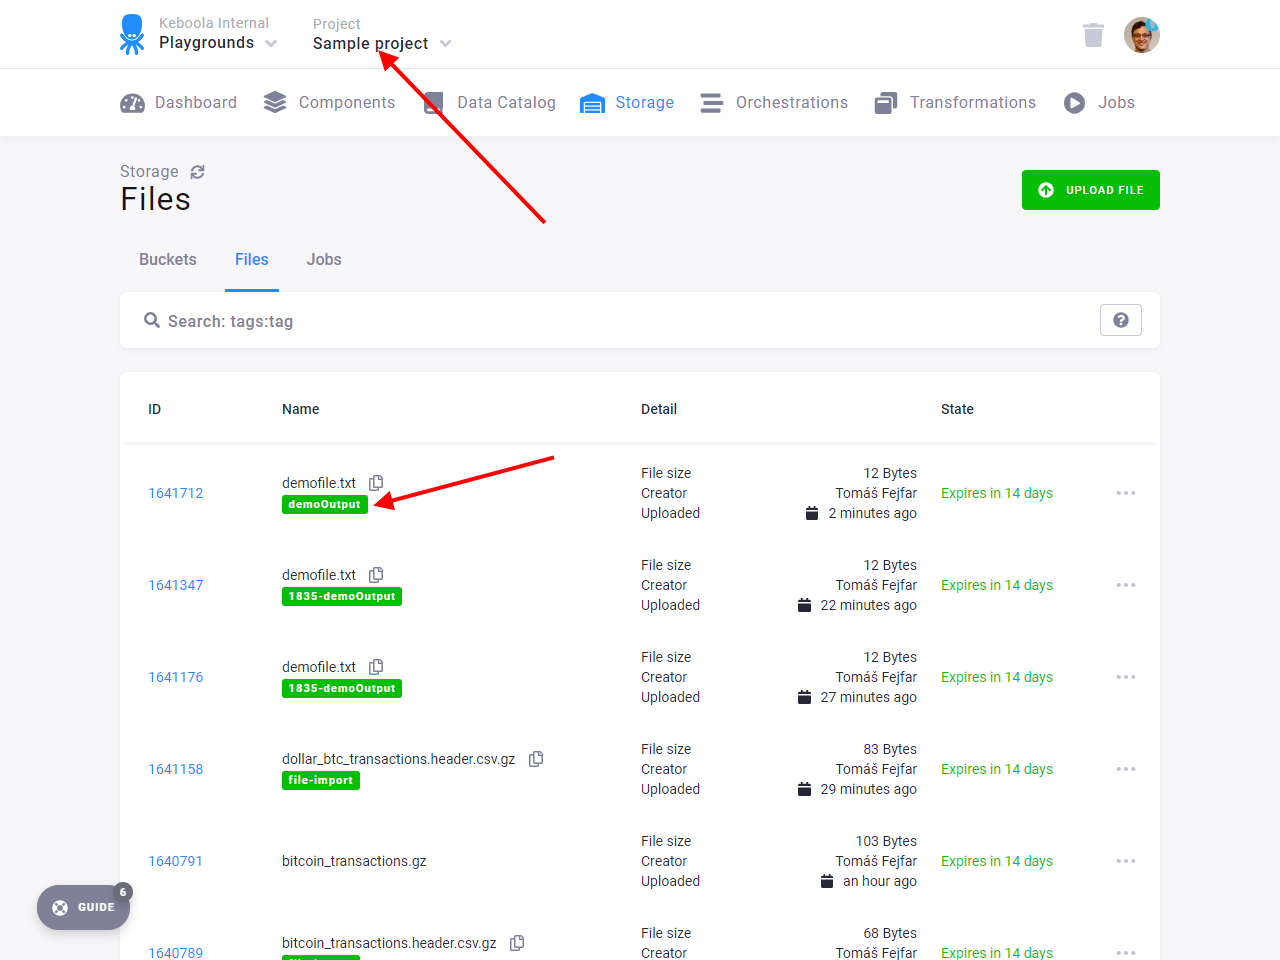
To make sure nothing has changed, run the transformation in production again. When it finishes, go to Storage –
Files. You can see that demoFile.txt was created. Because it ran in production, it was assigned the
tag demoOutput without any prefix.
This concludes the file manipulation part of this tutorial. You examined how files behave in branches. Now you can examine the changes you have made in the branch.
© 2026 Keboola
