Loading Data from Google Sheets
In the previous step, you learned how to quickly load data into Keboola using manual import. However, in real production projects, this is seldom used as most data is obtained automatically using data source connectors. In this part of the tutorial, you will use a Google Sheets data source connector to load data from an external spreadsheet.
Google Drive is commonly used for sharing small reference tables between different organizations. For our purposes, create a Google spreadsheet from the level.csv file. Imagine someone shared the level table with you through Google Drive.
Prepare
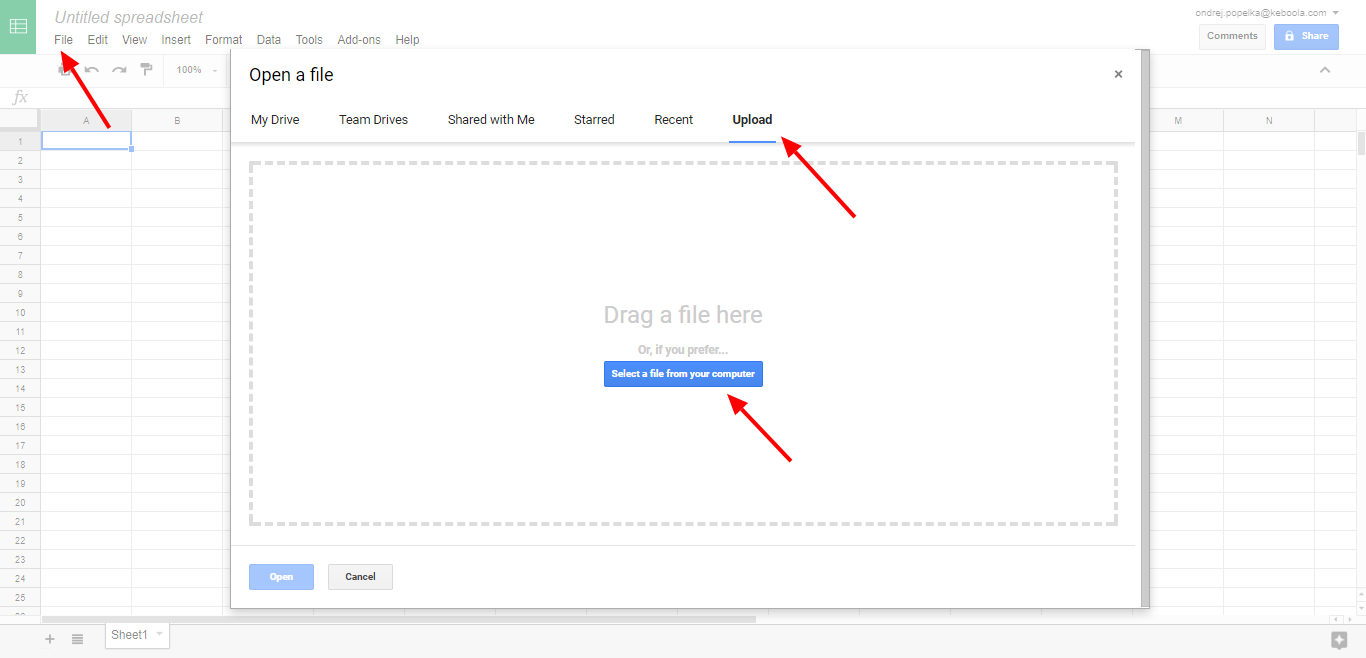
Go to Google Spreadsheets and start a new blank spreadsheet. Then go to File – Import and upload the level.csv file.
Configure Google Sheets Data Source Connector
-
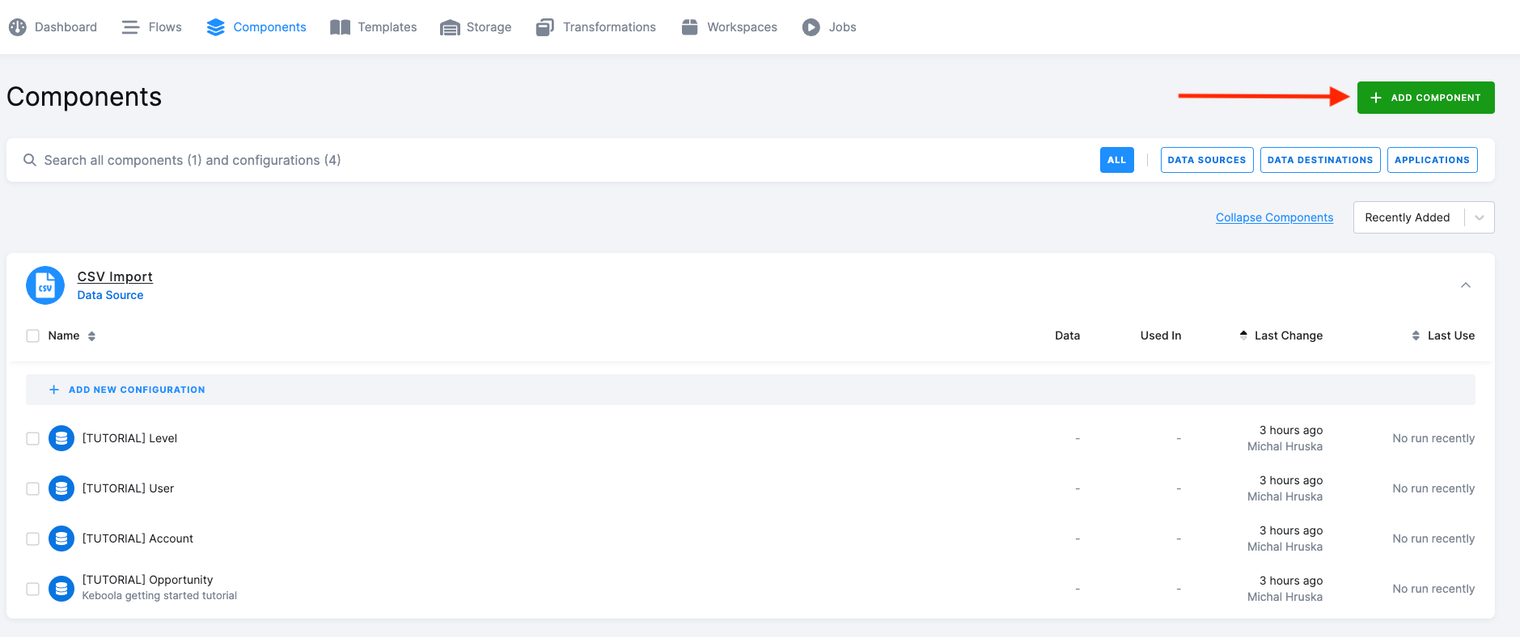
Navigate to Components section in Keboola and click the Add Component button:
-
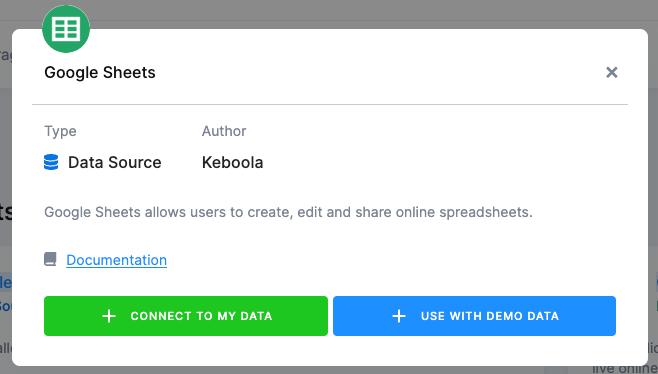
Utilize the search box to locate the Google Sheets data source connector. Once found, click on it.
-
Click Connect To My Data. The ‘Use With Demo Data’ option will extract datasets prepared by Keboola for your experimentation outside of this tutorial, and it can be found across all commonly used connectors.
-
Enter a name and description and click Create Configuration.
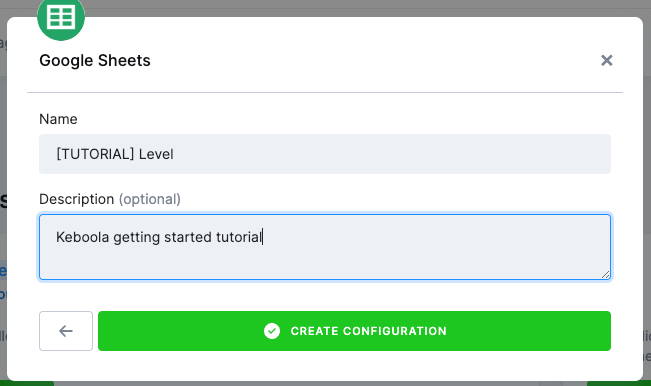
Each Keboola component (data source, data destination, or application) can support multiple configurations. This concept enables you to, for instance, extract data from multiple Google accounts.
-
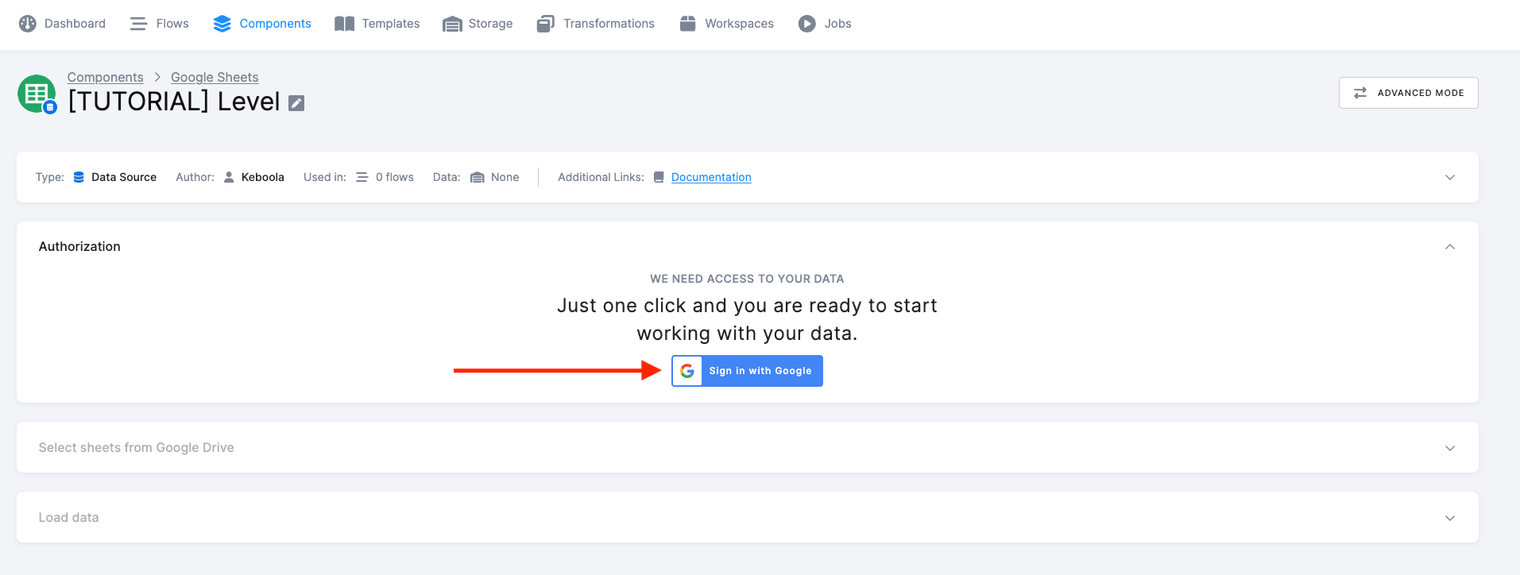
Authorize the connector to access the spreadsheet by clicking the Sign in with Google button.
-
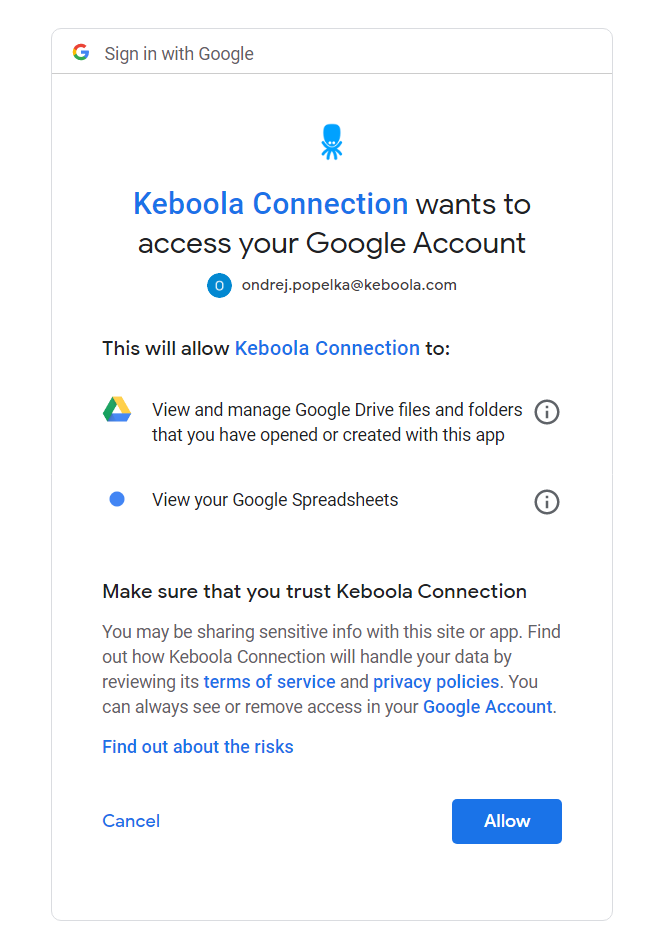
On the following screen, click Allow.
-
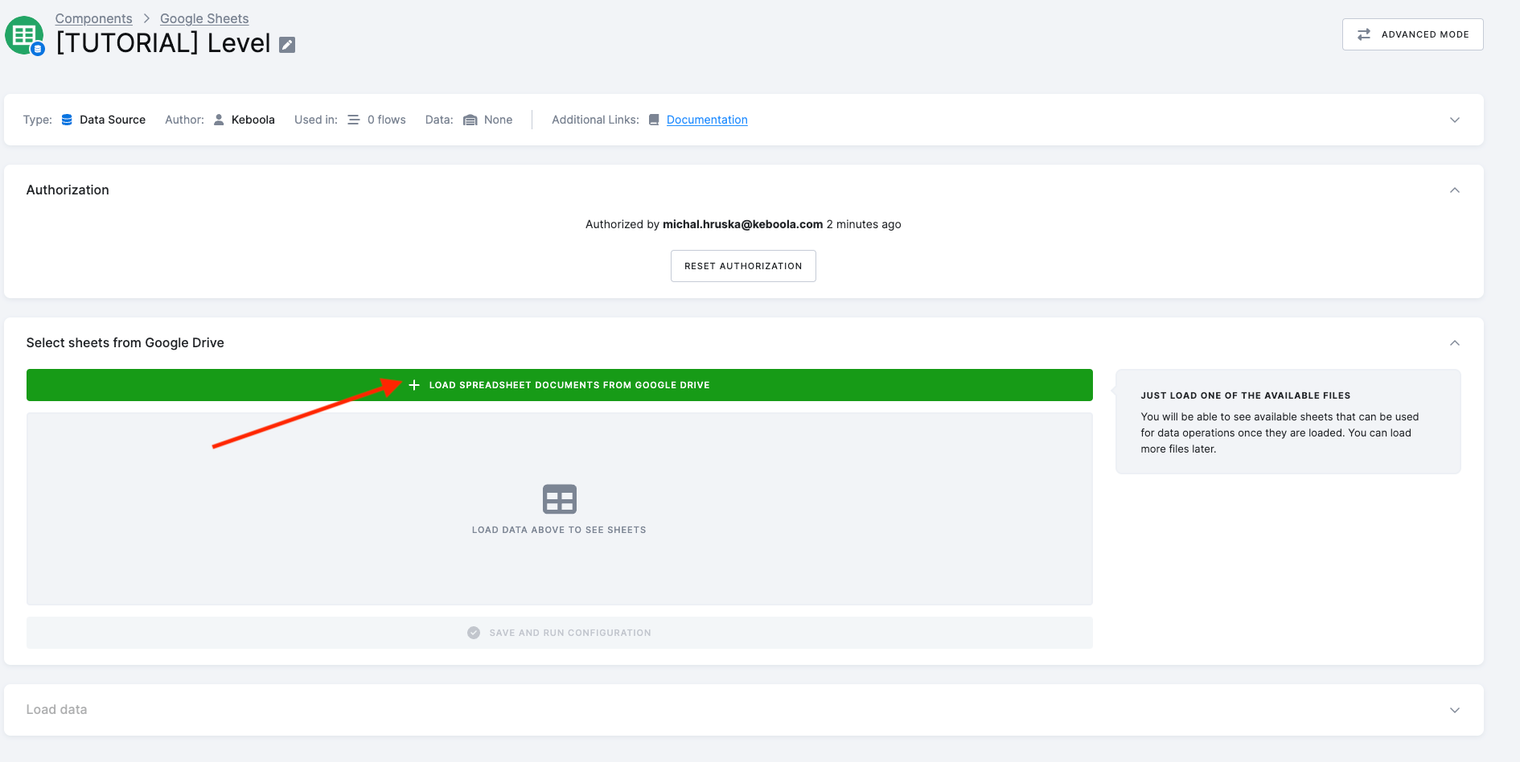
Now you want to select the Google Drive files to import.
-
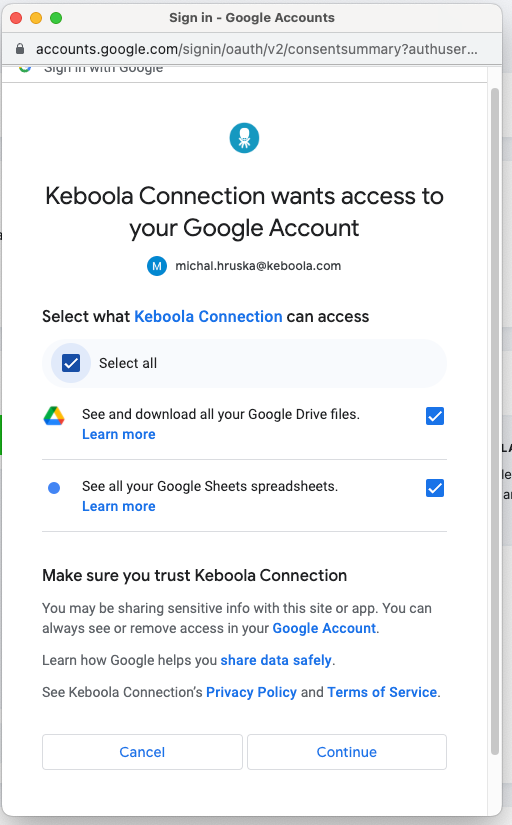
In step 5, you authorized Keboola to use your account to access the Drive. In this step, you will be asked to grant access specifically to spreadsheets. Click ‘Select all’ and then proceed by clicking ‘Continue’ on the following screen.
-
Use the search box to find your Level spreadsheet. Select it and click the Select button.

- Keboola has automatically detected all sheets from within your spreadsheet and will now allow you to select the one you want to load.
-
Select the sheet and click Save and Run Configuration. A job will be executed, and once completed, you will see a new table created.

-
The Google Sheets data source automatically generates an output bucket and table. Click on the name of the output table to check its contents, or navigate directly to the Storage section to explore the data.

What’s Next
Proceed to Data Manipulation for the next step in the tutorial. Alternatively, take another brief side step to explore loading data with the Database data source connector.
If You Need Help
Feel free to reach out to our support team if there’s anything we can help with.
