Working with Tables in Branch
So far, you have prepared table and file manipulating configurations in production. In this section of our tutorial, you will manipulate the configurations, run them, and learn how tables behave in branches.
Let’s say that you want to make some changes to the previously created configurations to
- use the top ten values instead of the top five, and
- convert bitcoin (BTC) to dollars based on the value of bitcoin on the given day.
However, you do not want to modify your current production transformation yet. Perhaps it is a critical transformation in production, perhaps you want to check the results first. In either case, development branches give you the option to test your changes safely before merging them into production.
Create New Branch
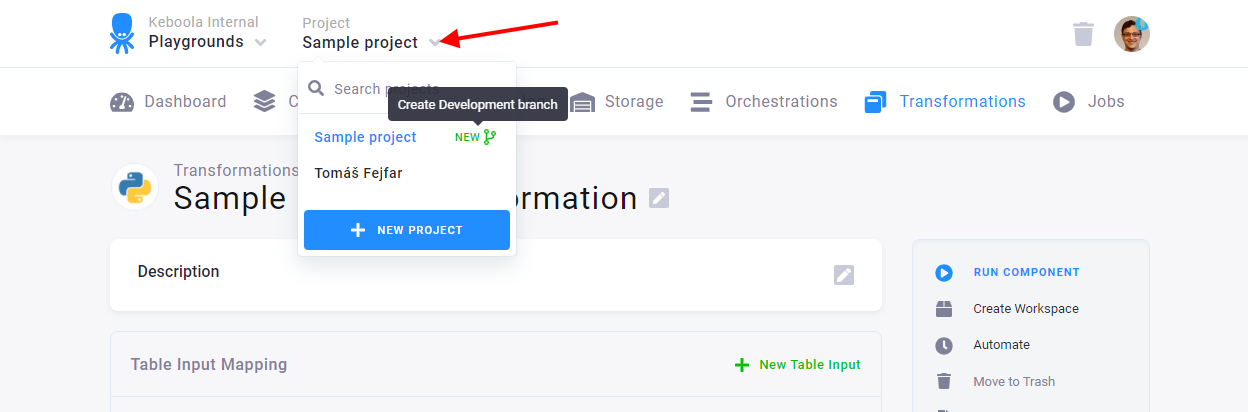
Section titled “Create New Branch”To create a new branch, click on your project’s name at the top of the screen. Then click on the green icon New displayed next to your project’s name.
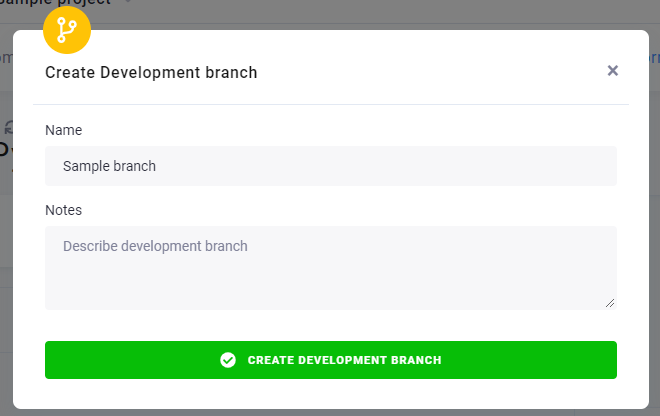
Name your new development branch Sample branch, and click Create Development Branch to open it.
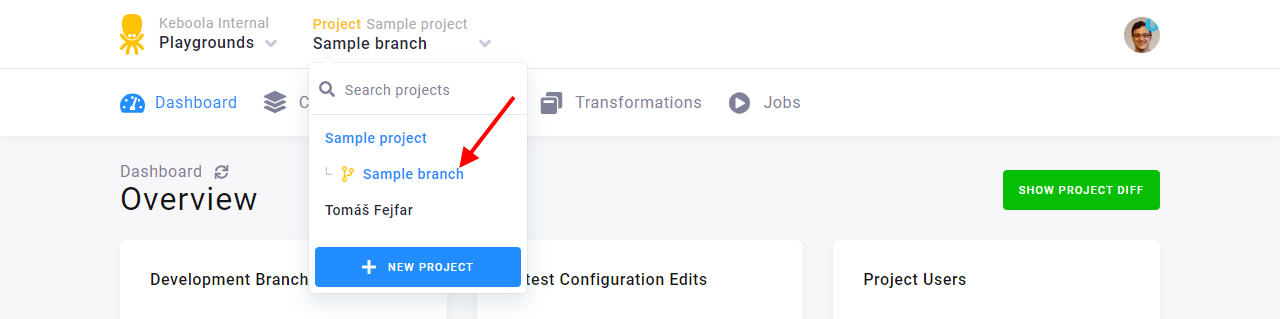
The new branch will appear right below the name of your production project.
Change Transformation
Section titled “Change Transformation”Let’s start with the easier task — changing the transformation so that it returns the top 10 rows instead of
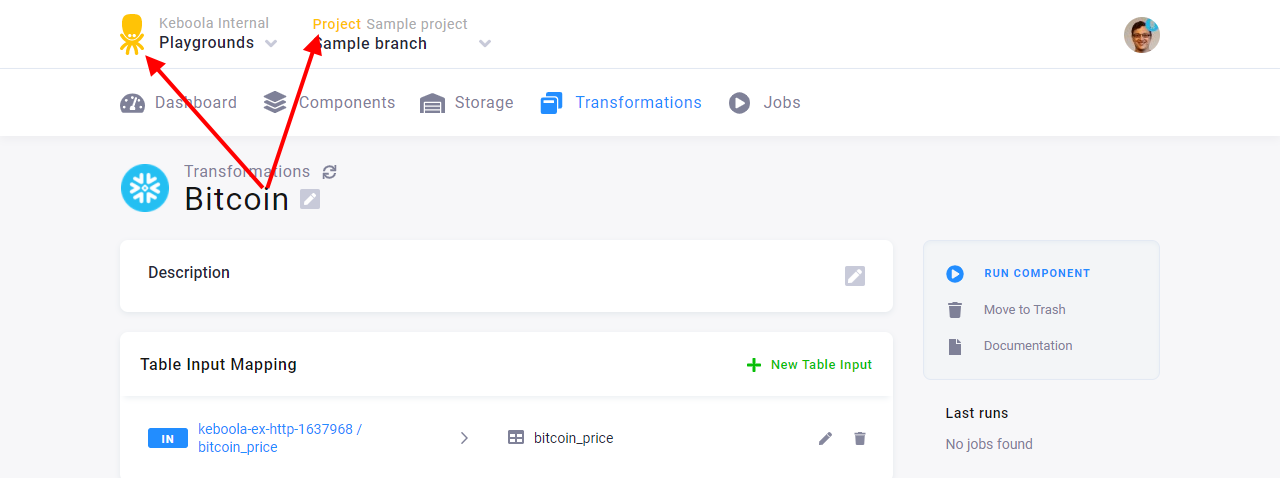
the top 5. In your branch, navigate to Transformations. You can see the previously created Bitcoin transformation.
It is, however, only a copy living in the branch. You can verify that you are working with the branch copy by checking
whether the page header has yellow accent and shows the branch name.
When you are in the branch, change the query limit from LIMIT 5 to LIMIT 10 in the transformation code, and save it.
CREATE TABLE "top_prices" AS SELECT * FROM "bitcoin_price" ORDER BY PRICE DESC LIMIT 10;
ALTER TABLE "top_prices" DROP COLUMN "_timestamp";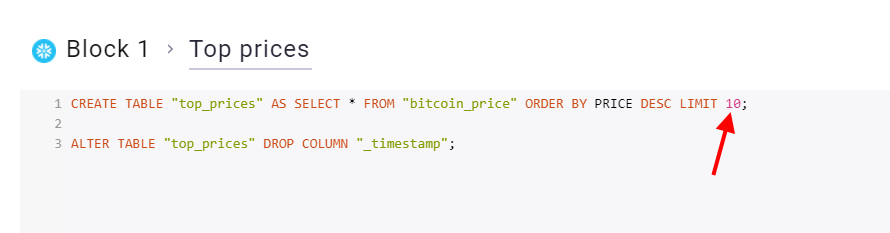
If you want, check that the original transformation did not change. You can do so by switching back to the project in
the top menu. The production transformation still contains LIMIT 5. Now that you have verified that a branch transformation
can be changed independently without affecting your production transformation, switch back to the branch you created
(Sample branch).
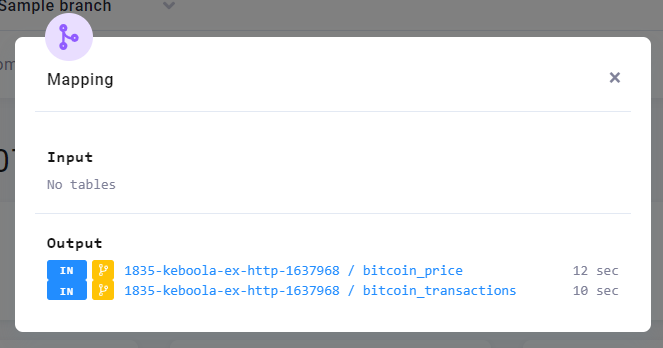
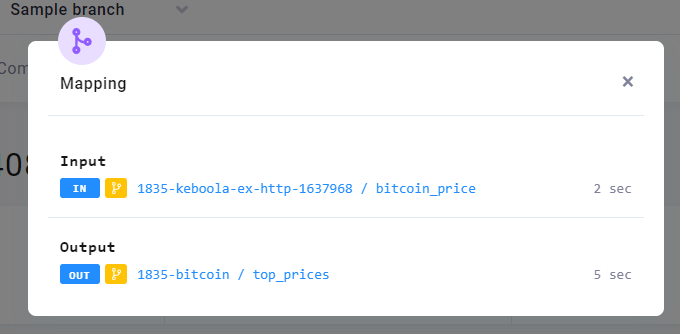
Navigate to the transformation and run it. Examine the Mapping section in the job detail.
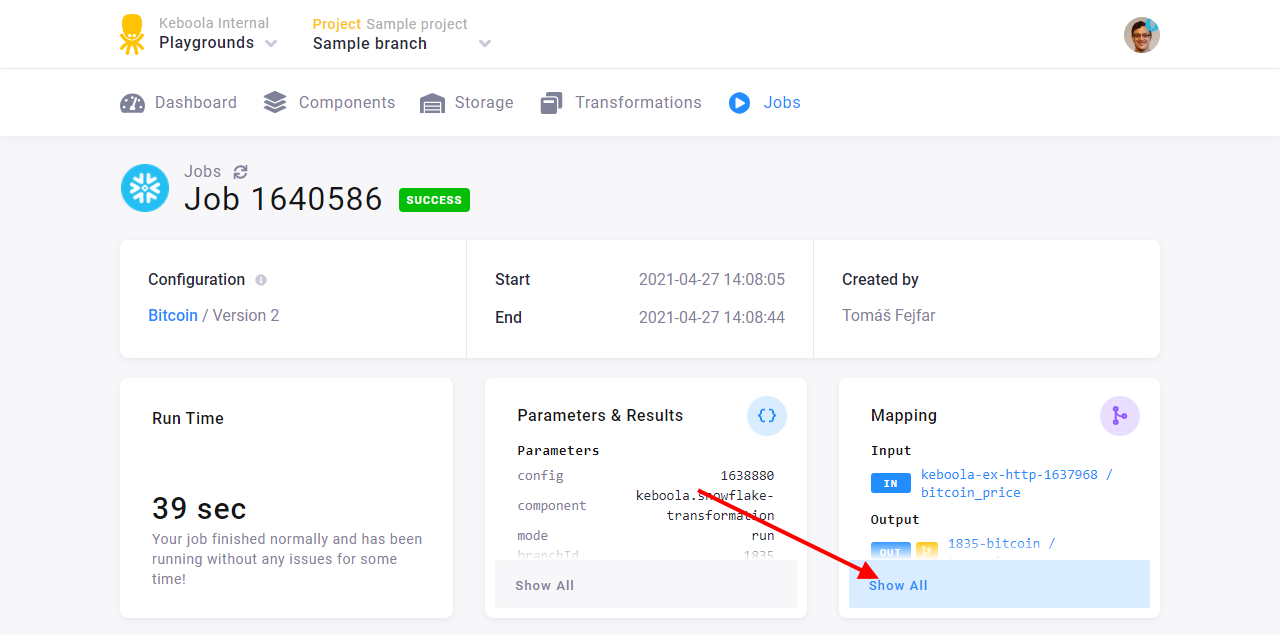
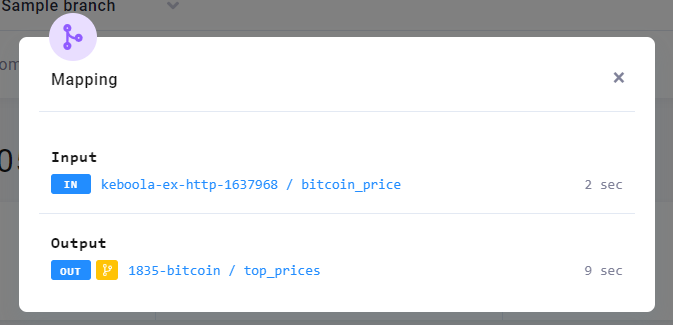
Notice how the Input section shows the data loaded from the bitcoin_price table, even though you did not run the data source connector in this branch. When a branch version of a table does not exist, Keboola uses the production version as a fall back.
Also notice that Output shows the small yellow branch icon, and the name of the bucket is prefixed with a number —
1835-bitcoin. When you run a component in a branch and the component wants to write to Storage, the outputs do not
overwrite production data. Instead a duplicate bucket prefixed with branch ID is automatically created. Examine
the table and check that it indeed has 10 values as it should.
This part of your task is done. Let’s get to the second part.
Download Transactions
Section titled “Download Transactions”The second objective is to produce a list of transactions showing the amount in both BTC and USD. You need to extract the account data first. Use the prepared CSV file with sample transactions.
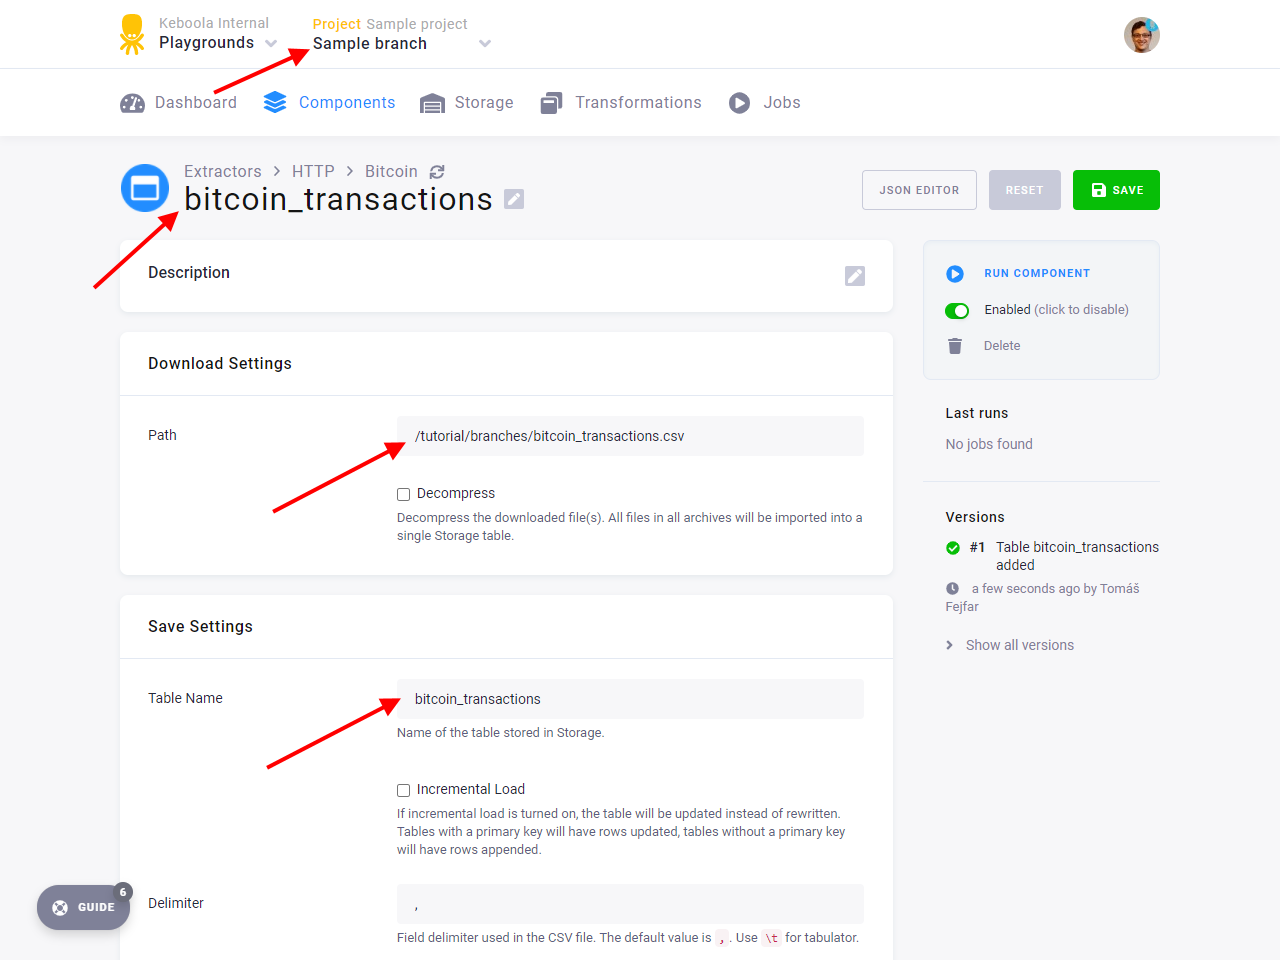
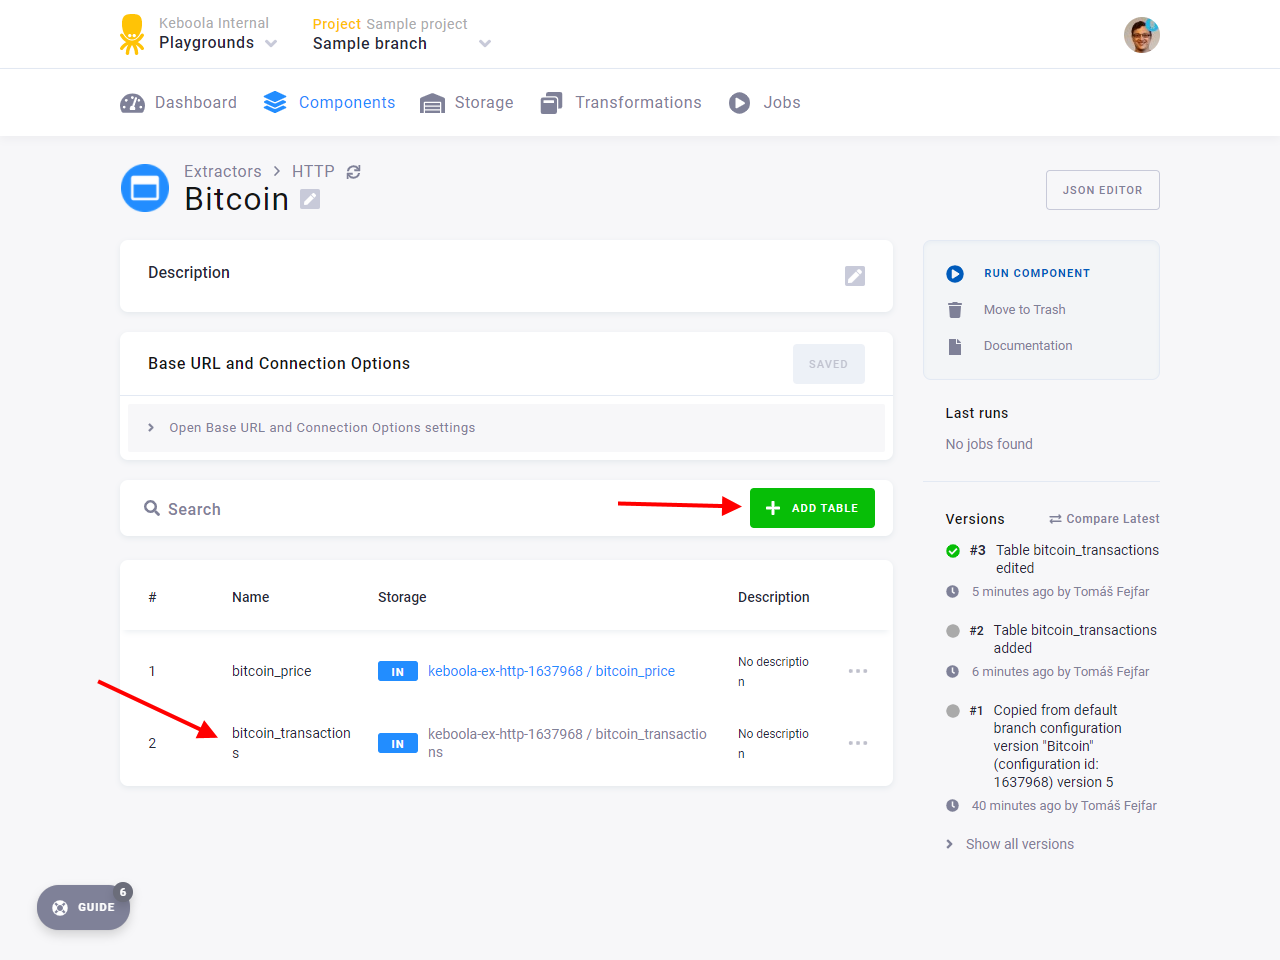
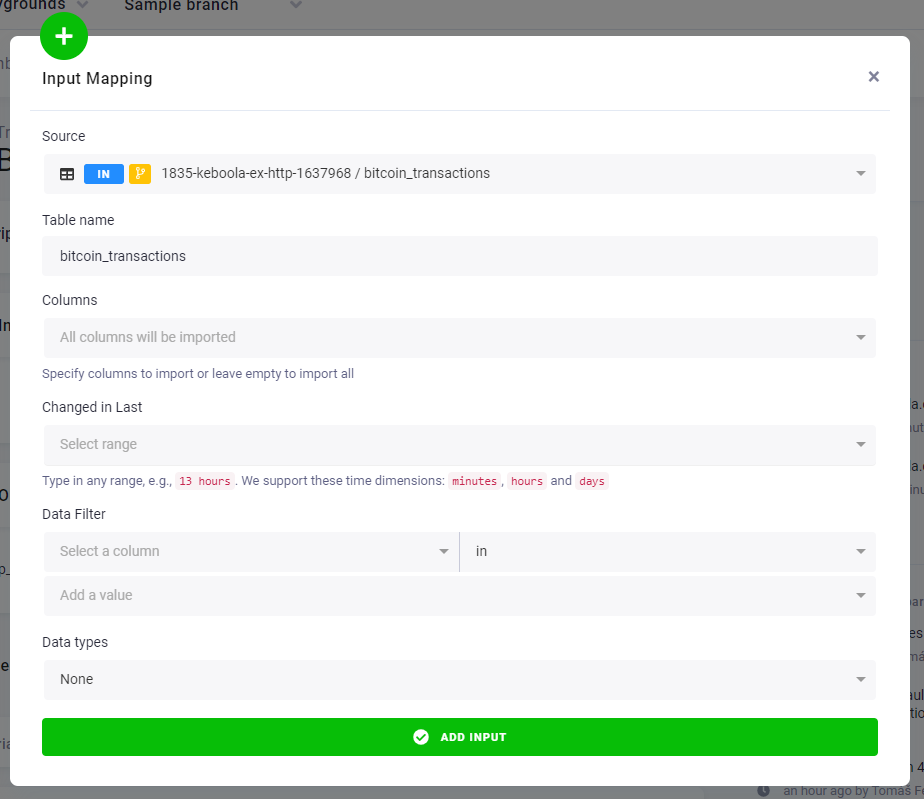
In the branch, navigate to your existing HTTP connector configuration and add a new table named bitcoin_transactions.
Fill in Path with /tutorial/branches/bitcoin_transactions.csv. Save and run the connector.
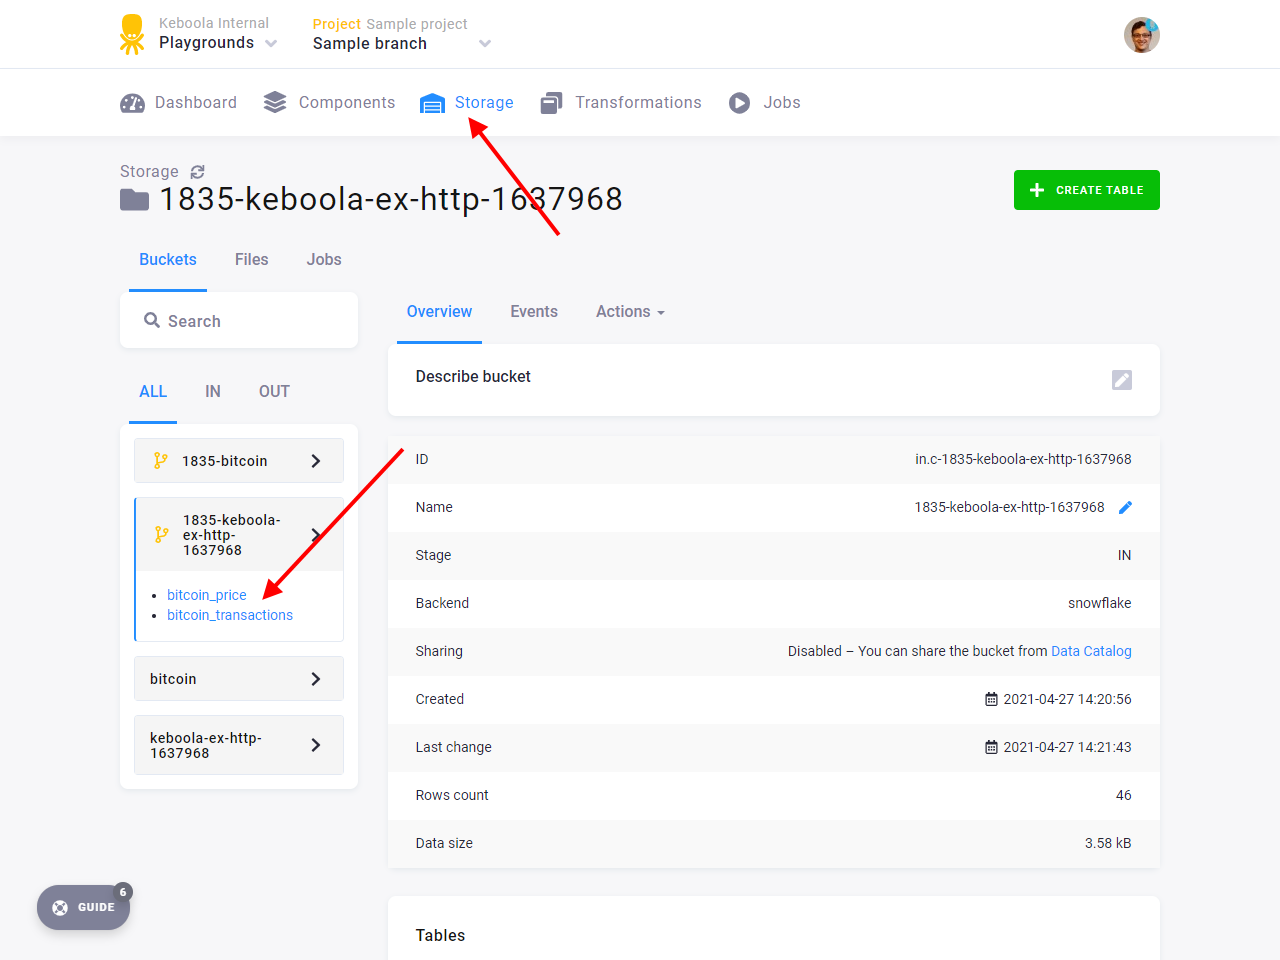
Examine the job outputs. There are tables with the branch icon in a bucket prefixed with a number. As we’ve already shown, this means that the output was stored in branch context, keeping your production data intact.
If you navigate to Storage Explorer in the branch, you’ll see that the created buckets are shown there with the icon as well.
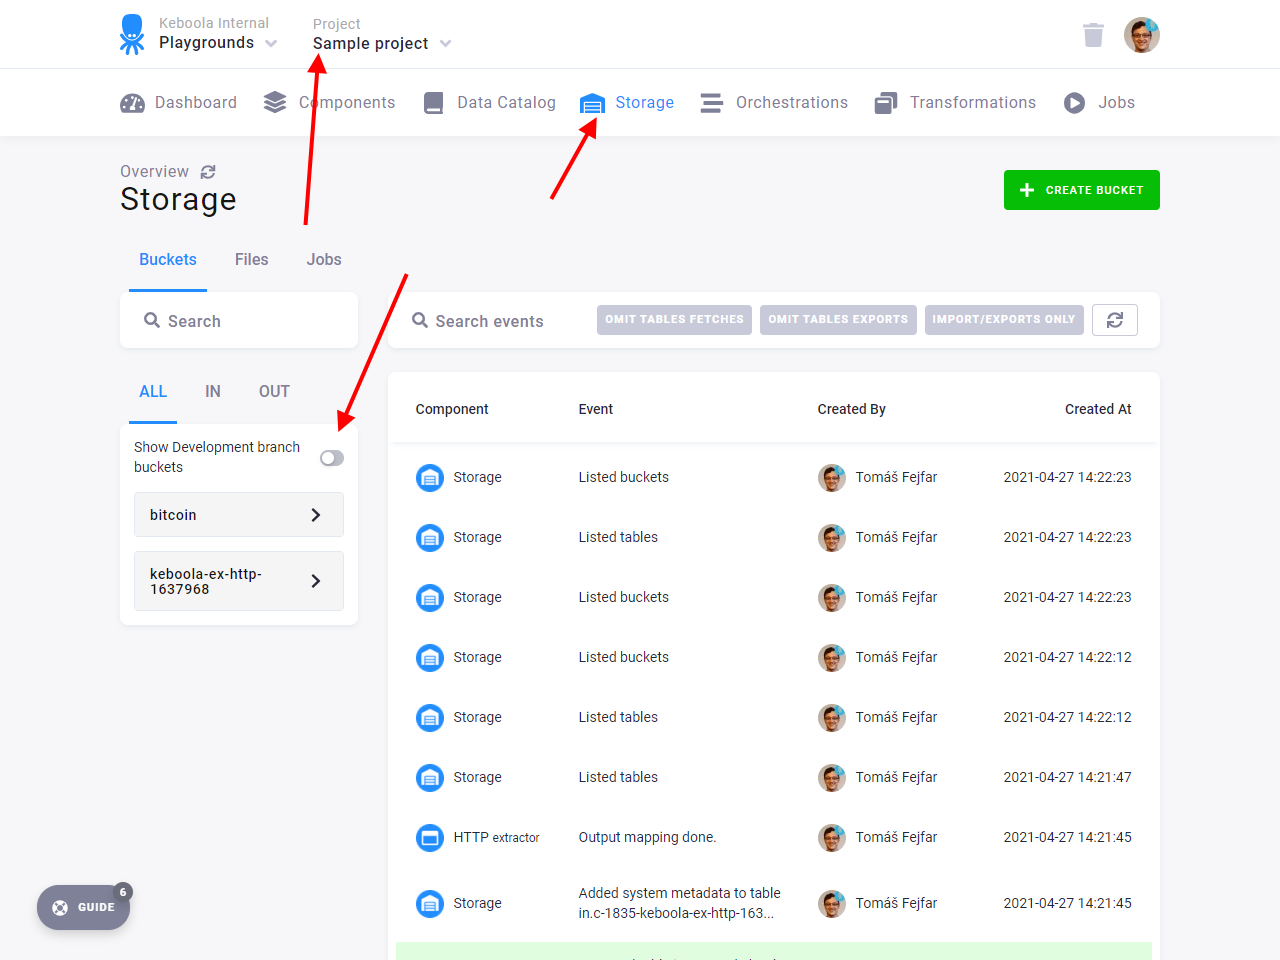
Also, when you switch back to production and navigate to the Storage Explorer, you’ll see a switch to show the branch buckets.

Now switch back to the Sample branch. Navigate to the Bitcoin transformation and run it again. Check the input mapping
and verify that the bitcoin_prices table from the branch was used as input.
What happened is that Keboola checked whether a branch version of the bucket existed and since it did (you ran the branch version of the HTTP connector), it was used in the transformation.
Extend Transformation
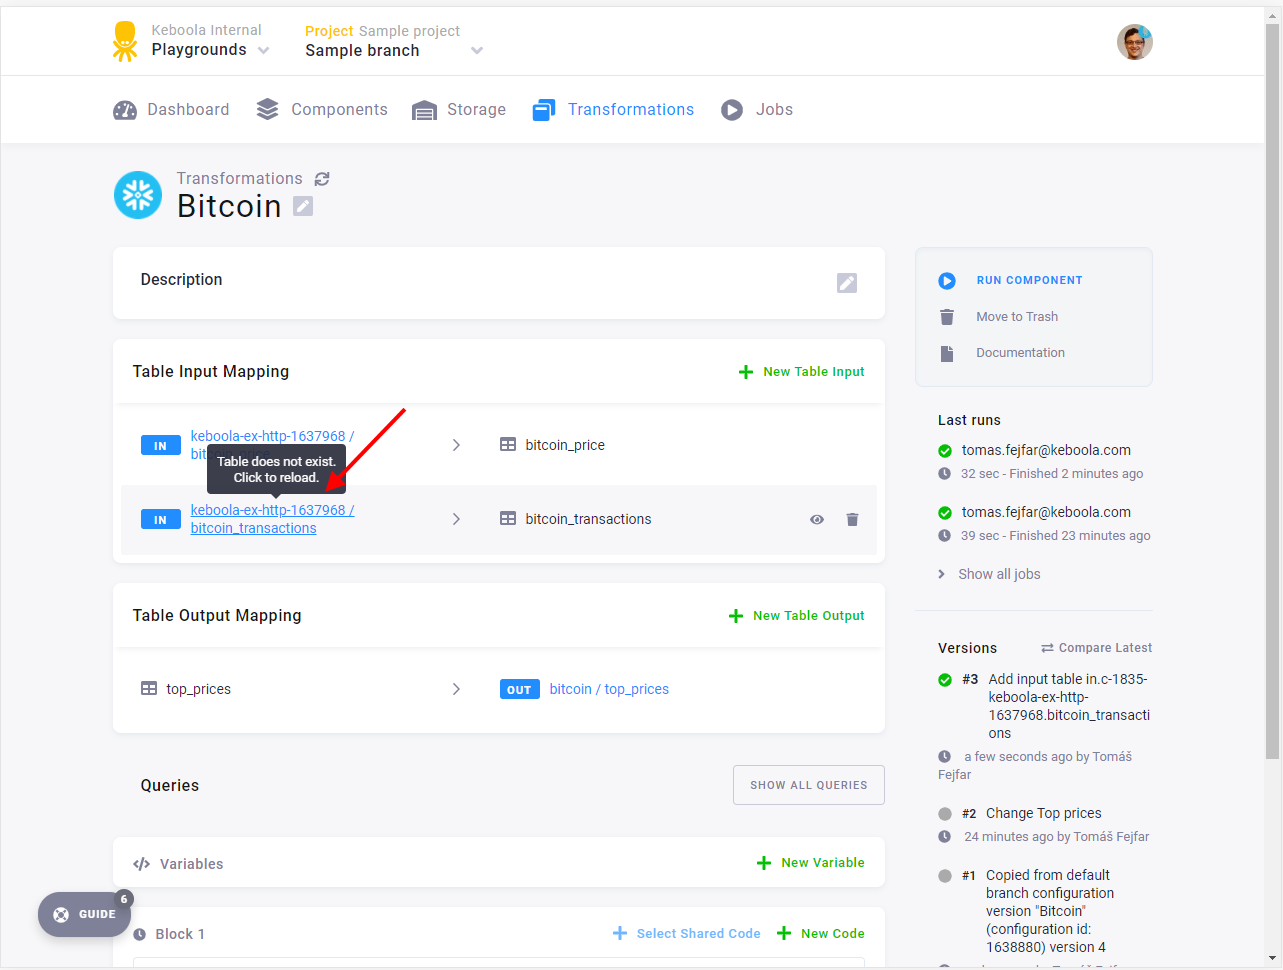
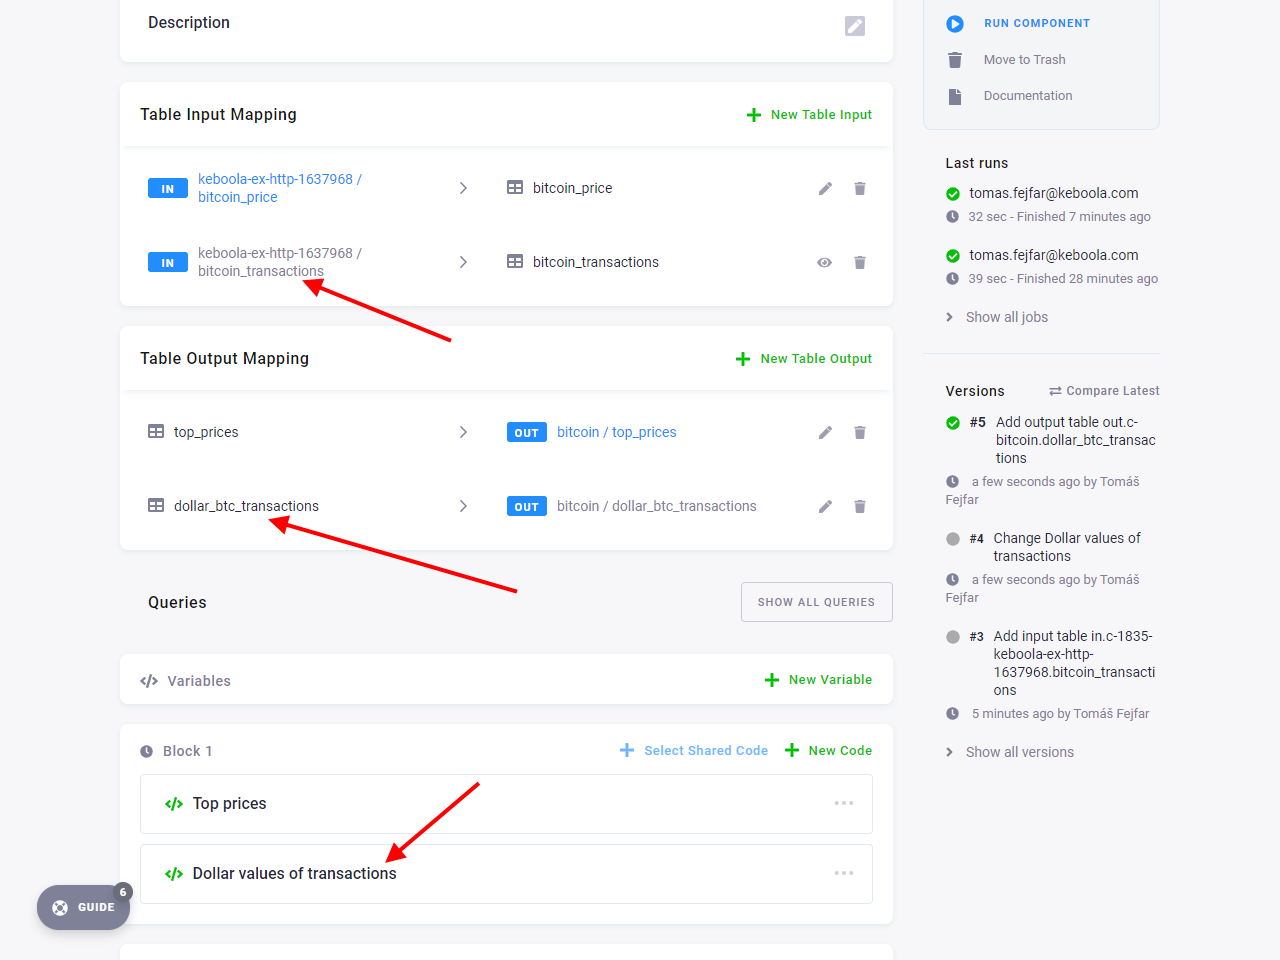
Section titled “Extend Transformation”You’ll be loading the data from the table bitcoin_transactions, so you need to add the table to input mapping.
Notice the branch icon next to the table name. You’re referring to the branch version of the table. Don’t be alarmed by the UI saying that the table does not exist — it exists only in the branch so far. The UI will be improved in future versions.
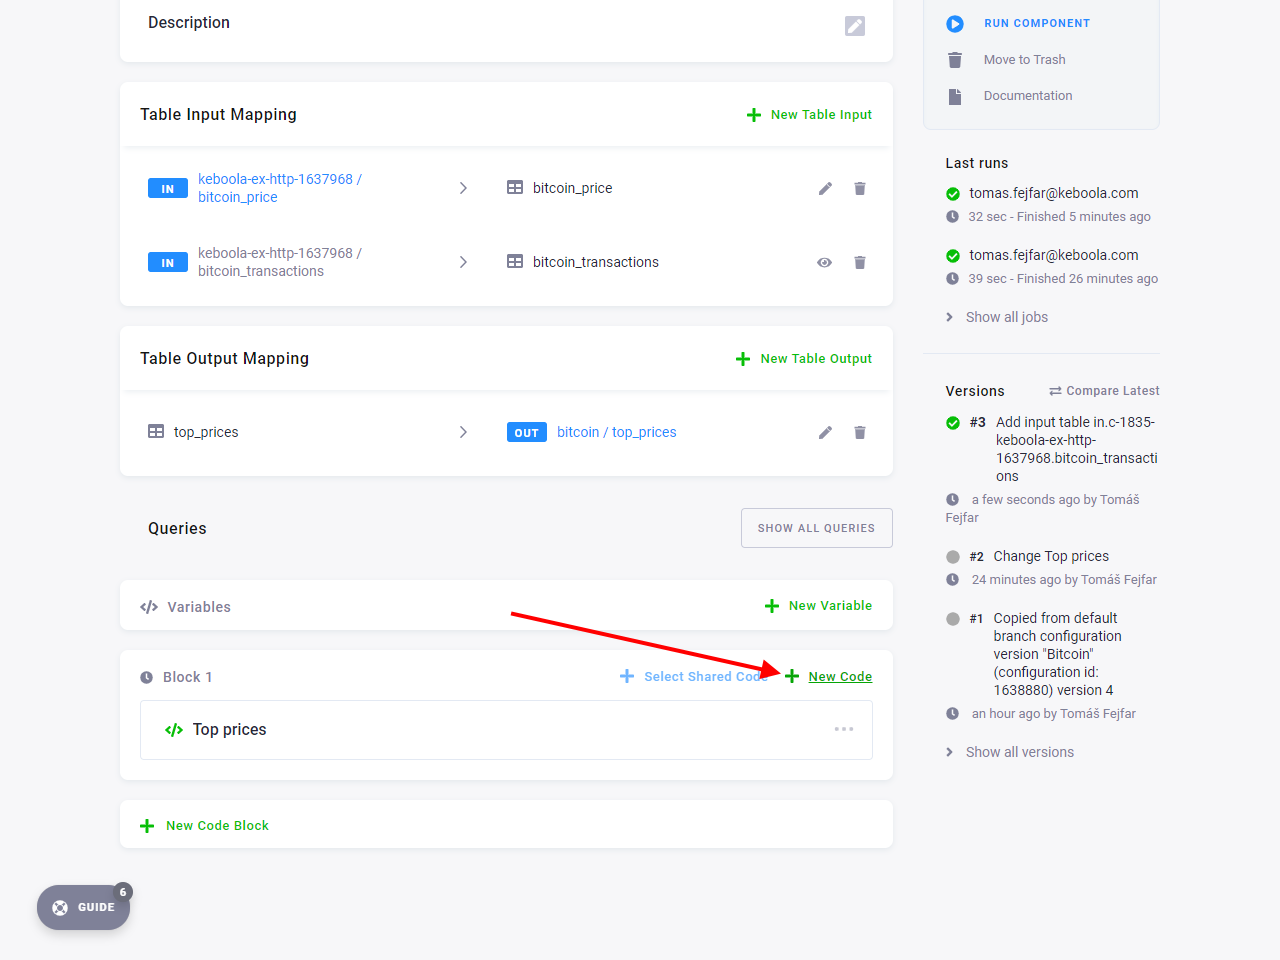
Now add a second code to Block 1 named Dollar values of transactions and insert the following SQL:
CREATE TABLE "dollar_btc_transactions" ASSELECT BT.DATE, BT.AMOUNT AS BTC_AMOUNT, BP.PRICE AS RATE, BT.AMOUNT * BP.PRICE AS USD_AMOUNTFROM "bitcoin_transactions" AS BTLEFT JOIN "bitcoin_price" AS BP ON BP.DATE = BT.DATE;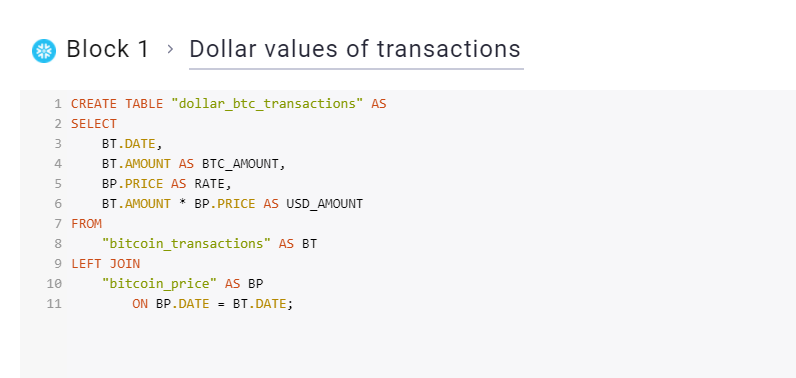
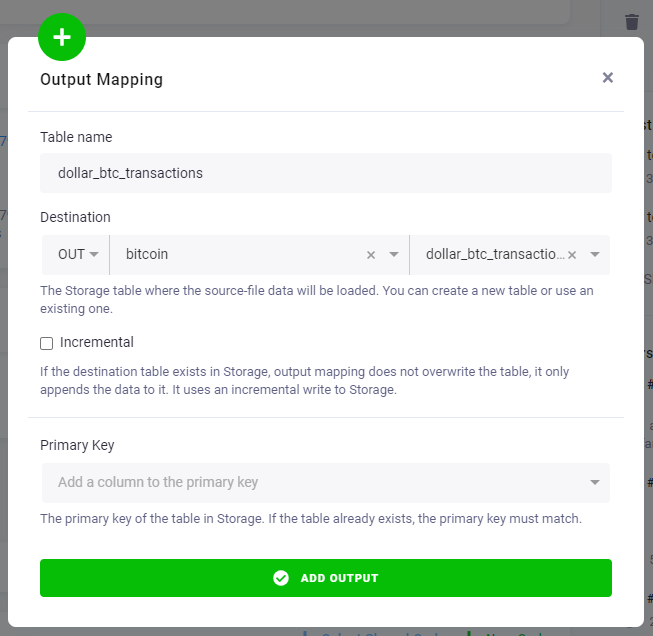
For the data to make it out of the transformation, you need to add the created dollar_btc_transactions table
to output mapping as well.
Run the updated transformation and examine the results.
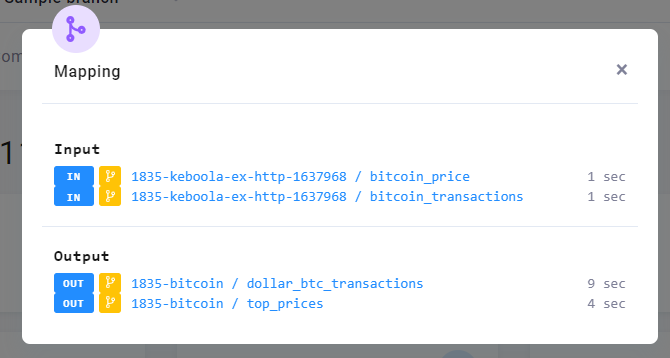
As you can see, this run of the transformation only accessed branch buckets. It loaded the data from the HTTP connector from the branch bucket as input and stored the output in two tables in another branch bucket. You can also examine the data in the tables to see that you indeed created a list of transactions with their dollar amounts.
The second part of your task is done as well. You changed the table-manipulating production configurations in a branch. You verified that the none of the changes affected the original project configurations or the project production data. Next you will run the file-manipulating configuration in a branch and examine how files work there.