Workspace
A workspace serves several purposes and can be used as
- an interactive development environment (IDE) to create transformations.
- an analytical workspace where you can interactively perform experiments and modelling with live production data.
- an ephemeral workspace created on each run of a transformation to provide the staging area in which the transformation operates. Ephemeral transformation workspaces are not visible in the transformation UI, hence we won’t mention them further.
Working with Workspaces
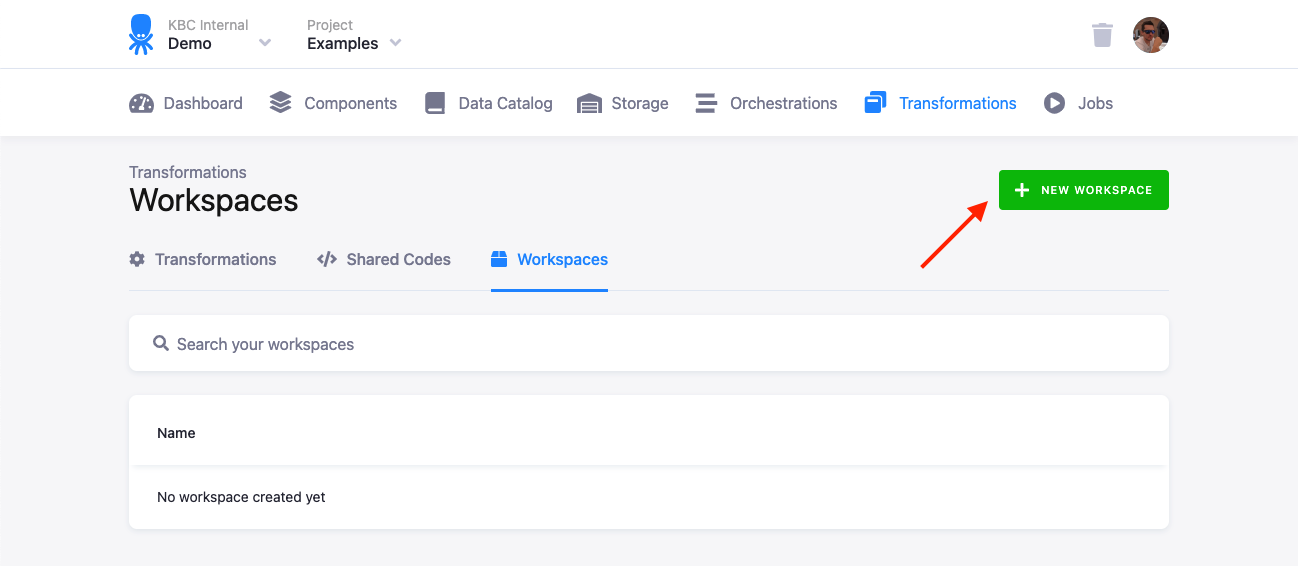
You can create a Workspace on the Transformations page:
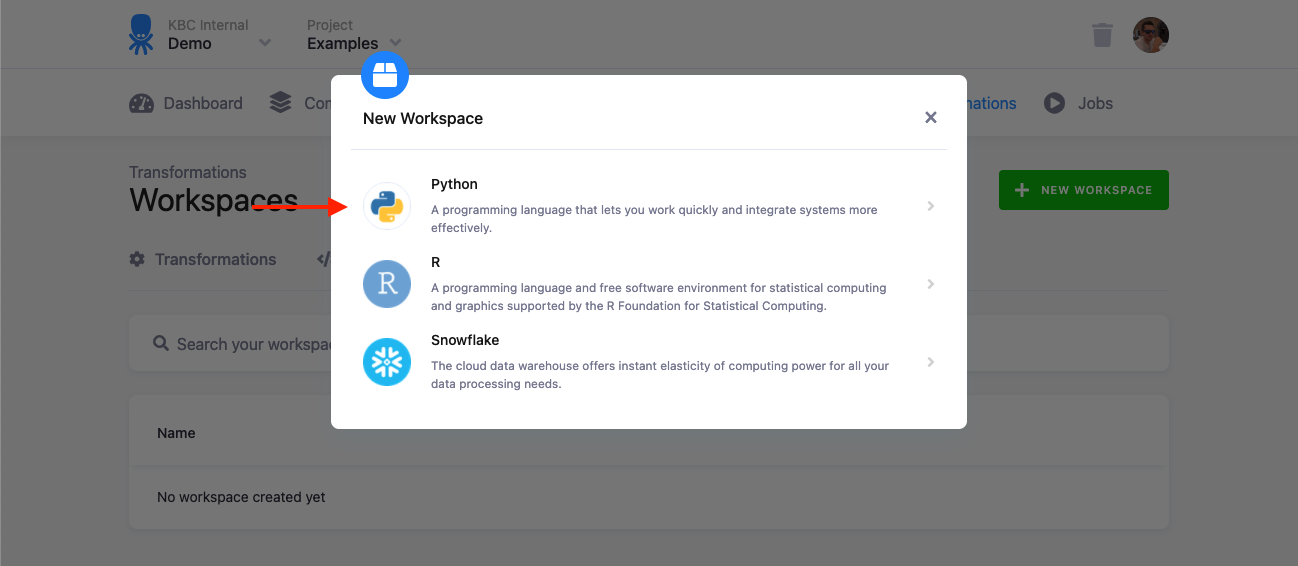
Select a workspace type; not all workspace types are supported in all project workspaces. Workspace types match available transformation types. For scripting languages (Python and R), we provide JupyterLab with the matching kernel. For SQL workspaces, you can either use Snowflake’s Snowsight or a database client of your liking (for example, Dbeaver).
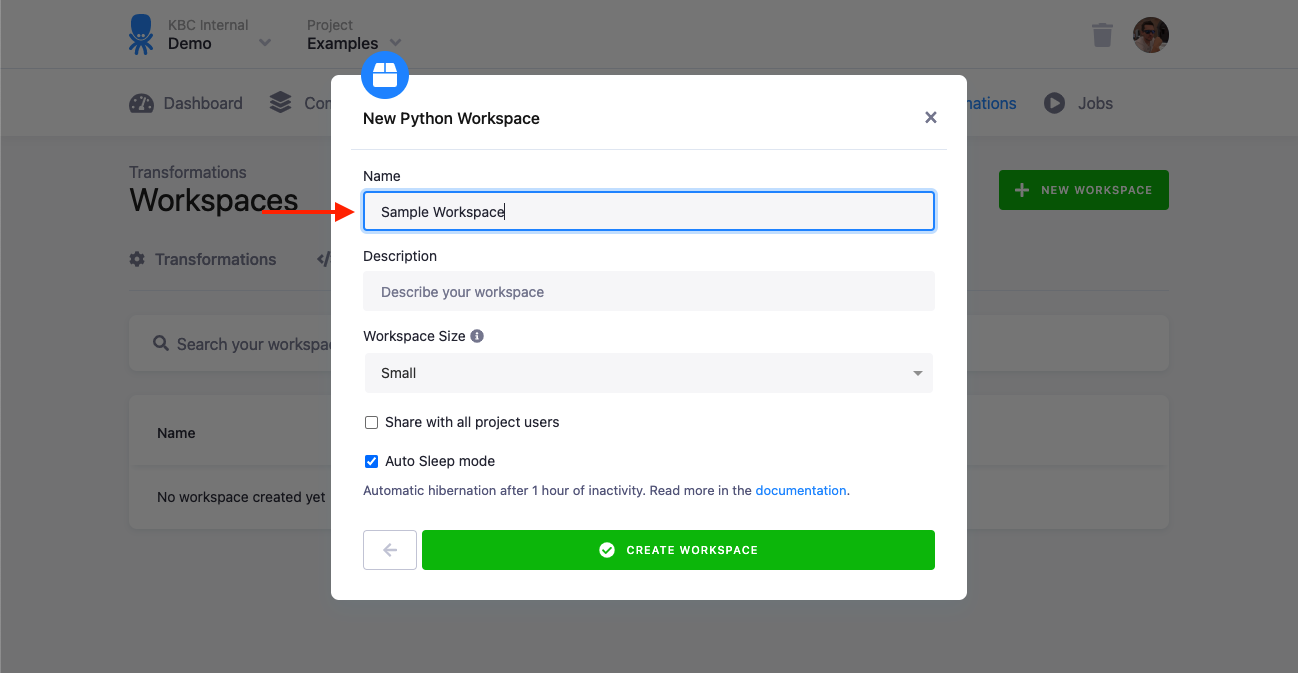
Name and optionally describe the workspace:
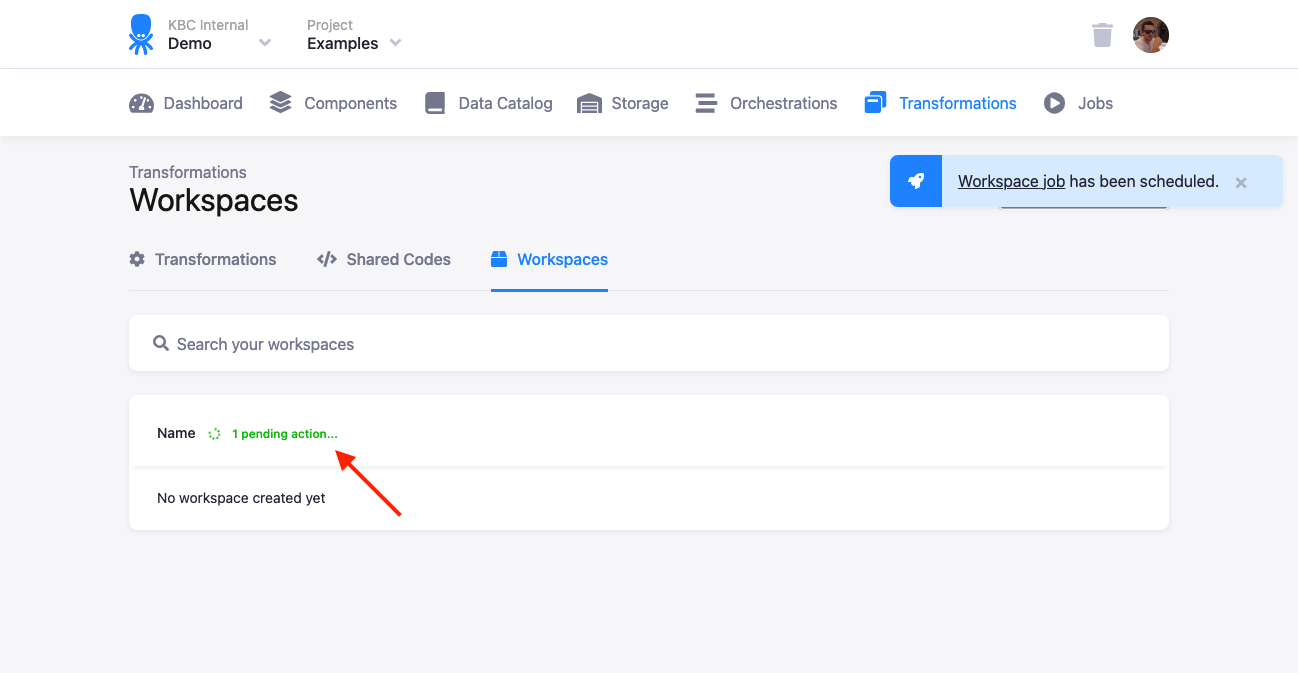
Creating the workspace takes a few seconds, so it will take a while before it appears:
Once the workspace is ready, you’ll see it in the workspace list:
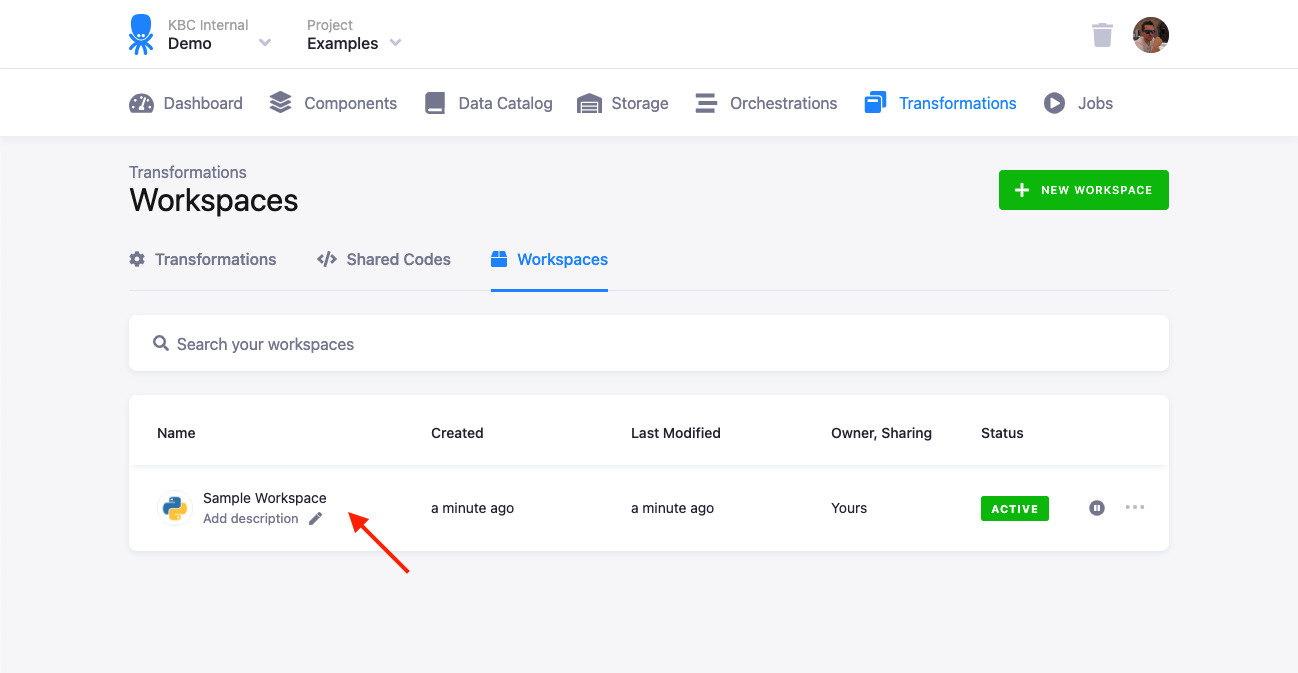
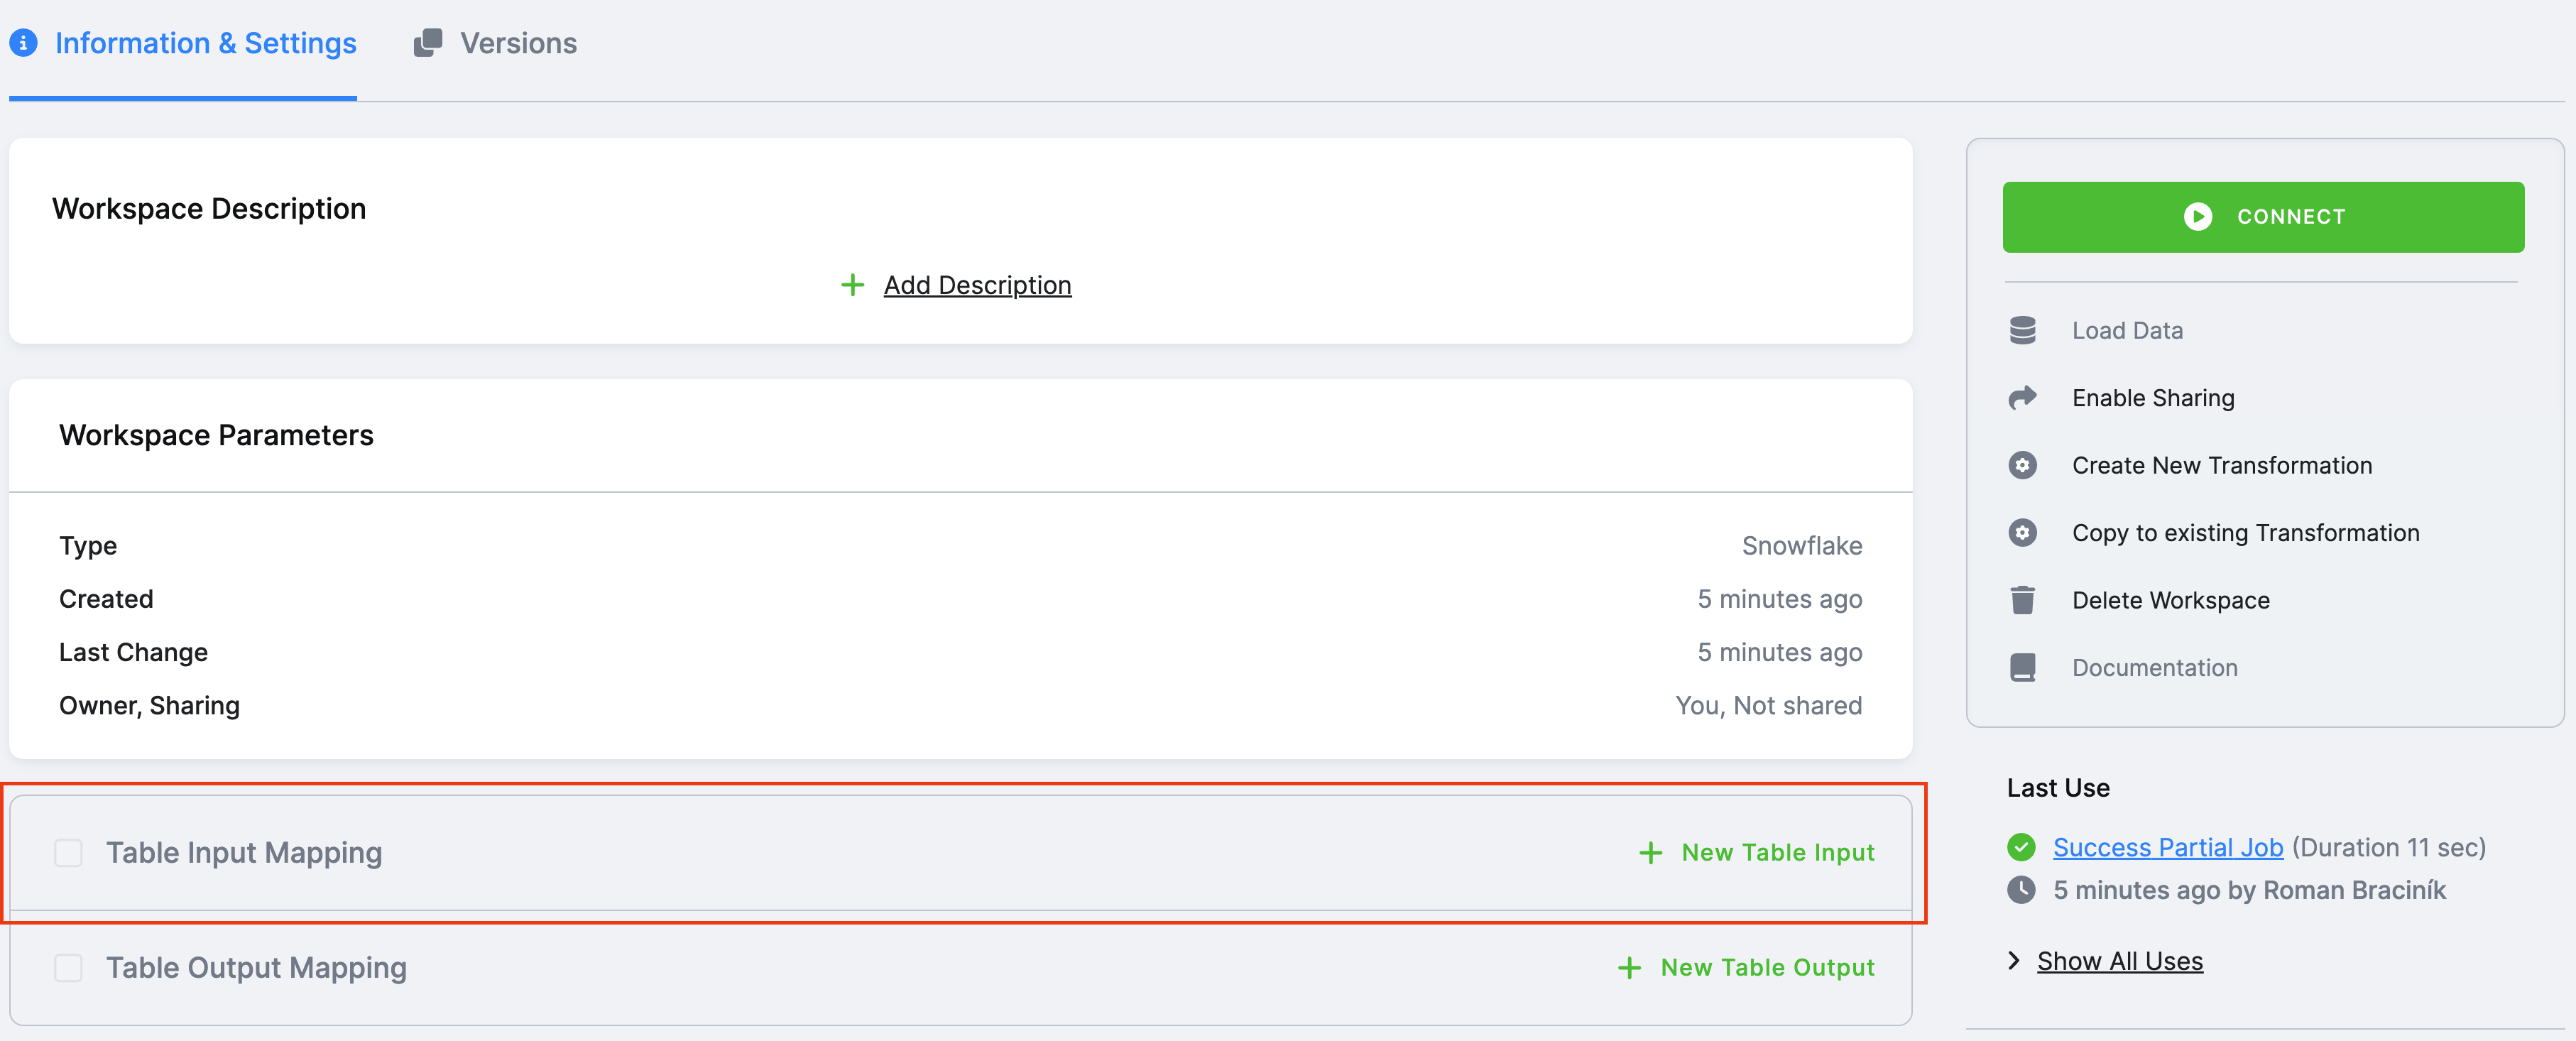
In the workspace detail, you can
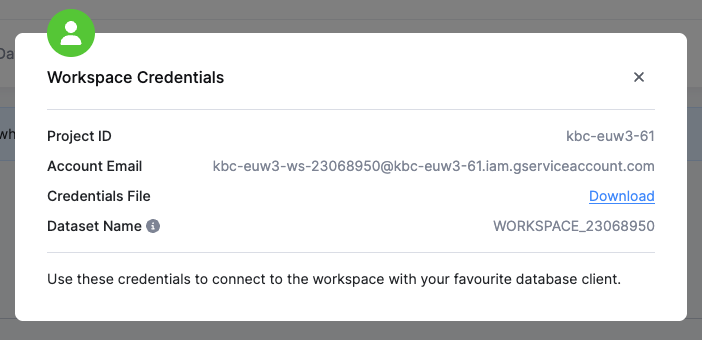
- get credentials & connect to the workspace,
- configure workspace mappings,
- load & unload data specified in the mappings, and
- manage the workspace (resume & terminate & delete).

Connecting to Workspace
Python/R
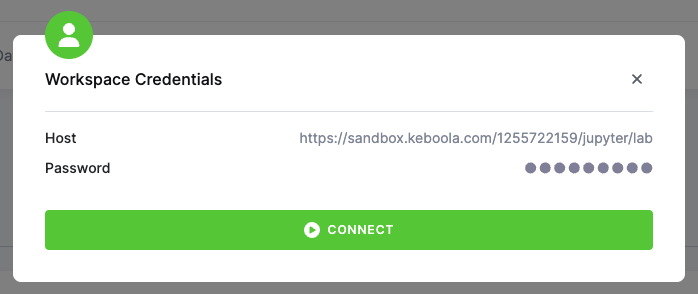
To connect to a JupyterLab workspace with the associated kernel (Python, R), use the URL and the password provided in the Credentials link. Use the Connect button to directly open the JupyterLab interface.
Snowflake
We provide two versions of Snowflake workspaces with different authentication options.
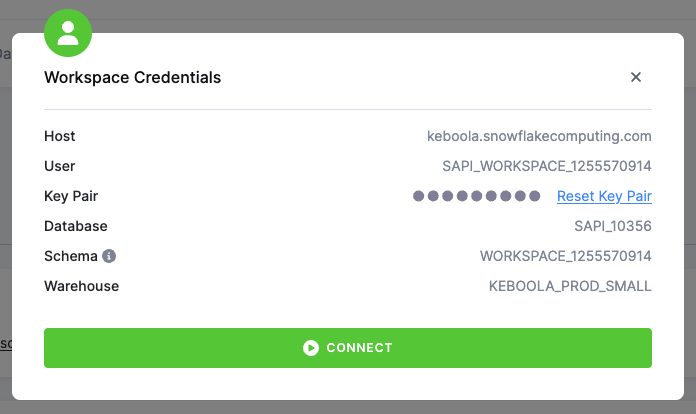
Person type workspace uses SSO and Key Pair authentication methods. To connect using:
SSO- use the Connect button in the Connect menu to login to Snowflake’s Snowsight web interface.Key Pair- use your favorite database client or other third-party tool and the Key Pair credentials provided in the Connect menu.
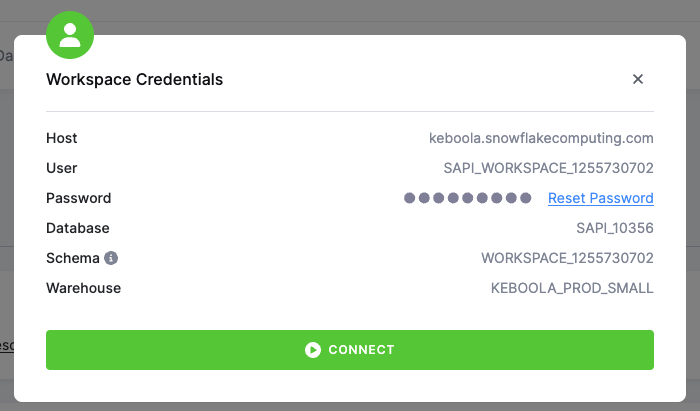
Legacy Service type workspace uses SSO and Password authentication methods. To connect using:
SSO- use the Connect button in the Connect menu to login to Snowflake’s Snowsight web interface.Password- use your favorite database client or other third-party tool and the Password credentials provided in the Connect menu.
Important
Legacy Service type workspace is using single-factor password authentication which is being deprecated by Snowflake. As a result, we are deprecating this login type by the end of 2025. We recommend using
Persontype workspace instead, if you don’t need to use password authentication.
Using Key Pair Authentication with Third-Party Tools
Below are links to documentation for popular database IDEs used by Keboola users that support Key Pair authentication.
- DBeaver Community Edition
- DBeaver Commercial Editions
- DataGrip
- VSCode/Cursor Snowflake Extension
- VSCode/Cursore DBCode Extension
BigQuery
To connect to a BigQuery workspace, you have to use your database client and the Credentials File provided in the Connect menu.
Workspace Lifecycle
When a workspace is created, it enters the Active state and can be used.
- Database (Snowflake and BigQuery) workspaces are billed by the runtime of queries executed in them. As such, we leave them in active state until you delete them.
- JupyterLab workspaces are billed by their running time. They can be terminated and resumed, in order to reduce running time while preserving your work.

Workspace termination can be done manually or it is done automatically after 1 hour period of inactivity (if auto sleep feature is supported and enabled).
Inactivity is measured from the last save of any notebook in JupyterLab. When a workspace is terminated, it is switched off
and consumes no credits. A terminated workspace can be resumed. Resuming a workspace means that we restore the
last saved version of all notebooks in the home directory (/data). We also load the current data from Input Mapping.
On a restored workspace, you’ll get
- all notebook files with their results,
- the current version of input mapping sources (beware that these might have changed in the mean time)
- new password
- Git configuration (if it was initialized before the termination)
Terminating and restoring a workspace means that you’ll loose
- the contents of memory,
- state of the notebook executions (the results are preserved however), and
- modifications to any data or temporary files on the local workspace drive.
Note: When you terminate and restore the workspace, its password changes.
When a workspace is terminated and you return to the JupyterLab interface (e.g., when you put your computer to sleep), you’ll see the following error:
Server Connection Error
A connection to the Jupyter server could not be established. JupyterLab will continue trying to reconnect. Check your network connection or Jupyter server configuration.
If you see this error, please go to the list of workspaces in Keboola, resume the workspace and reconnect from there.
Loading Data
To load arbitrary data into the workspace, configure a table input mapping or file input mapping (or both) and click the Load Data button.

When loading data into a workspace, you can specify entire buckets, which can be especially useful when you are not sure what tables you’ll need in your work. You can also take advantage of alias tables and prepare buckets with the tables you’ll need.
Read-Only Input Mapping
Note: You must be using new transformations to see this feature.
The workspace also supports read-only input mappings, as described in the mapping section. For each workspace or Snowflake writer (data destination) configuration, users can choose whether to use a read-only input mapping.
Note that there are security implications. If you enable a read-only input mapping for a workspace, then it has access to all the data in the project. You may not want to share workspace credentials with other people unless it’s acceptable for them to see all the data in the project. If limited access is required, do not enable read-only input mappings for the workspace.
With read-only input mappings disabled, only tables listed in the input mapping are accessible.
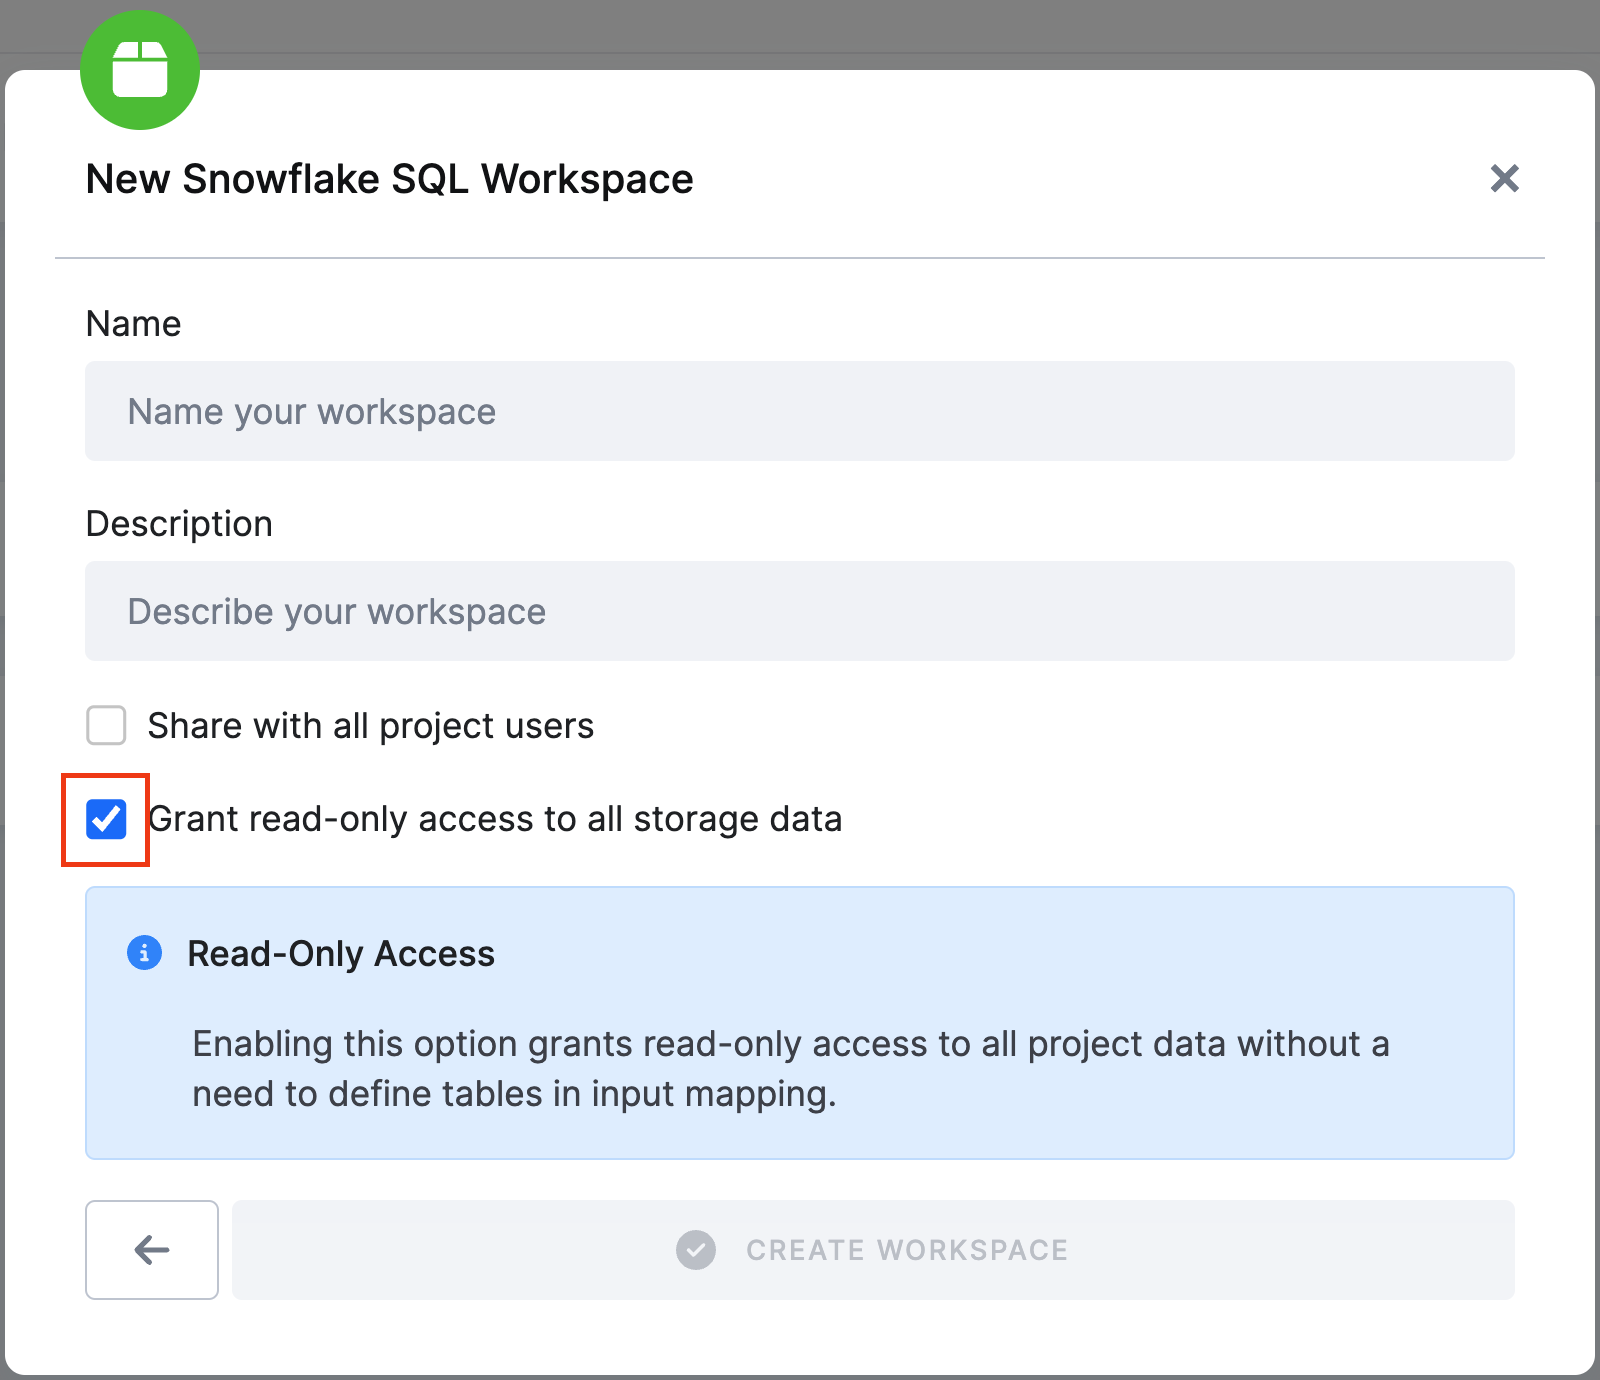
So, if we enable this feature when we create a workspace, we can access individual tables in the workspace,
without needing to define any tables in the input mapping. However, a read-only input mapping cannot access alias tables, because technically it is just a reference to an existing schema.
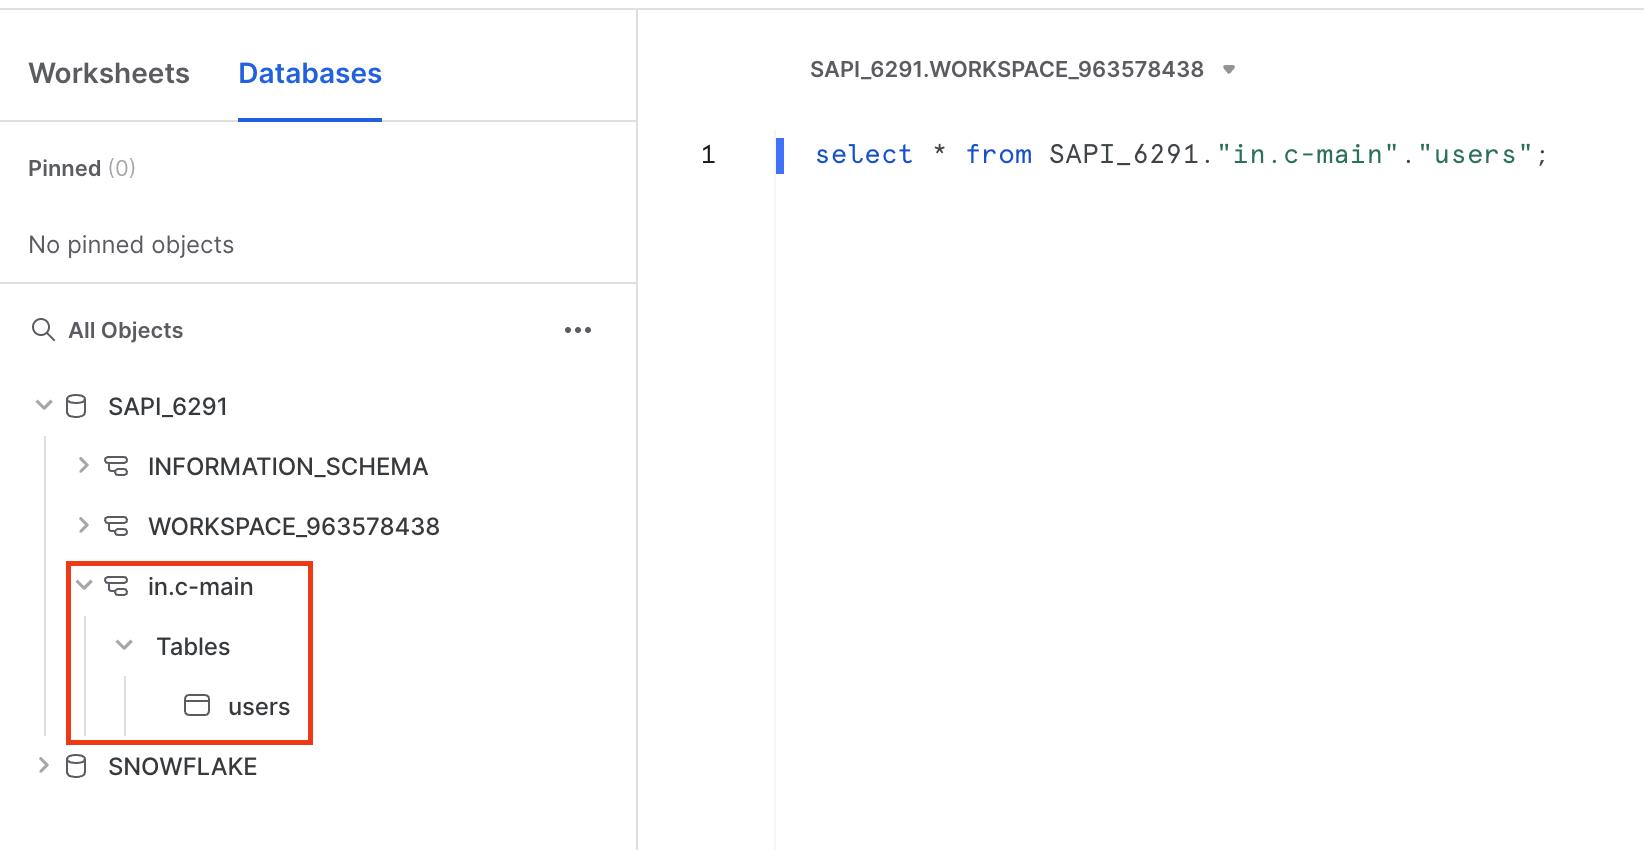
This also applies to linked buckets. *Note that buckets and tables belong to another project, so you must access, for example, the database of another project depending on the backend.
For example, say your bucket in.c-customers is linked from bucket in.c-crm-extractor in project 123. You then need to reference the tables in the transformation like this: "KEBOOLA_123"."in.c-crm-extractor"."my-table". When developing transformation code, it’s easiest to create a workspace with read-only input mappings enabled and look directly in the database to find the correct database and schema names.
Unloading Data
You can also unload data from the Python and R workspaces. To unload data, configure Table Output Mapping or File Output Mapping (or both) and click Unload Data button.
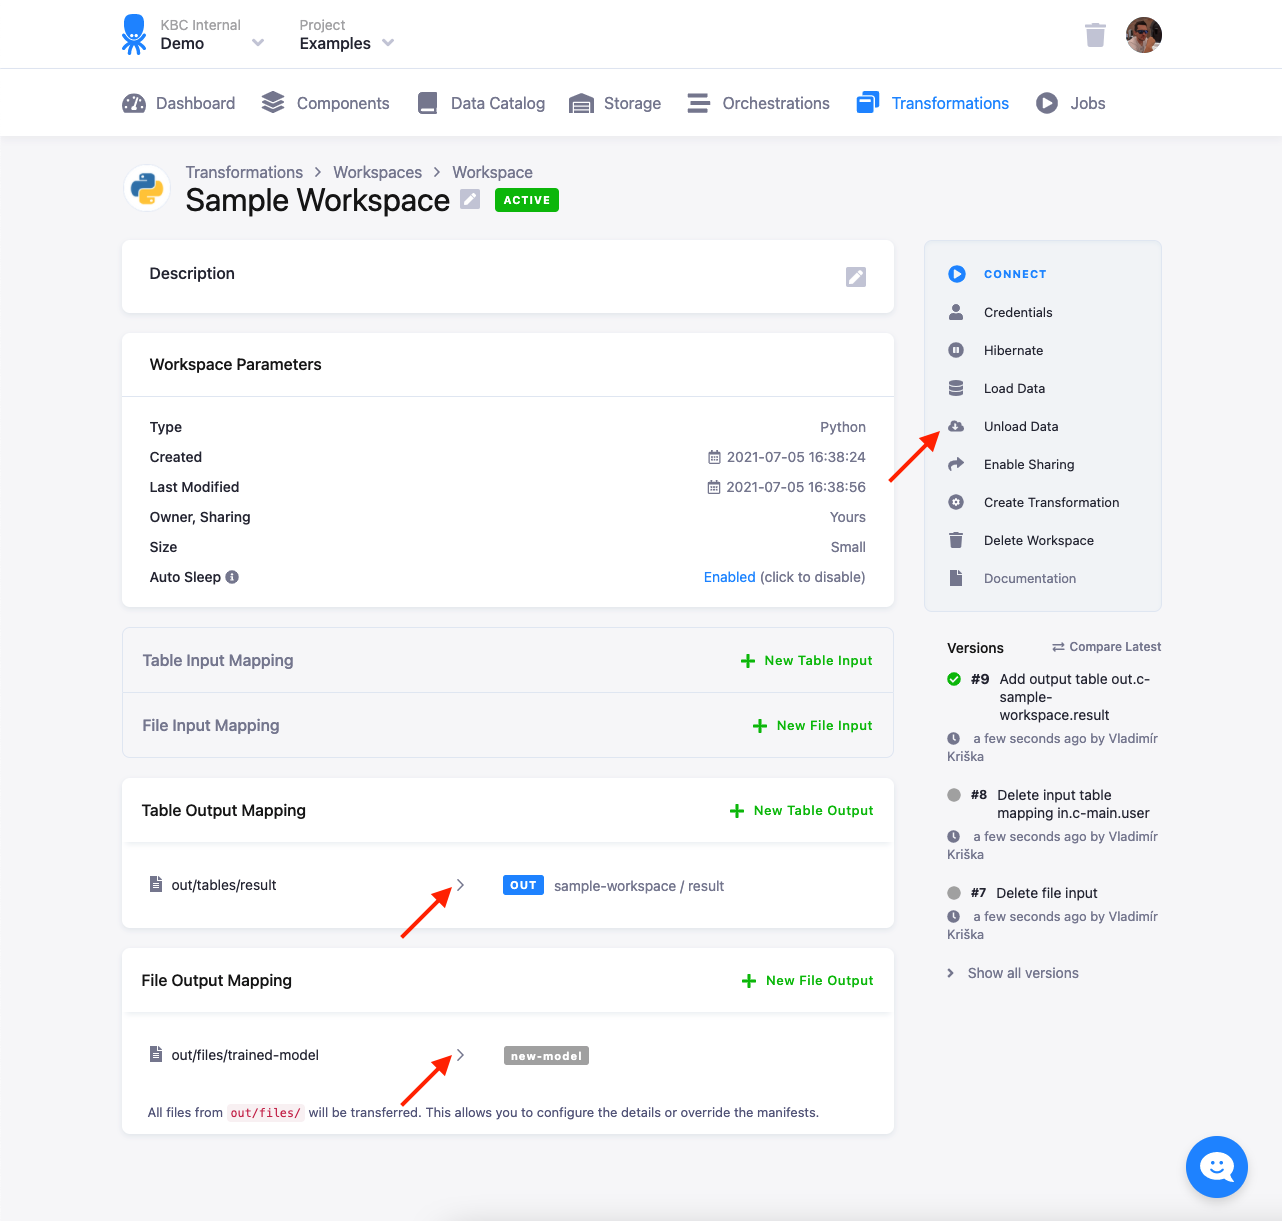
Unloading data is useful, for example, when your ad-hoc analysis leads to valuable results, or when you trained a new model which you’d like to use in transformations.
Data Persistency (beta)
When this feature is enabled in a project, your data in workspaces can be kept. This way you can, when you return, start where you left off without losing data or time by importing the data again or executing scripts to get to the right stage.
Once this feature is activated, we will automatically back up all the data in newly created workspaces up to the limits defined by your selected workspace size. More specifically:
- Small (50 GB), medium (100 GB), and large (150 GB)
- Everything in the /data folder will be kept.
- Auto-save (backup) of notebooks is disabled.
- Input-mapping is performed automatically only once, when the workspace is created, not when a workspace resumes.
Nothing changes for workspaces created before the feature was activated. Your data will be lost upon leaving the workspace. Workspaces created following the feature’s deactivation will not keep their data when you leave. However, if a workspace is created while the feature is activated, it will keep its data even after the feature is deactivated. Your data will be kept until the workspace is deleted.
Provisioning of persistent storage takes some time, usually 2–3 minutes after the feature is activated. To prevent workspaces that are begun in the meantime from becoming broken, we block their initiation until the storage is ready to be used.
Pricing: Curently for FREE in public beta. When it is generally available, additional charges will apply.
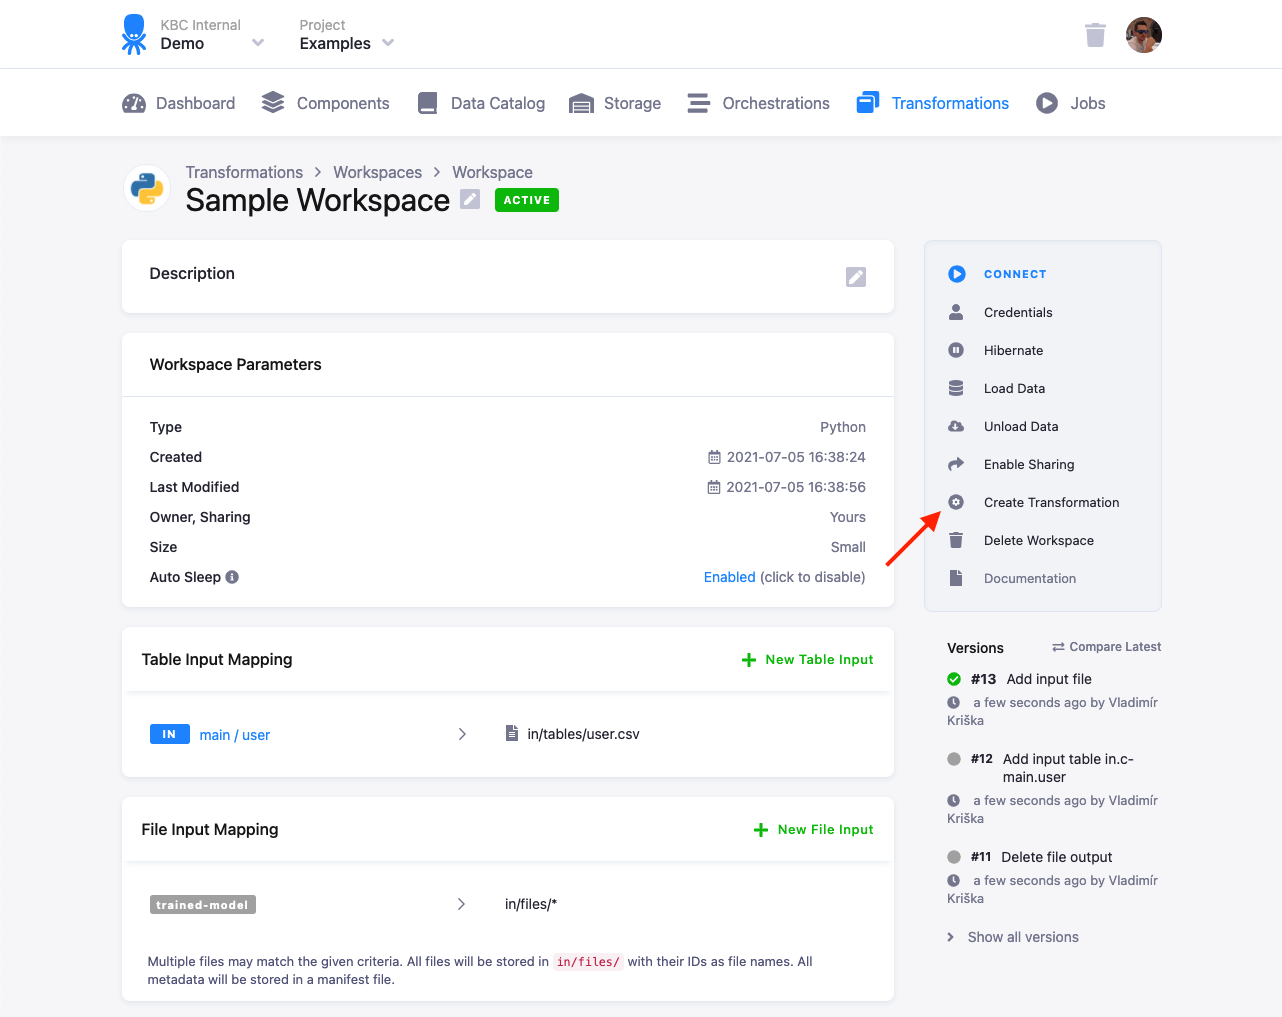
Developing Transformations
Workspaces are highly useful for developing transformations. When you configure mappings and develop a script in JupyterLab, you can use the Create Transformation button to deploy the notebook into a transformation. Please note that only input/output mapping without the actual script is copied when creating transformation from a workspace
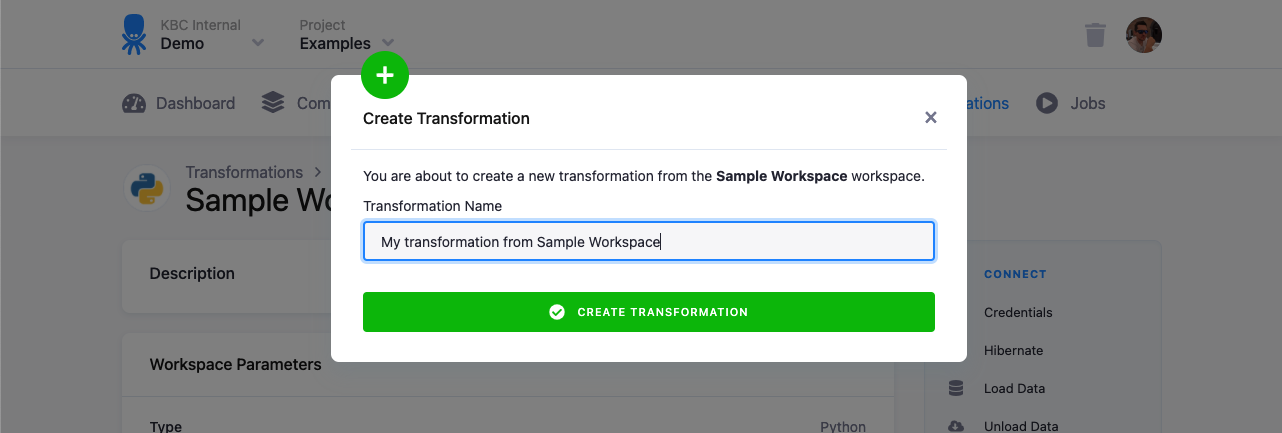
Enter the name of the new transformation:
You can also create workspaces from transformations.
Analytical Workspaces
Apart from developing transformations, you can use workspaces to perform ad-hoc analysis of production data of your choice. A workspace provides you with a safe and isolated environment where you can experiment. The input mapping isolation also means that you can work on live production projects without data in the workspace constantly changing — you update them on demand by loading data into the workspace.
A comprehensive video guide on this subject is available on our YouTube channel.