Synapse
This data destination connector sends data to an Azure Synapse database and is only available on the Azure Keboola stacks.
Configuration
Create a new configuration of the Synapse data destination connector. Start with setting up database credentials and provide a host name, port, user name, password, database name, and a schema.
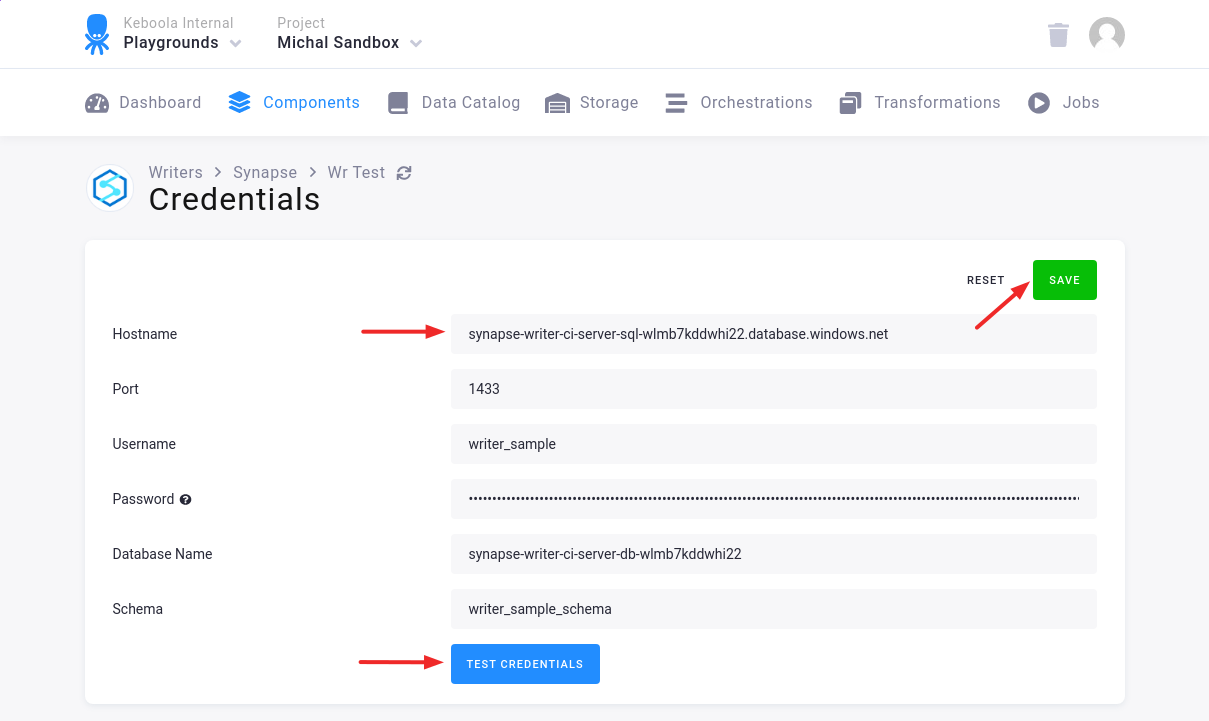
We highly recommend that you create dedicated credentials for the connector.
First, create a login in the master database:
sqlcmd -S hostname -U user -P password -d master -I
CREATE LOGIN writer_sample WITH PASSWORD = '123pass###';Then connect to your database (not master). Synapse doesn’t support database switching.
sqlcmd -S hostname -U user -P password -d database -I
Continue by creating a user and granting the permissions:
CREATE SCHEMA writer_sample_schema;
CREATE ROLE writer_sample_role;
CREATE USER writer_sample FROM LOGIN writer_sample WITH DEFAULT_SCHEMA=writer_sample_schema;
GRANT EXECUTE, CREATE TABLE TO writer_sample_role;
GRANT ALTER, SELECT, INSERT, UPDATE, DELETE ON SCHEMA :: writer_sample_schema TO writer_sample_role;
GRANT ADMINISTER DATABASE BULK OPERATIONS TO writer_sample_role;
EXEC sp_addrolemember 'writer_sample_role', 'writer_sample';
Table Configuration
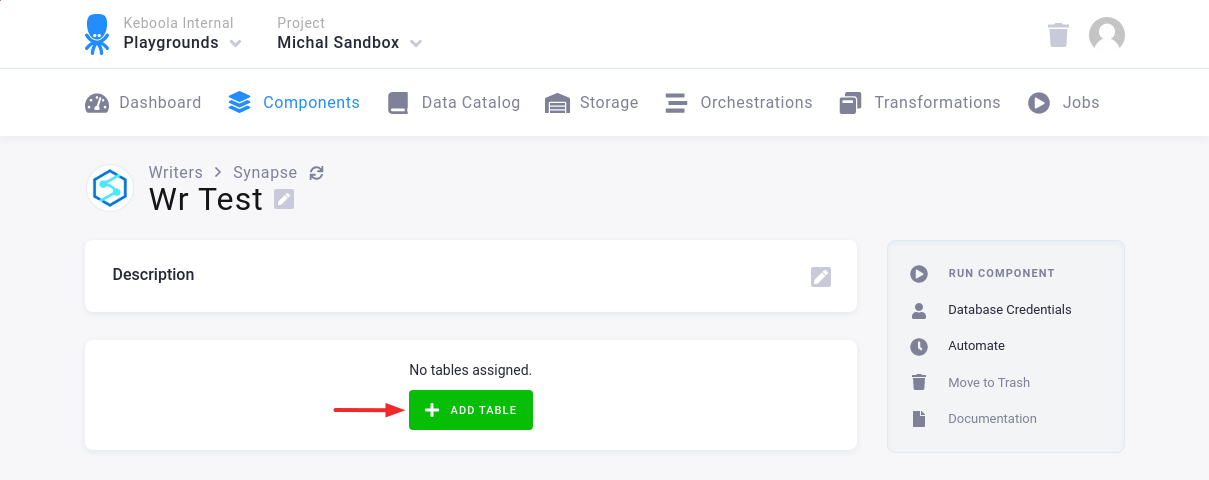
The next step is to configure the tables to write.
Click the Add Table button:
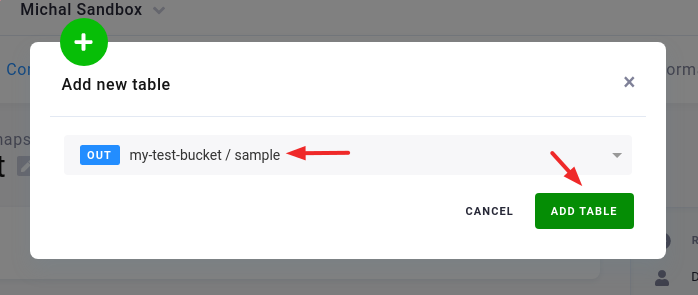
Select an existing table from Storage:
Then specify the table configuration. Use the preview icon to peek at the column contents.
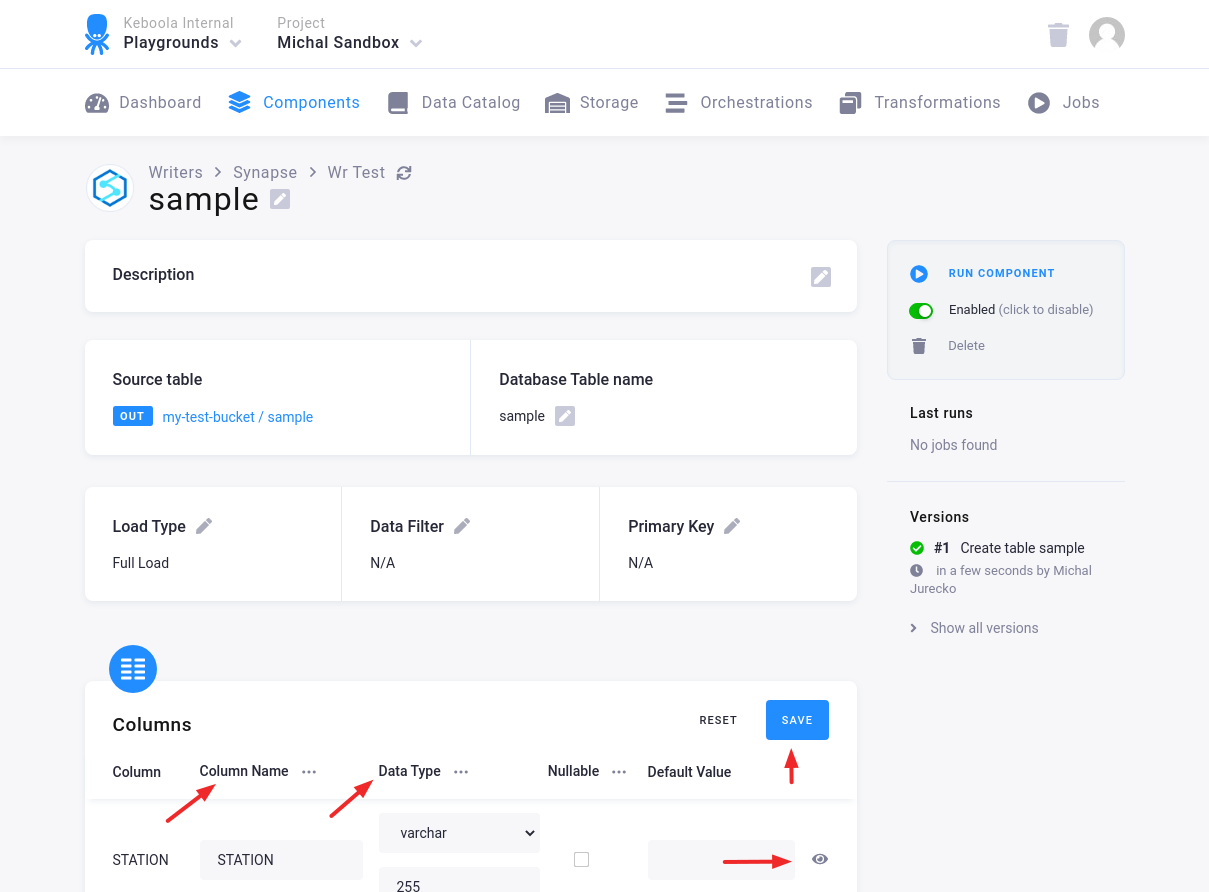
For each column you can specify its
- name in the destination database; you can also use the select box in the table header to bulk convert the case of all names.
- data type (one of Azure Synapse data types); you can also use the select box in the table header to bulk set the type for all columns. Setting the data type to
IGNOREmeans that the column will not be present in the destination table. - nullable; when checked, the column will be marked as nullable, and empty values (
'') in that column will be converted toNULL. Use this for non-string columns with missing data. - default value; the provided value will be set as the default value of the column in the target table.
When done configuring the columns, don’t forget to save the settings.
Load Options
At the top of the page, you can specify the target table name and additional load options. There are two main options how the connector can write data to tables — Full Load and Incremental Load.

In the Incremental Load mode, the data are bulk inserted into the destination table and the table structure must match (including the data types). That means the structure of the target table will not be modified. If the target table doesn’t exist, it will be created. If a primary key is defined on the table, the data is upserted. If no primary key is defined, the data is inserted.
In the Full Load mode, the table is completely overwritten including the table structure. The table is removed
using the DROP command
and is recreated. The DROP command needs to acquire
a table-level lock.
This means that if the database is used by other applications which acquire table-level locks, the connector may
freeze waiting for the locks to be released.
Additionally, you can specify a Primary key of the table, a simple column Data filter, and a filter for incremental processing.