AWS S3
This data source connector loads a single or multiple CSV files from a single or multiple AWS S3 buckets and stores them in multiple tables in Keboola Storage.
After creating a new configuration, select the files you want to extract from AWS S3 and determine how you save them to Keboola Storage. You also need to set up proper permissions on AWS.
Configuration
Create a new configuration of the AWS S3 connector.
In order to access the files in S3, you need to set up AWS credentials or create an AWS role.
Authentication with AWS credentials
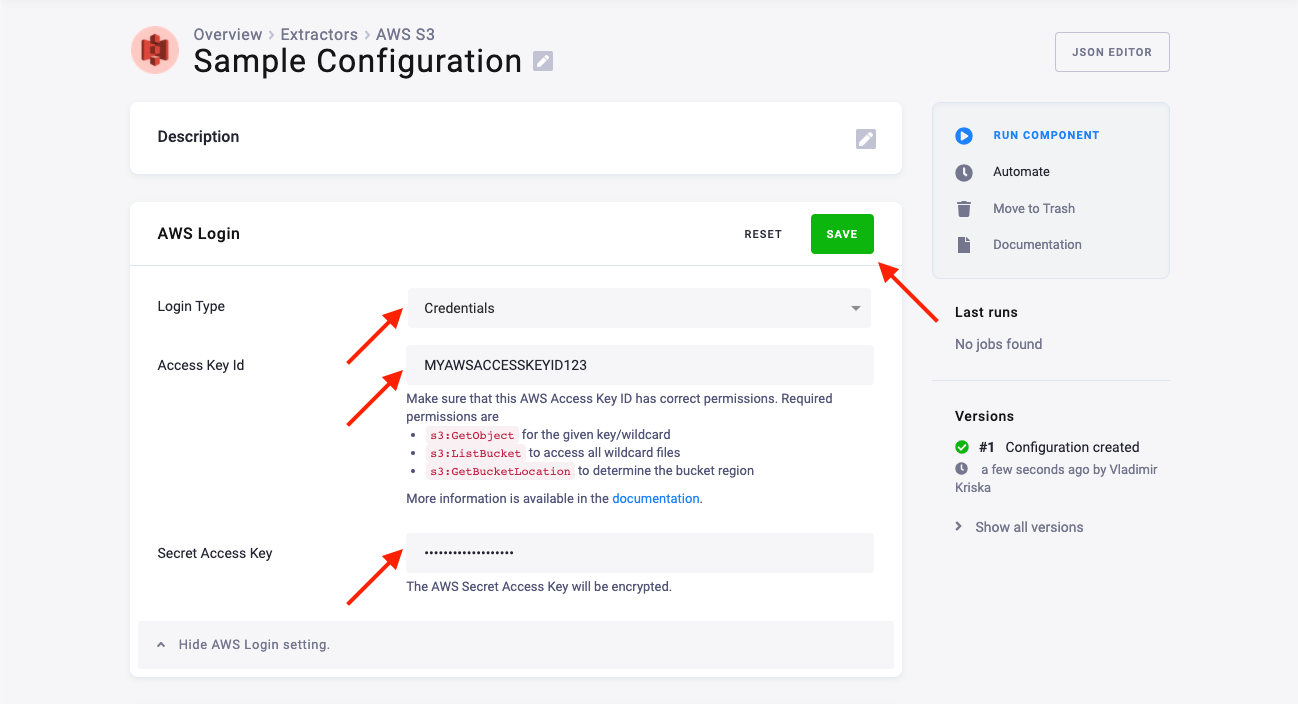
Select Credentials as the Login Type. Use the AWS Access Key ID and the Secret Access Key with read permissions to the desired S3 bucket(s) and file(s).
Make sure this AWS Access Key ID has the correct permissions:
s3:GetObjectfor the given key/wildcards3:ListBucketto access all wildcard filess3:GetBucketLocationto determine the region of the S3 bucket(s)
You can add the following policy document as an inline policy to an AWS user:
{
    "Version": "2012-10-17",
    "Statement": [
        {
            "Effect": "Allow",
            "Action": [
                "s3:GetObject"
            ],
            "Resource": "arn:aws:s3:::mybucket/folder/*"
        },
        {
            "Action": [
                "s3:ListBucket",
                "s3:GetBucketLocation"
            ],
            "Effect": "Allow",
            "Resource": "arn:aws:s3:::mybucket"
        }
    ]
}
Authentication with AWS role
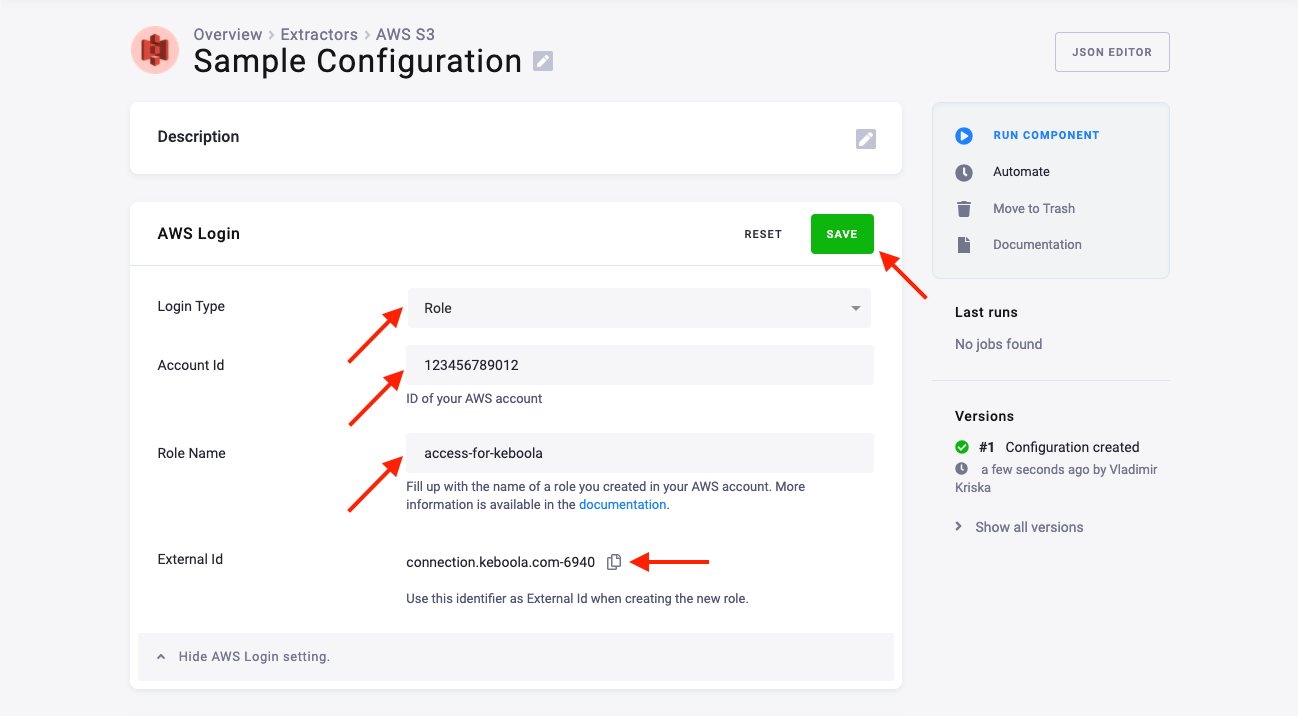
Select Role as the Login Type. Create a role in your AWS account using the following steps:
- Go to the IAM Console and click Create role. Then click Another AWS account.
- For Account ID
- use
147946154733for stacksconnection.keboola.com,connection.eu-central-1.keboola.com,connection.north-europe.azure.keboola.com. - use
206948715642for all other stacks.
- use
- For External ID, enter the value from your project.
- Do not enable the setting to Require MFA (multi-factor authentication).
- On the next page, attach the policy:
s3:GetObjectfor the given key/wildcards3:ListBucketto access all wildcard filess3:GetBucketLocationto determine the region of the S3 bucket(s)
- Or, you can create a new inline policy:
{
    "Version": "2012-10-17",
    "Statement": [
        {
            "Effect": "Allow",
            "Action": [
                "s3:GetObject"
            ],
            "Resource": "arn:aws:s3:::mybucket/*"
        },
        {
            "Action": [
                "s3:ListBucket",
                "s3:GetBucketLocation"
            ],
            "Effect": "Allow",
            "Resource": "arn:aws:s3:::mybucket"
        }
    ]
}- On the last page, set the Role name and click Create role.
In your project, fill in your Account ID and Role Name.
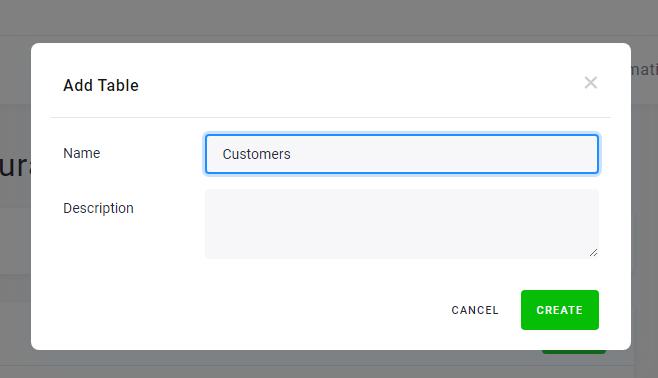
Add Tables
To create a new table, click the New Table button and assign it a name. It will be used to create the destination table name in Storage and can be modified.
Configured tables are stored as configuration rows. Each table has different settings (key, load type, etc.) but they all share the same AWS credentials.
Source
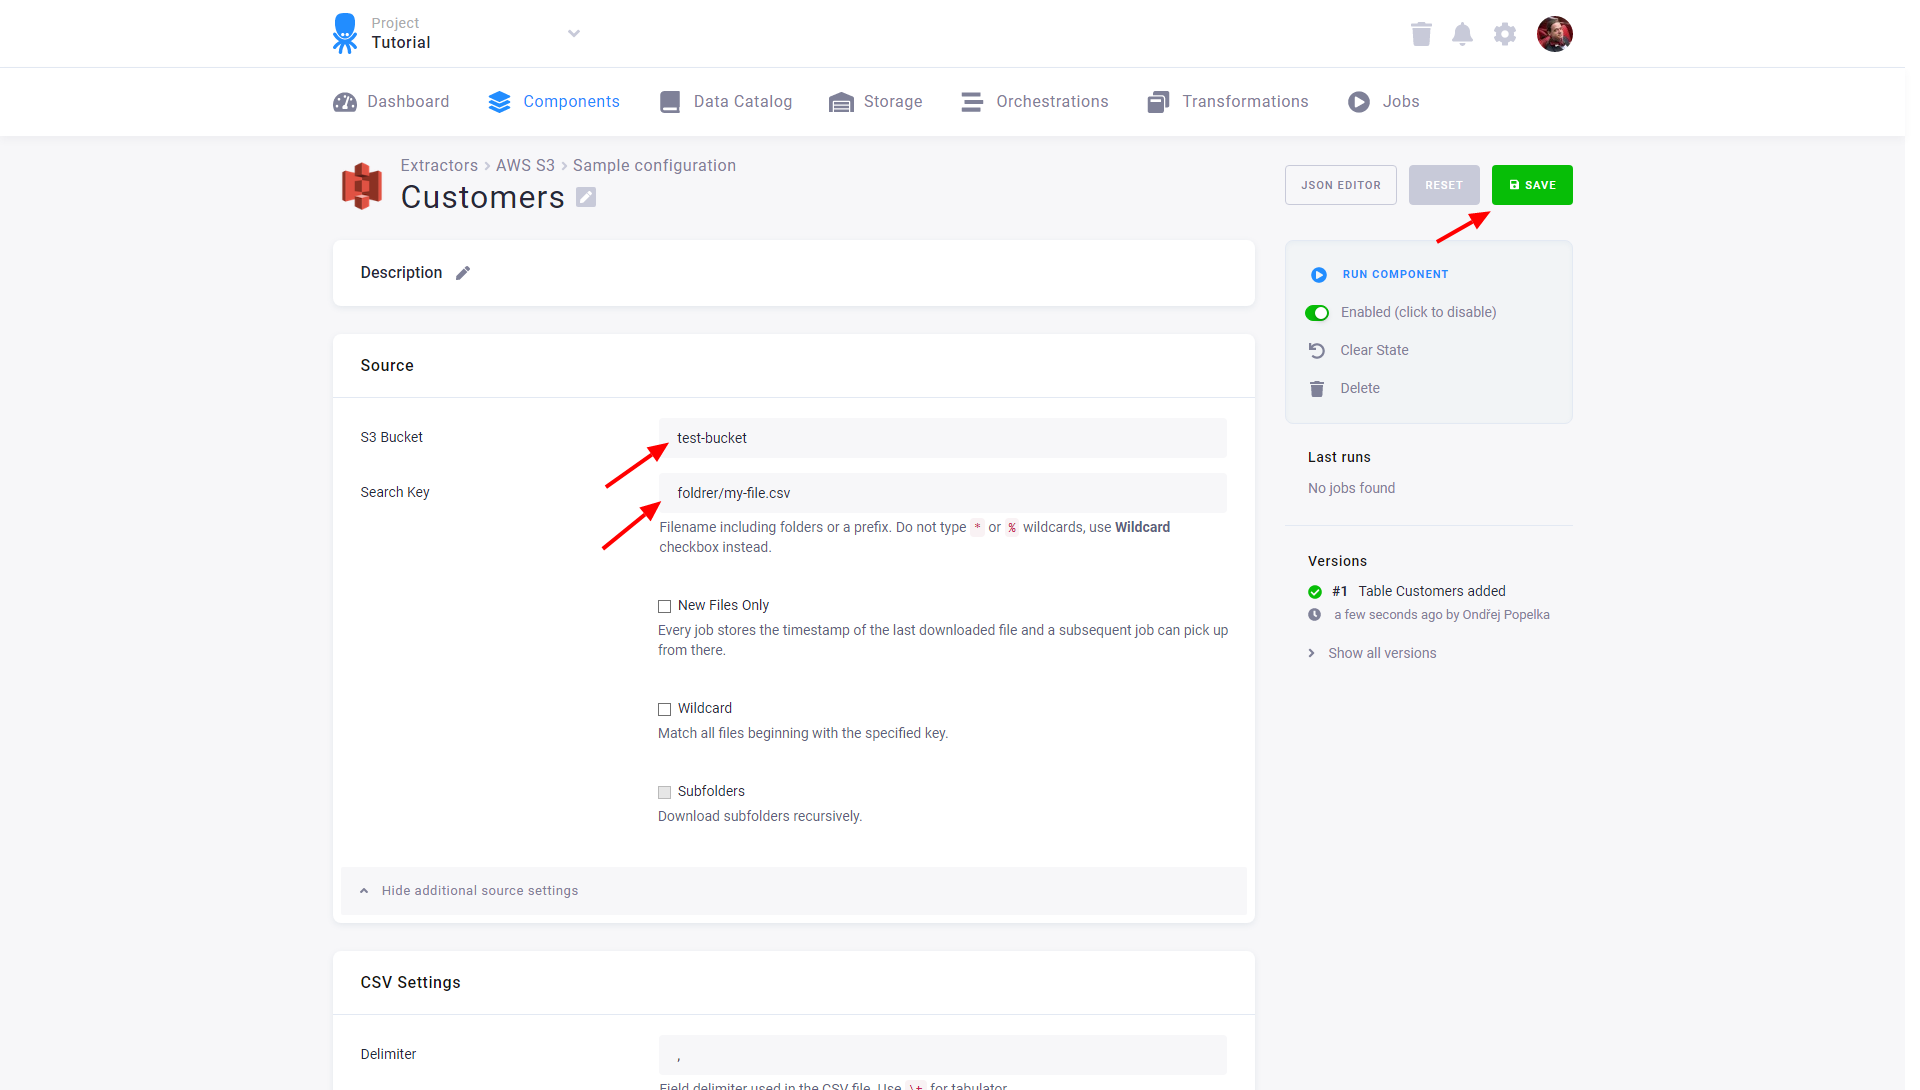
For each table you have to specify an AWS S3 Bucket and a Search Key. The Search Key can be a path to a single file or a prefix to multiple files (omit the wildcard character and use the Wildcard checkbox instead).
The additional source settings section allows you to set up the following:
- New Files Only: The connector will keep track of the downloaded files and will continue with the unprocessed files on the next run. To reset the state which keeps track of the progress and enables to continue with new files, use the Reset State button or uncheck the New Files Only option and run the connector again.
- Wildcard: Search Key is used as a prefix, and all available files matching the prefix will be downloaded.
- Subfolders: Available only with Wildcard turned on. The connector will also process all subfolders.
CSV Settings
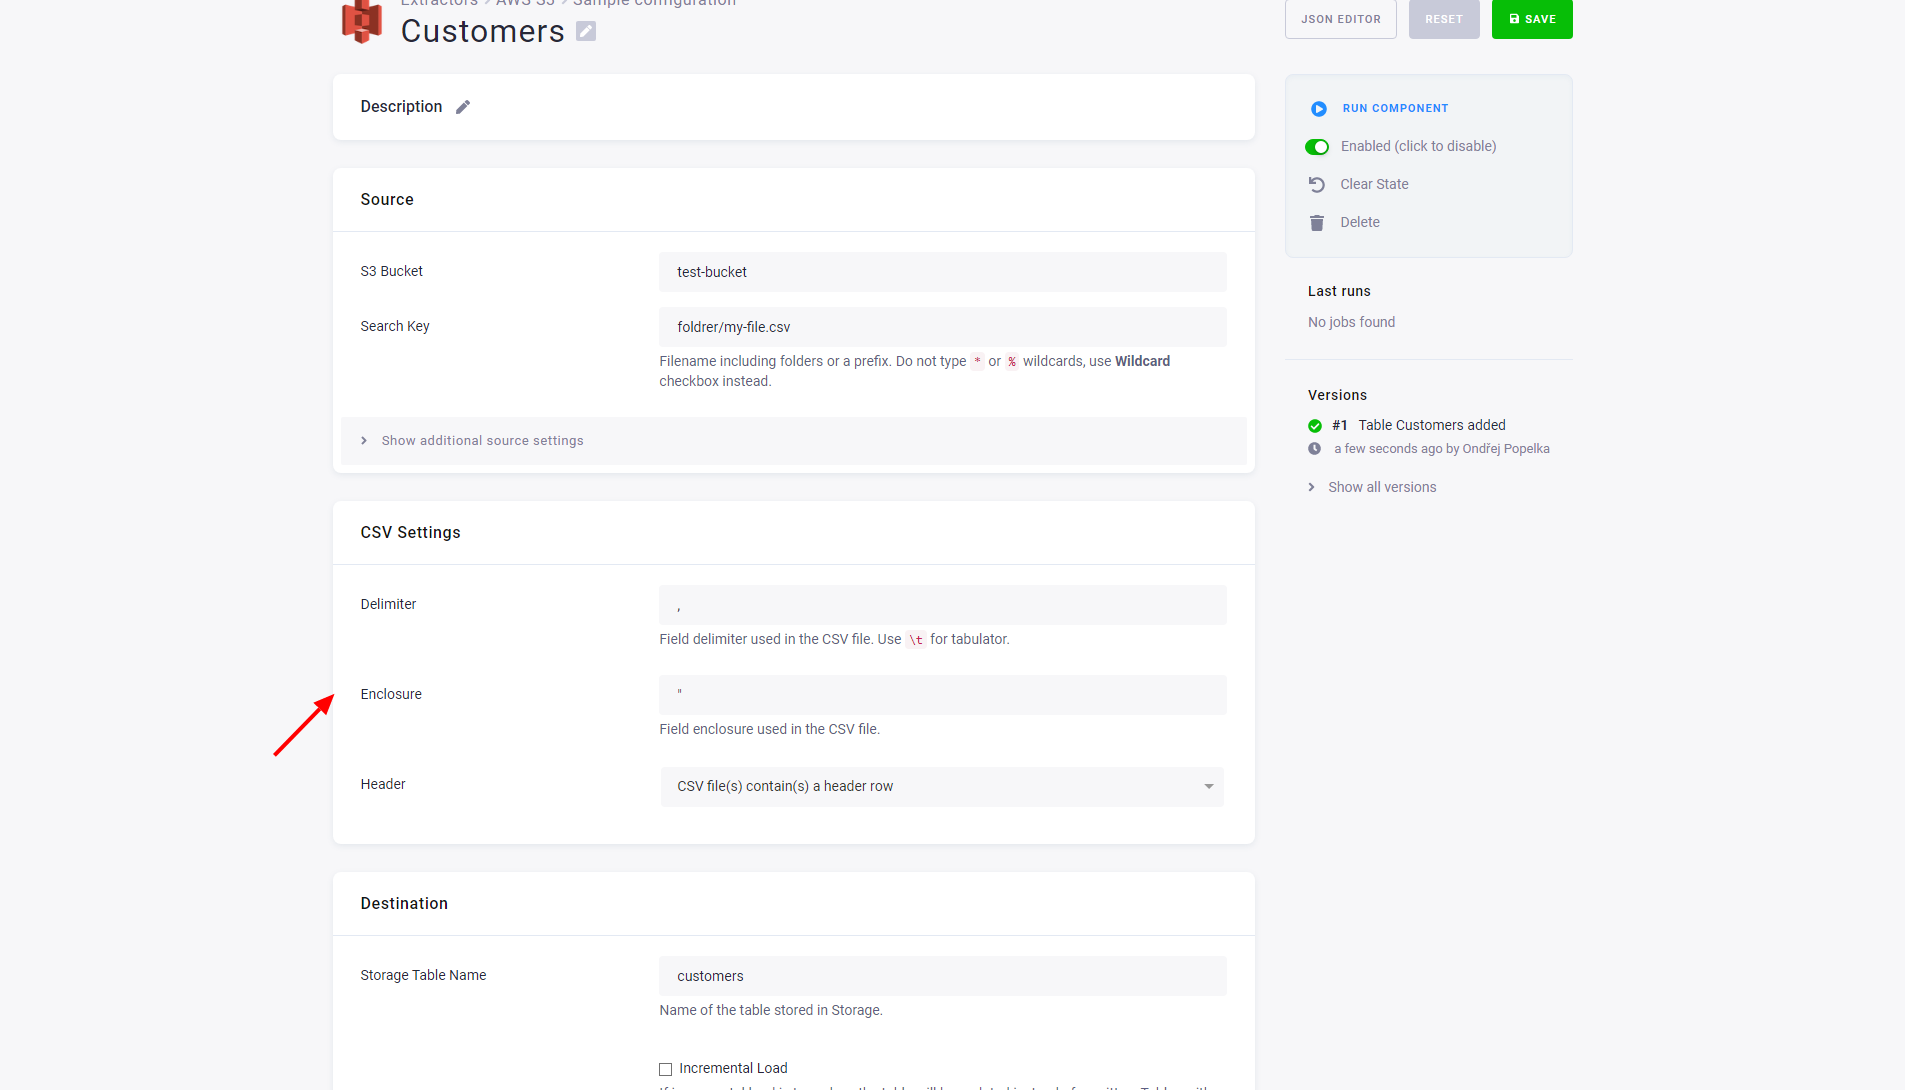
- Delimiter and Enclosure specify the CSV format settings.
- Header specifies how the destination table column names are obtained:
- CSV file(s) contain(s) a header row: All downloaded files contain a row with the CSV header. The connector obtains the header from a randomly selected downloaded file.
- Set column names manually: None of the downloaded files does contain a header row and you will use the Column Names input to specify the headers manually.
- Generate column names as col_1, col_2, etc.: None of the downloaded files contains a header row, and
the connector will generate the column names automatically as a sequential number with the
col_prefix.
Destination
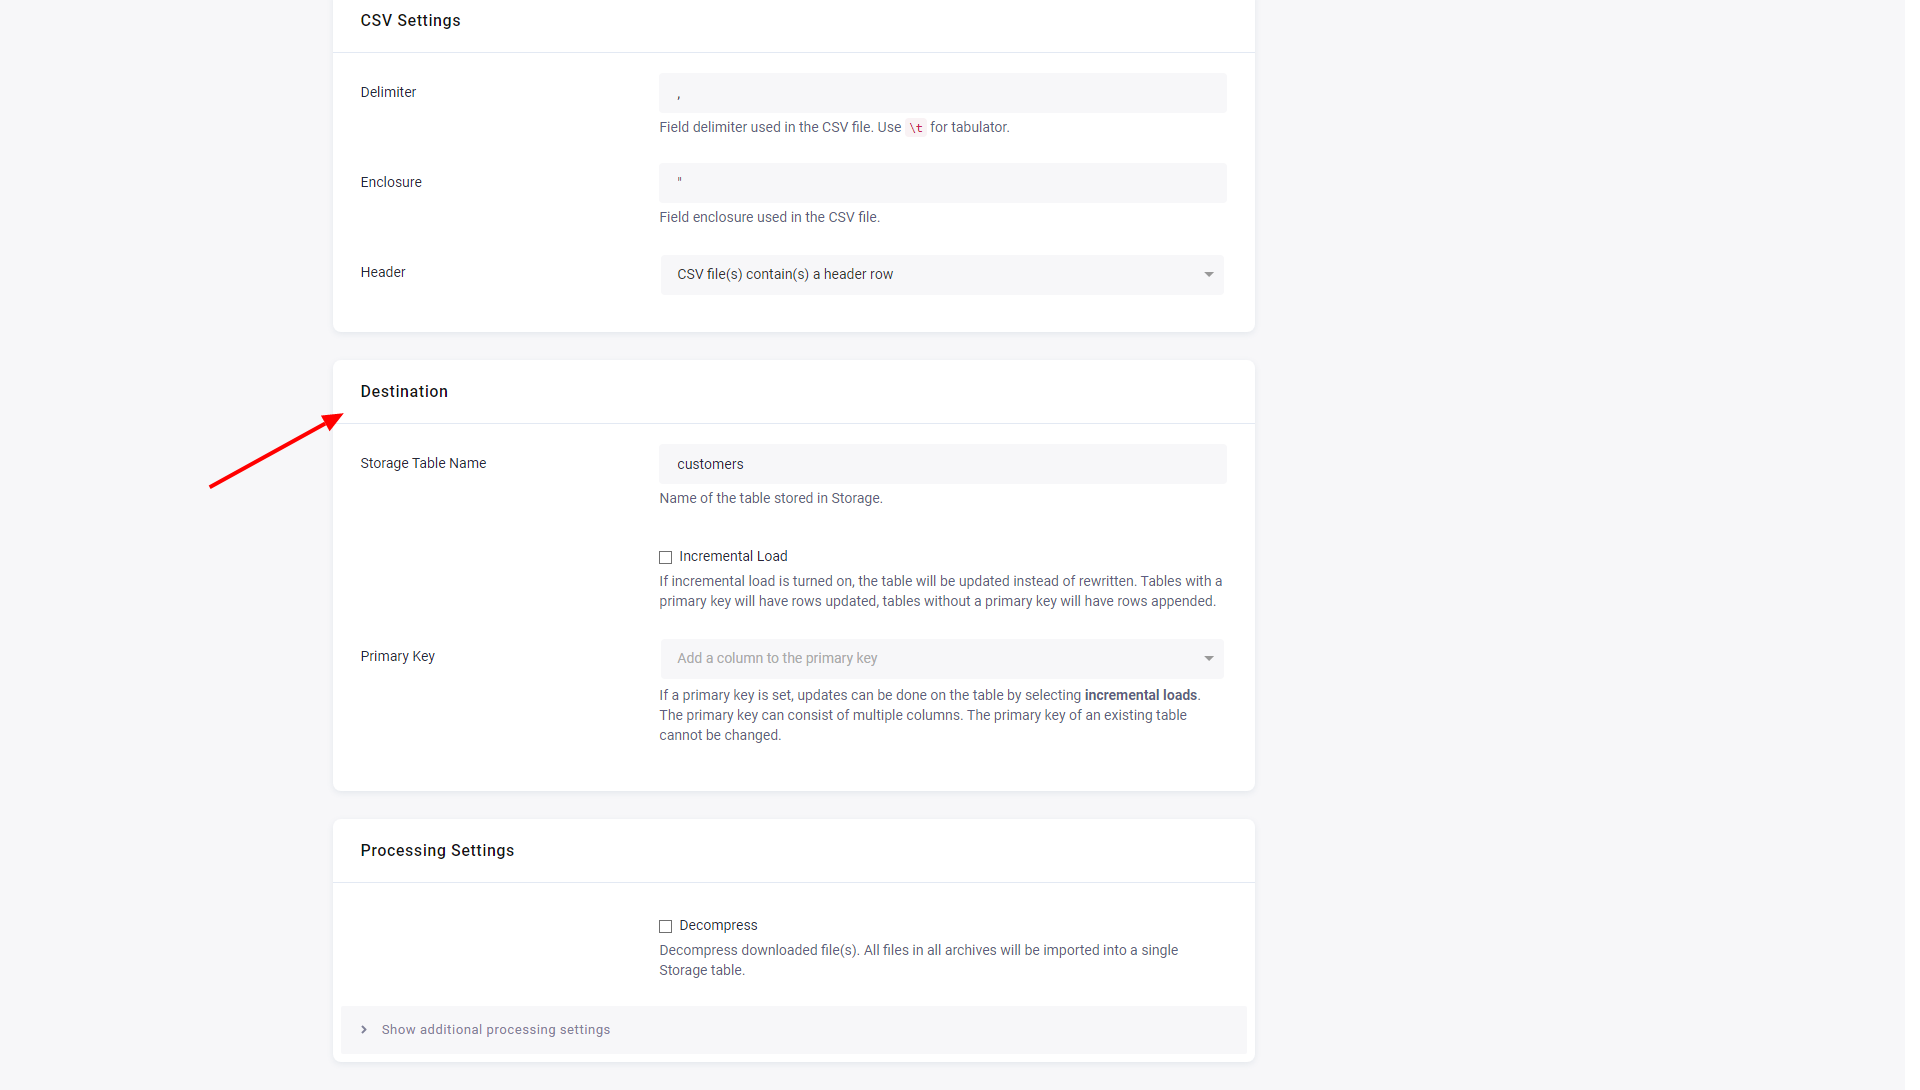
- The initial value in Storage Table Name is derived from the configuration table name. You can change it at any time; however, the Storage bucket where the table will be saved cannot be changed.
- Incremental Load will turn on incremental loading to Storage. The result of the incremental load depends on other settings (mainly Primary Key).
- Primary Key can be used to specify the primary key in Storage; it can be used with Incremental Load and New Files Only to create a configuration that incrementally loads all new files into a table in Storage.
Processing Settings
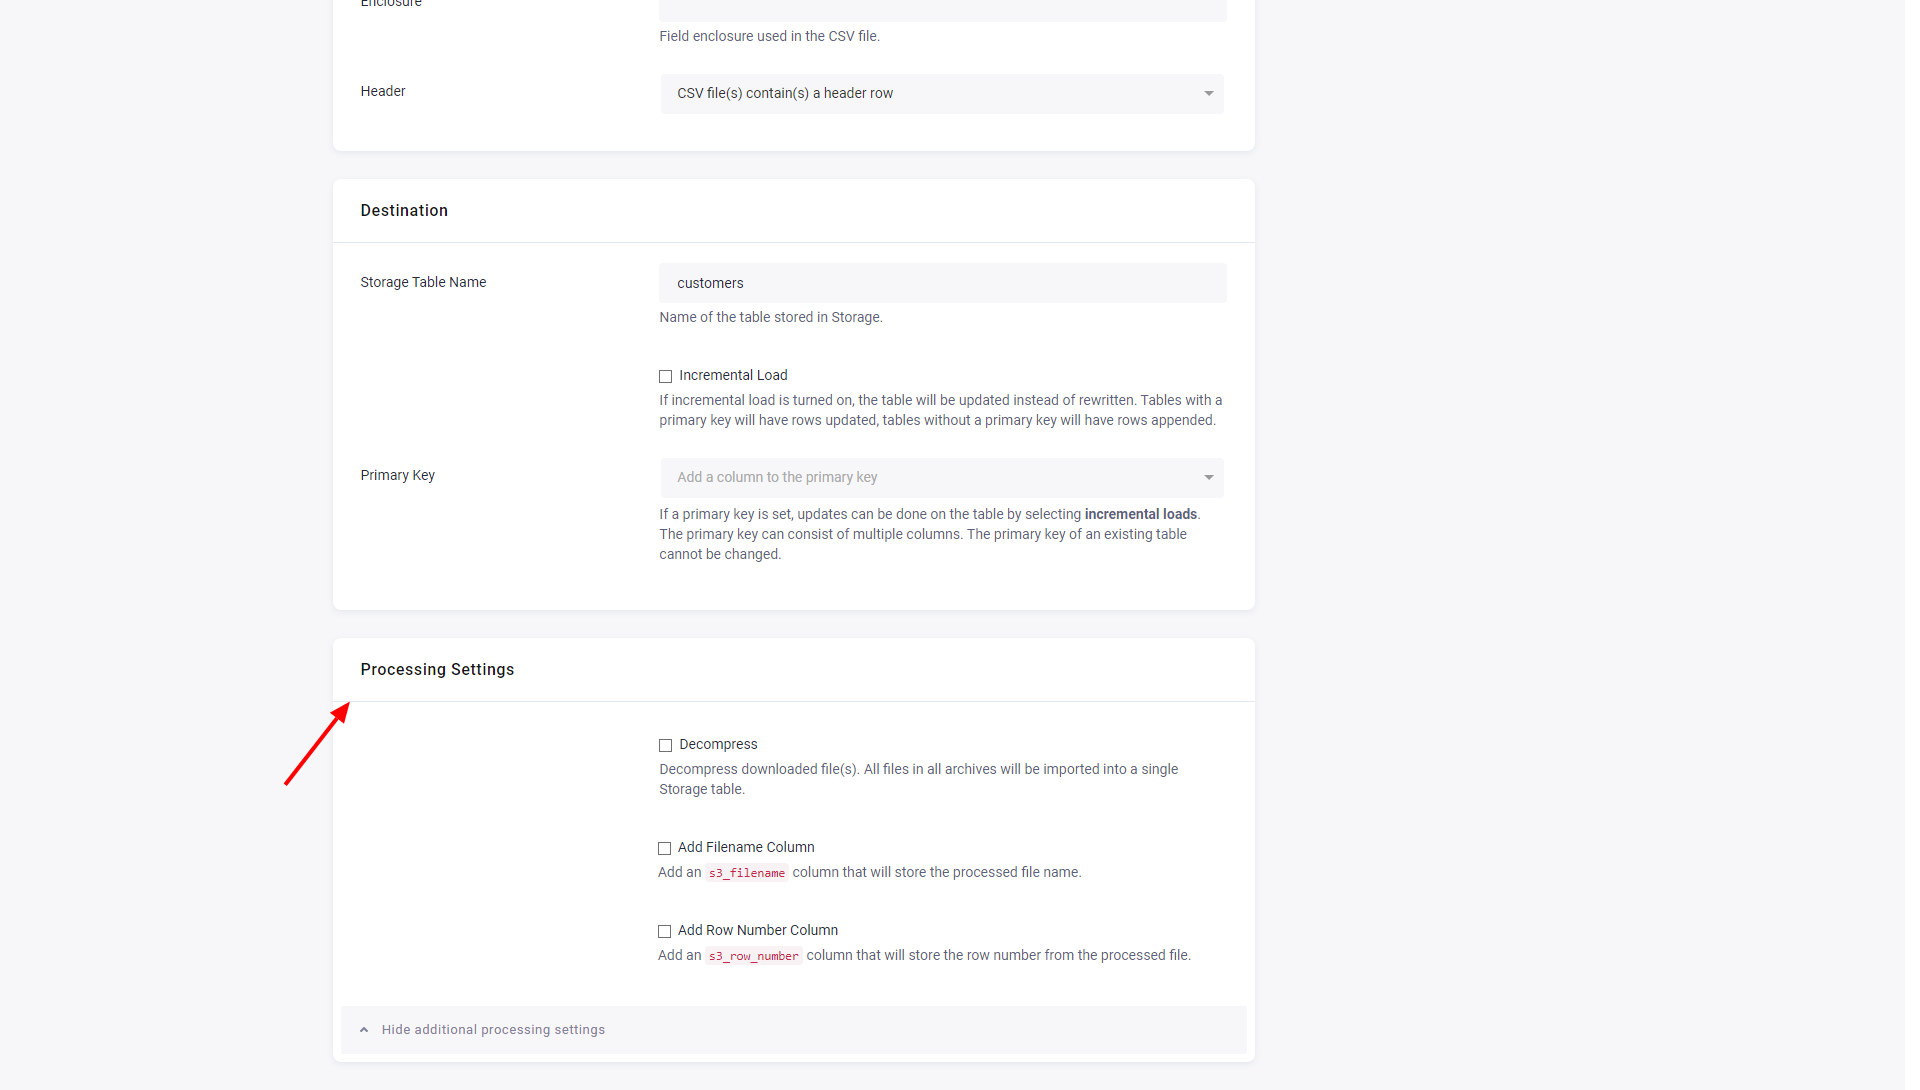
- Decompress: All downloaded files will be decompressed (currently supporting ZIP and GZIP). All files in all archives will be imported into a single Storage table.
- Add Filename Column: A new column
s3_filenameis added to the table and will contain the original filename including the relative path to the Search Key. - Add Row Number Column: A new column
s3_row_filenameis added to the table and will contain the row number in each of the downloaded files.
The data source connector also supports Advanced mode, all supported parameters are described in the GitHub repository.
Limitations
All files stored in AWS Glacier are ignored.