Google Analytics (UA, GA4)
- Features
- Configuration
- Create New Query
- Date Ranges
- Anti-Sampling
- Filters
- Segments
- Custom Dimensions and Metrics
- Custom OAuth Credentials
This data source connector allows you to integrate your Google Analytics data into the Keboola environment. To do that, you will need a Google Analytics account.
Note: This component supports both Google Analytics 4 (GA4) and old Universal Analytics (UA).
Features
The Google Analytics connector works with the newest version of the Google Analytics 4 (GA4) (Google Analytics Data API) and Universal Analytics (Google Analytics Reporting API - V4).
These APIs provides the following key features:
-
Metric expressions — The API allows you to request not only built-in metrics but also combinations of metrics expressed in mathematical operations. For example, you can use the expression
ga:goal1completions/ga:sessionsto request the goal completions per number of sessions. -
Multiple date ranges — The API allows you to get data in two date ranges in a single request.
-
Multiple segments — The API enables you to get multiple segments in a single request.
Important: Data is always imported incrementally.
Configuration
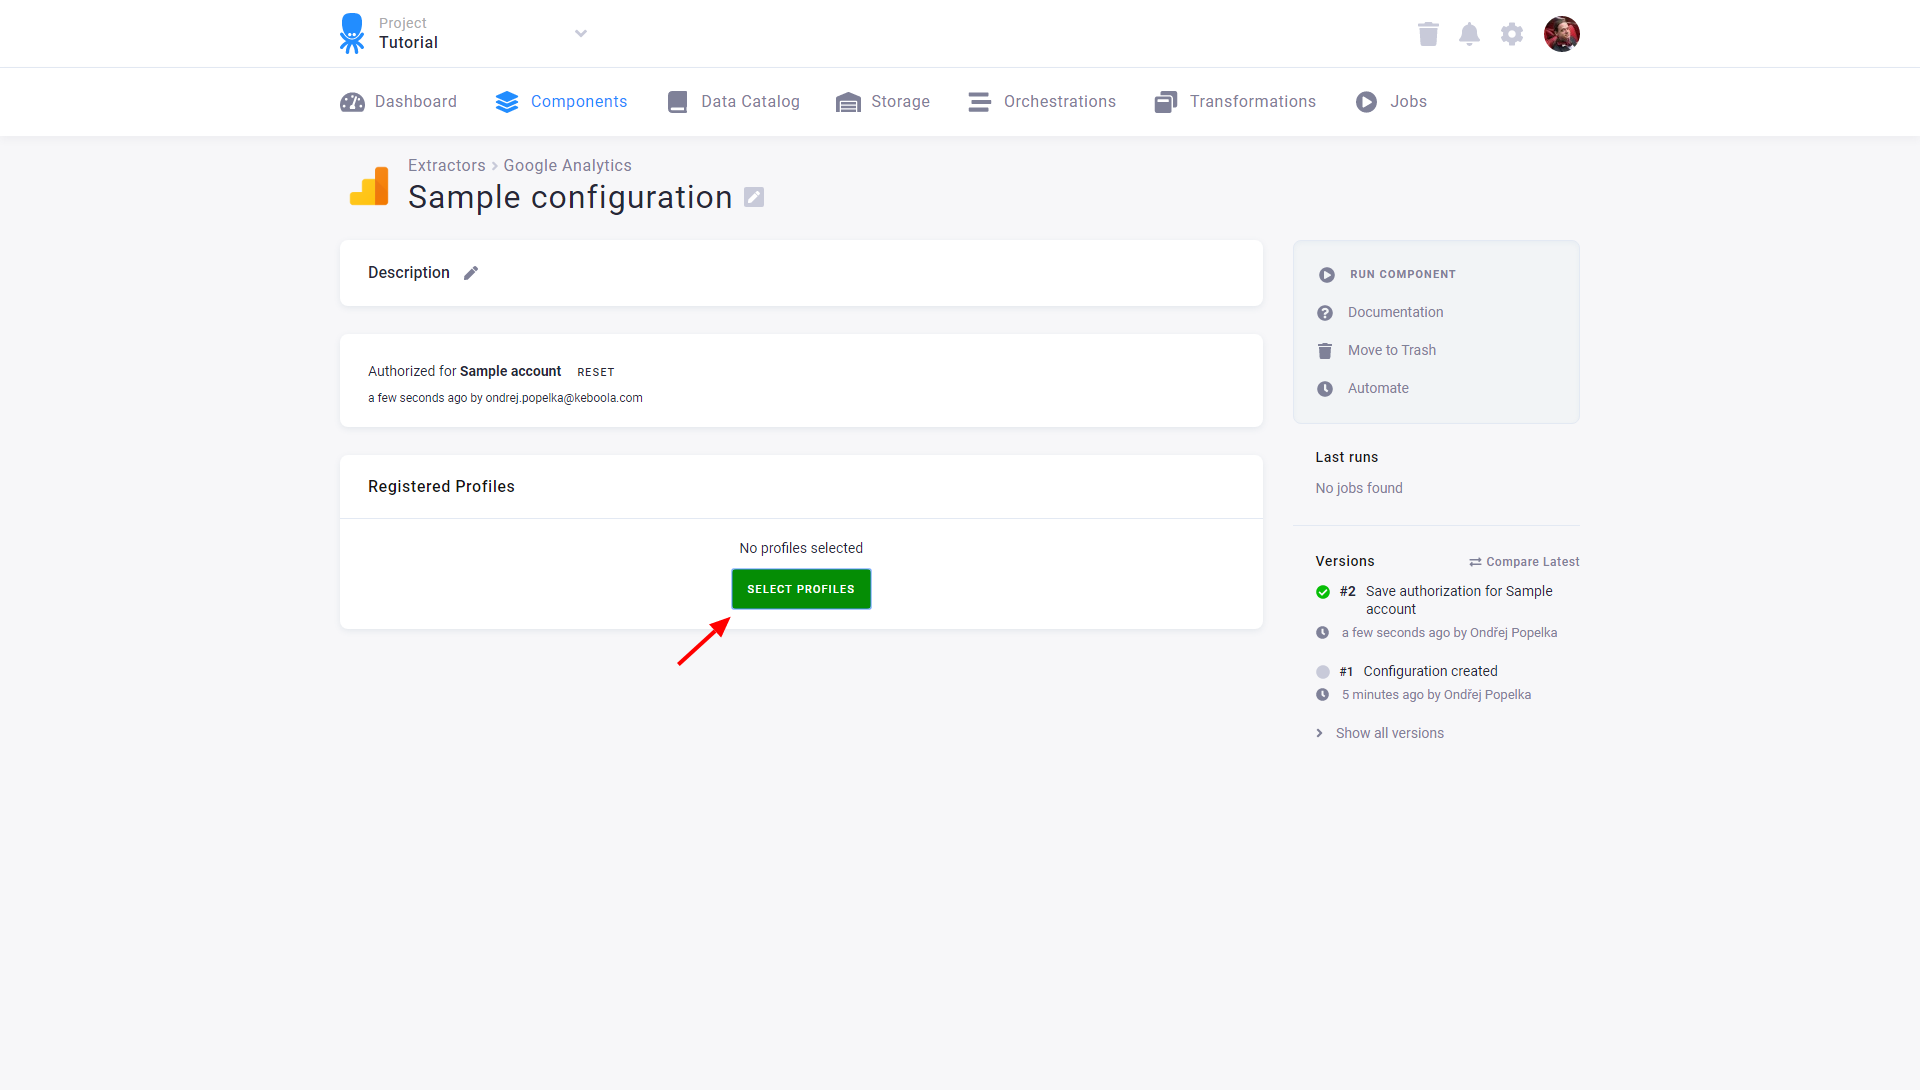
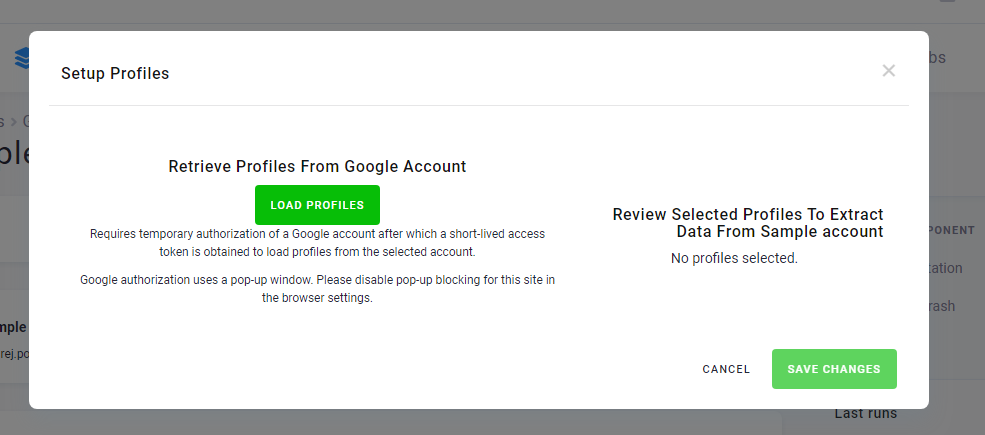
Create a new configuration of the Google Analytics connector. Then click Authorize Account to authorize the configuration. Select the desired Google Analytics account and profiles (Reporting API view) or GA4 properties (Data API view) from which you would like to extract data.
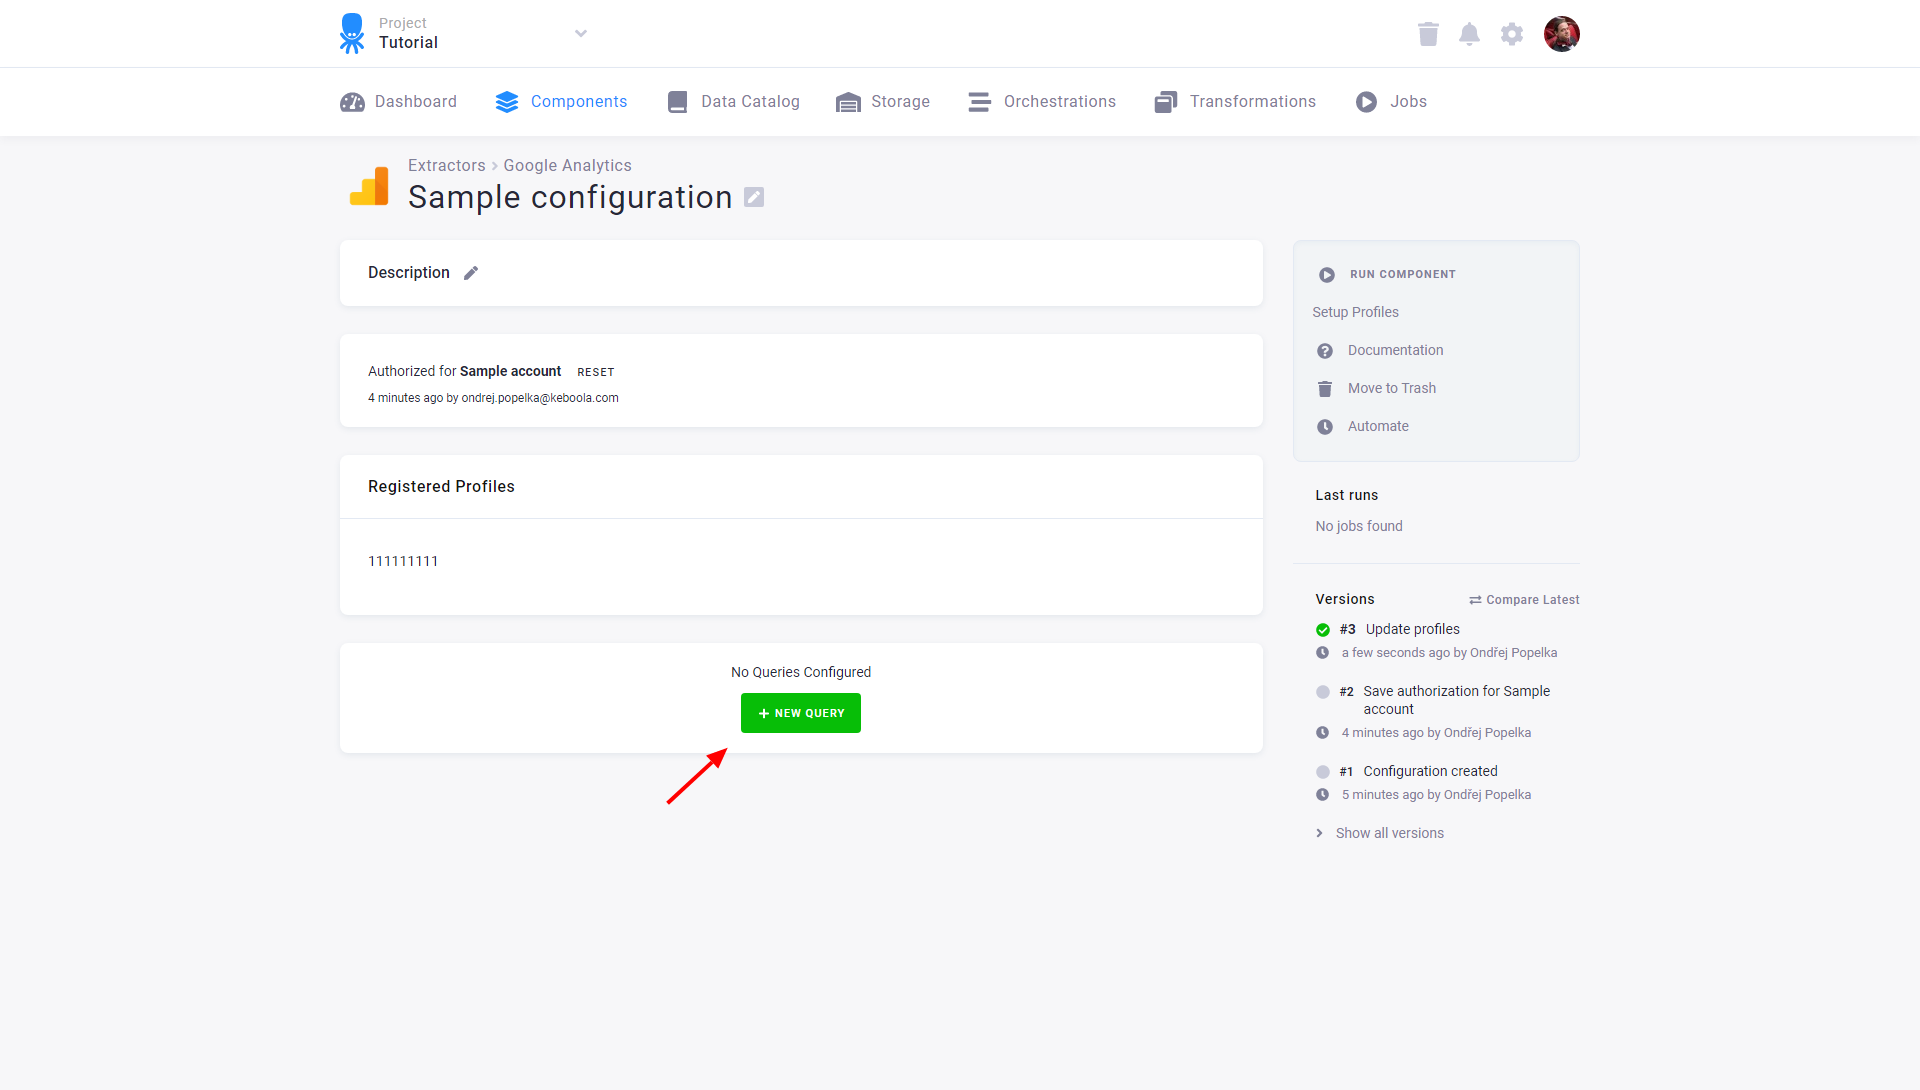
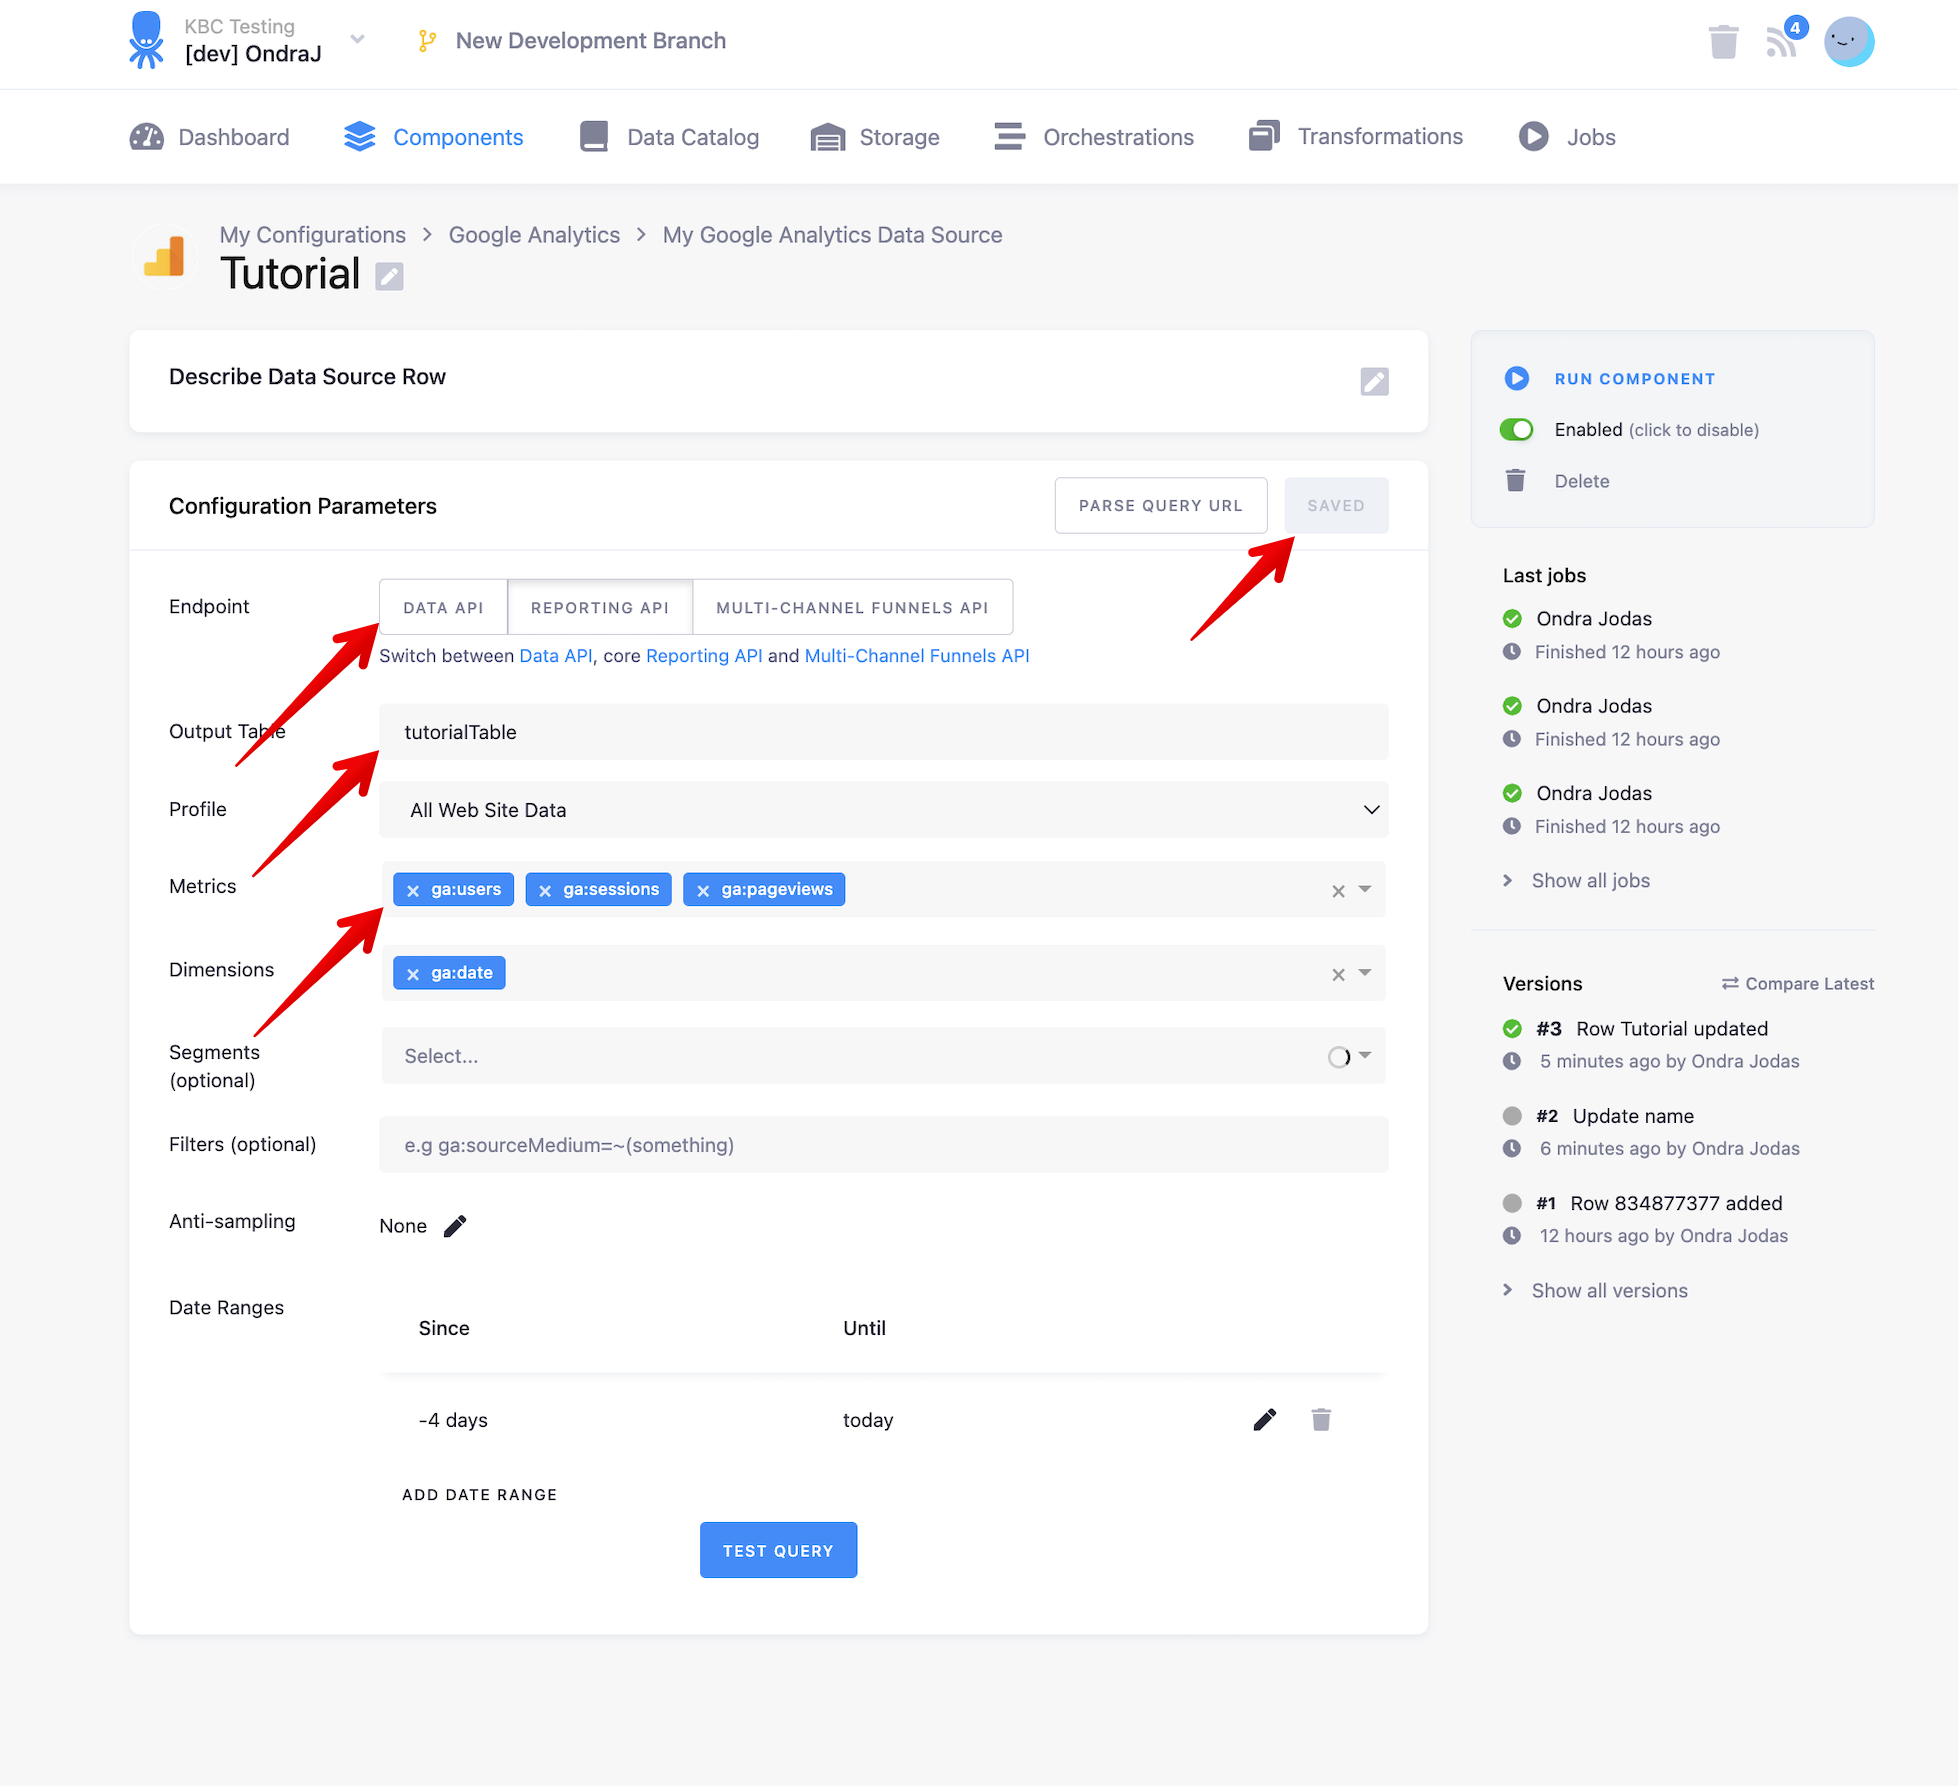
Create New Query
Each query consists of metrics, dimensions and a date range. Optionally, it can be filtered by a filter expression or a segment. Let’s create a simple query with some basic metrics such as Sessions, Users and Pageviews.
-
From API selector choose
Reporting API. -
Name your table in the storage, for example,
tutorialTable. -
From the metrics selector, choose the following metrics:
ga:sessions,ga:users,ga:pageviews. -
From the dimensions selector, choose the
ga:datedimension. -
Leave the date range on default (last 4 days).
-
See the query results by hitting the
Test querybutton. -
Now you see sessions, users, and pageviews of the last five days sliced by date.
-
When you are happy with the results, save your query.
-
To store the results to Storage, click the “play” icon on the query list page.
Date Ranges
A date range specifies a time window from which the data will be extracted. You can use any expression compatible with the PHP strtotime() function.
Multiple date ranges are useful, for example, when you want to compare metric performance to the previous date range. Let’s say you want to see Sessions by month, compared to the same month last year. Of course, you can download all the data from last year, but with this approach, you can download just the data you need.
Incremental load, when you want download data from the previous job.
Notice: Multiple date ranges and Incremental load cannot be uses together.
Anti-Sampling
The Google Analytics API does not always return precise data. Under certain circumstances, the data returned is sampled. To work around this problem and get more precise results, choose either the DailyWalk or Adaptive anti-sampling algorithm. Both divide the wanted date range into smaller chunks. You can configure anti-sampling in the query detail.
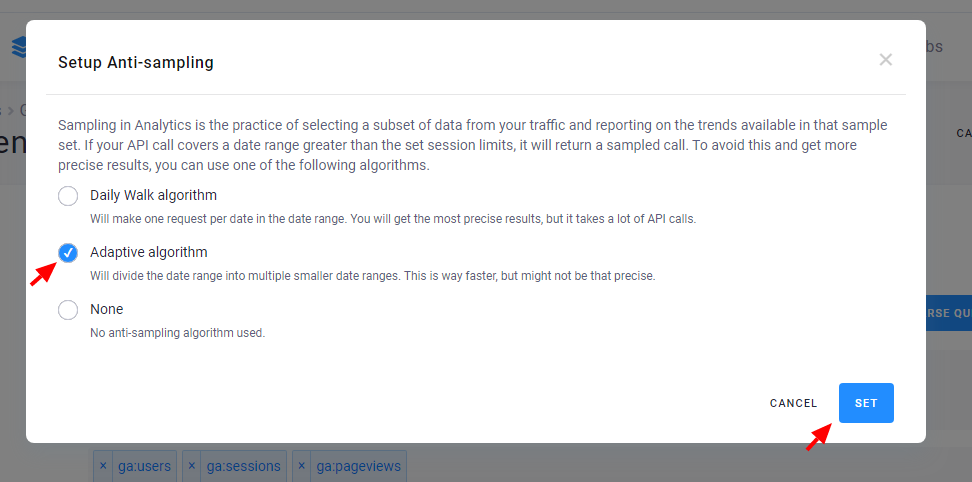
DailyWalk, as the name suggests, divides the date range by days. It means that the data source connector needs to make as many requests as there are days in the date range. Even though this algorithm might be more precise in some cases, you usually get the same results faster with the Adaptive algorithm.
The Adaptive algorithm uses a more sophisticated approach, splitting the original date range into few smaller date sections. To learn more about it, read this in-depth explanation.
Filters
Filters allow you to limit and modify the data that is included in a view. For example, you can use filters to exclude traffic from particular IP addresses, focus on a specific subdomain or directory, or convert dynamic page URLs into readable text strings. If interested, read more about how to use filters.
Learn how to construct a filter expression.
Segments
A segment is a subset of your Analytics data. For example, of your entire set of users, one segment might be users from a particular country or city. Another segment might be users who purchase a particular line of products or who visit a specific part of your site. Read more.
Important: When you want to use segments, use the ga:segments dimension.
You will have to type it in, however, because it is not in the option list of dimensions.
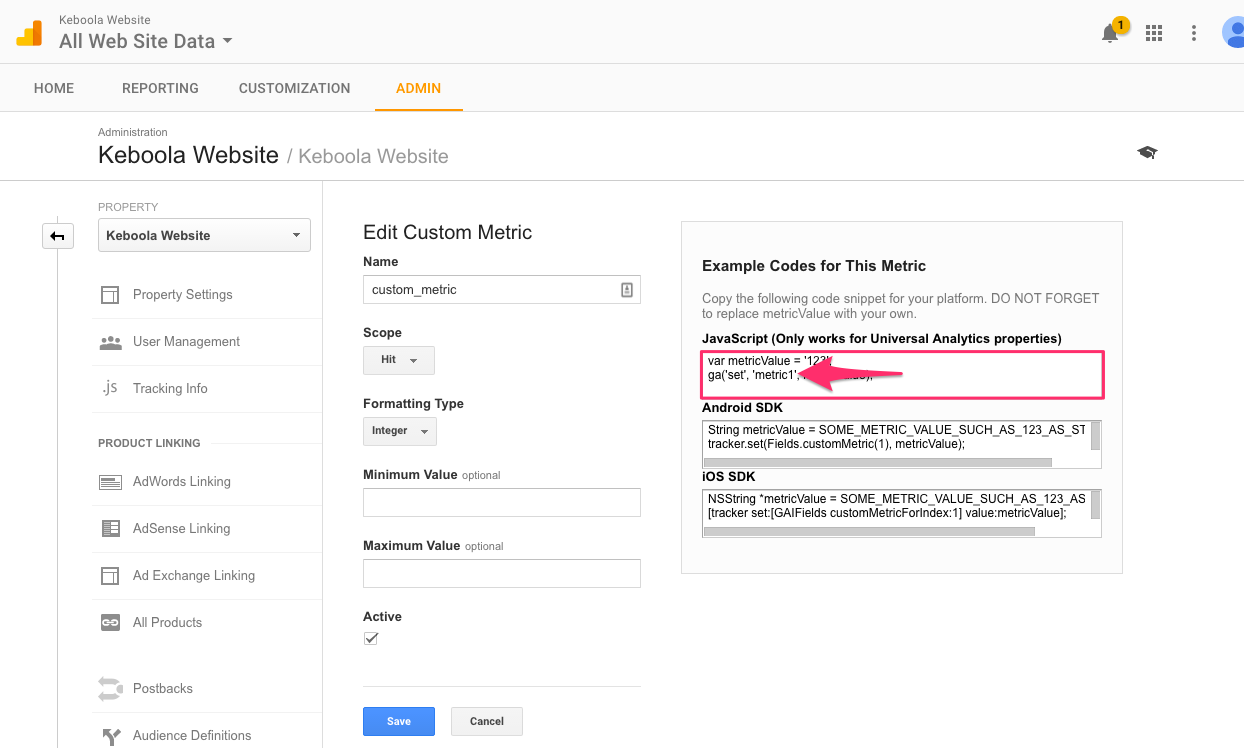
Custom Dimensions and Metrics
It is possible to use custom dimensions and metrics.
Although they are not listed in the selector options, you can type them in manually.
Insert the dimension or metric ID in the format of ga:metricXX or ga:dimensionXX where XX is a number, for example ga:metric1.
You can find the IDs on the Google Analytics page:
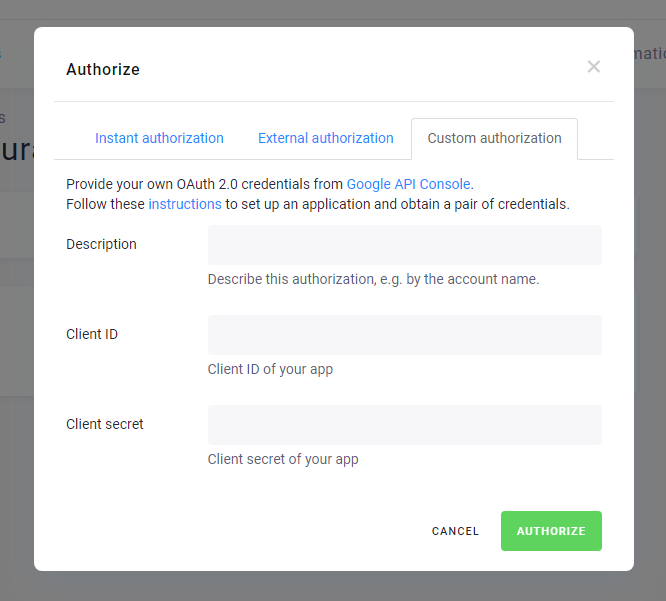
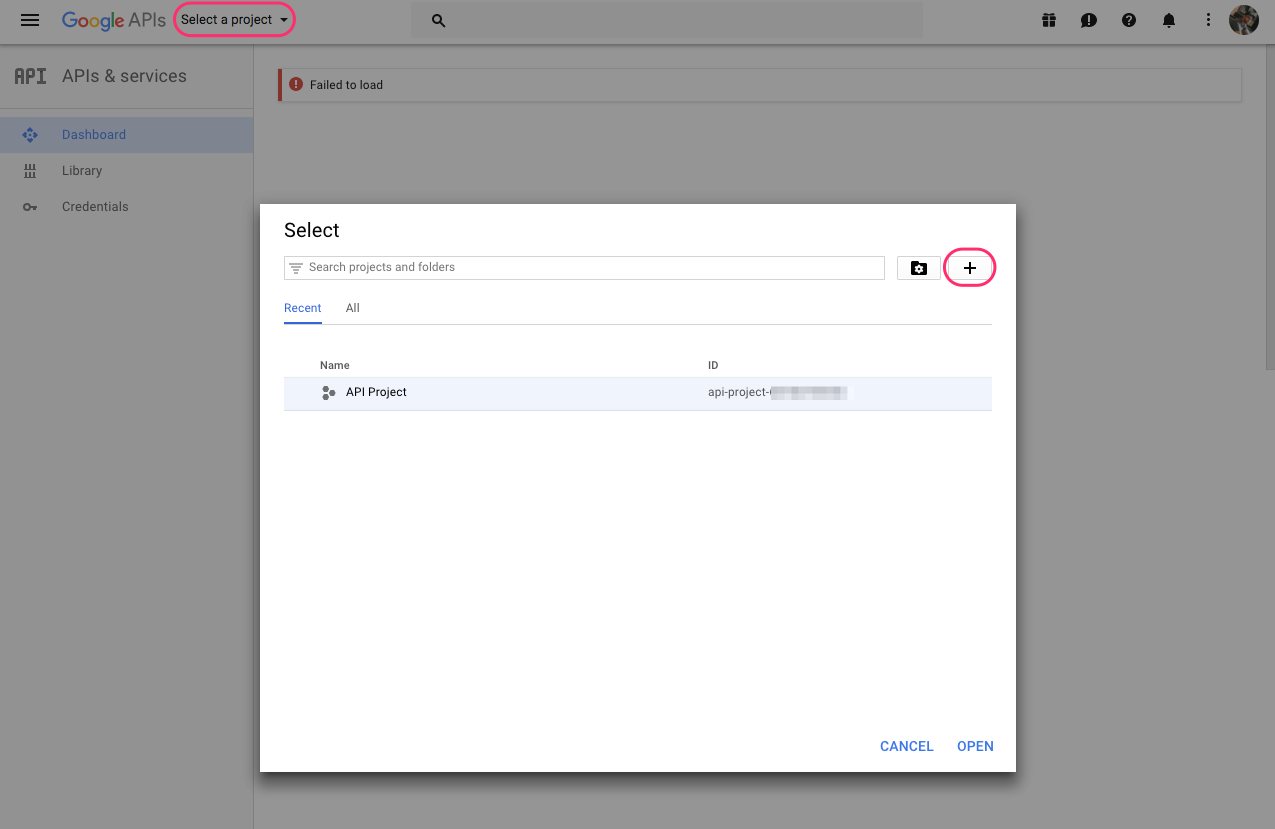
Custom OAuth Credentials
To avoid hitting quota limits, you can use your own OAuth Client ID and Secret:
- Visit the Google API Console.
-
Select an existing project or create a new one.
-
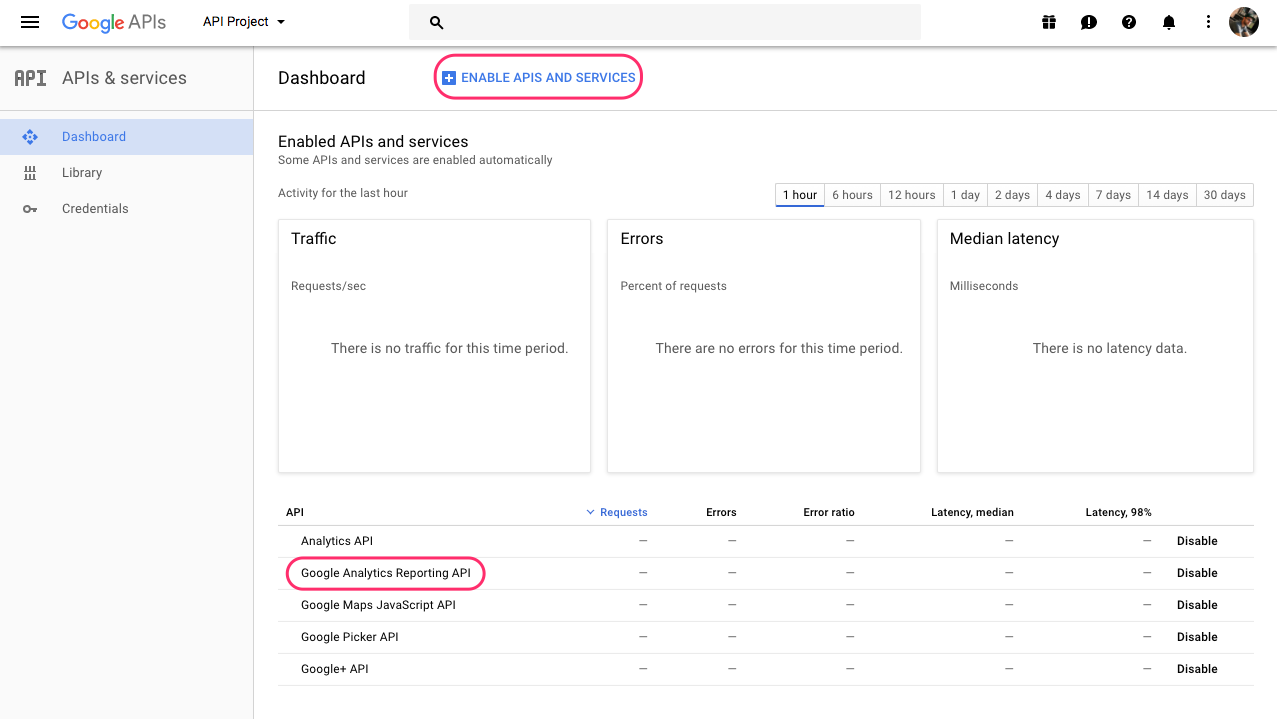
Enable the Google Analytics Data API and Google Analytics Admin API if you plan to use Google Analytics Data API or enable the Google Analytics Reporting API if you plan to use the Reporting API or Multi-Channel Funnels API. You also need to enable Google Analytcics API.
-
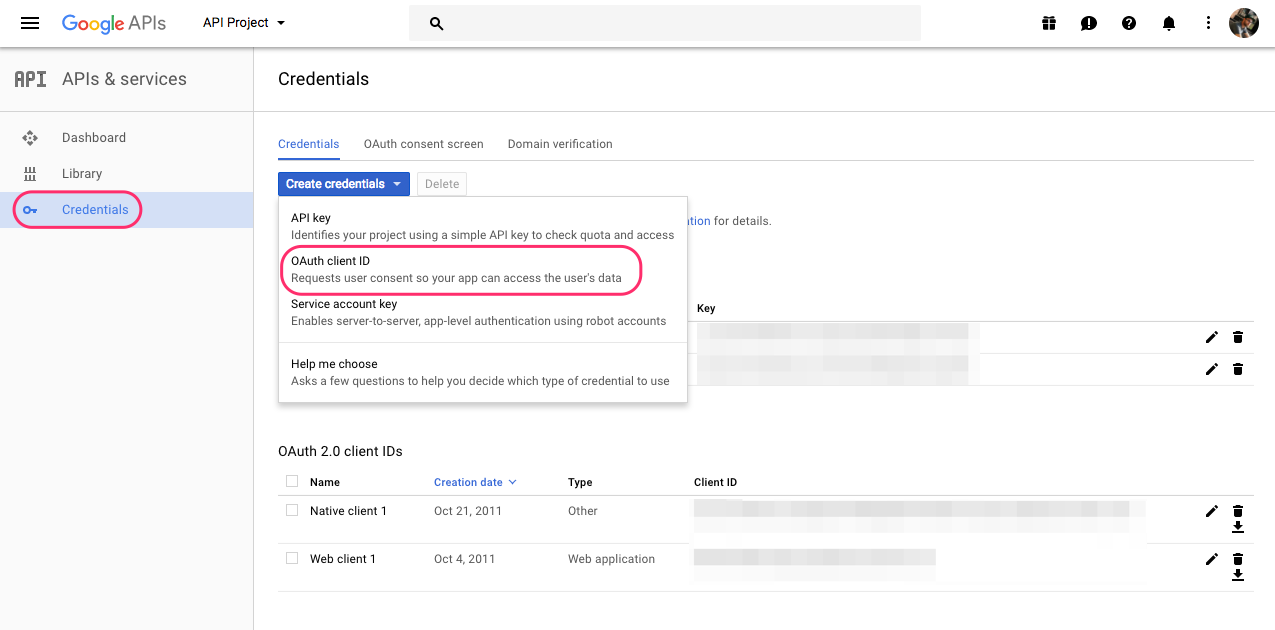
Select the Credentials section from the menu on the left, click the Create credentials button and select OAuth client ID.
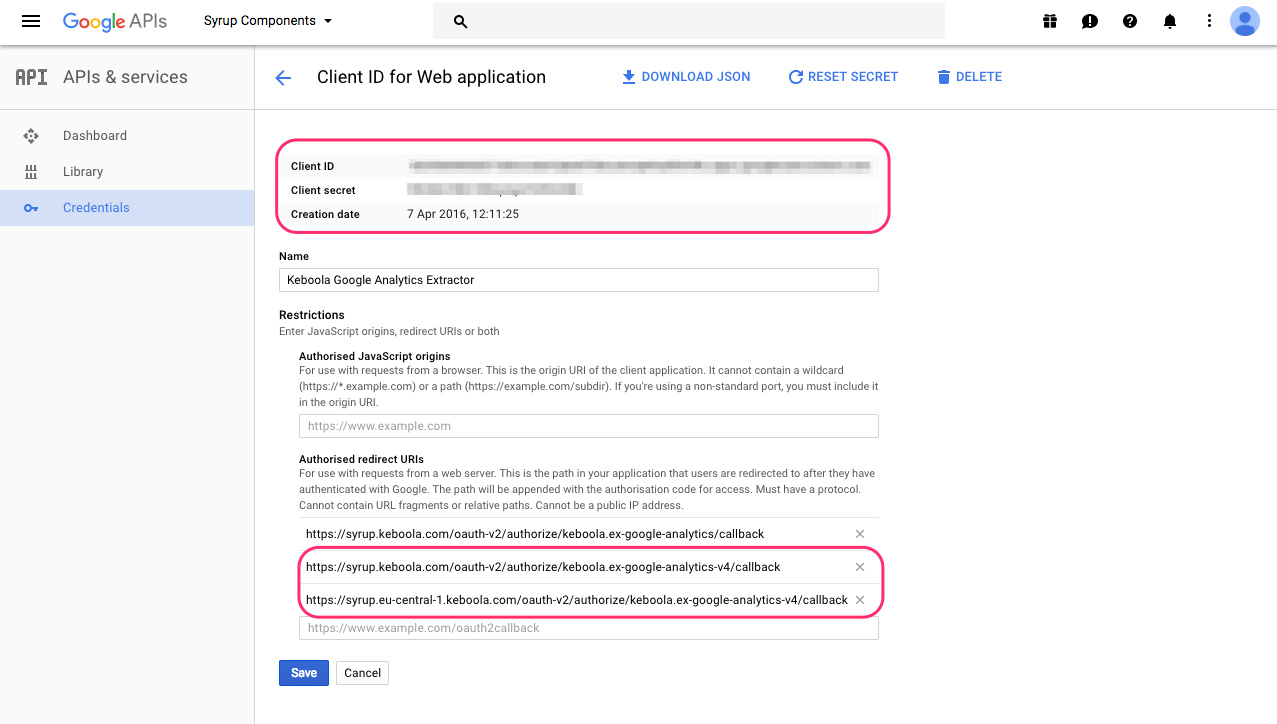
- Choose Web Application. Into Authorized redirect URIs insert:
https://oauth.keboola.com/authorize/keboola.ex-google-analytics-v4/callback- or
https://oauth.eu-central-1.keboola.com/authorize/keboola.ex-google-analytics-v4/callback - or
https://oauth.north-europe.azure.keboola.com/authorize/keboola.ex-google-analytics-v4/callback
- Click Create and a popup window will display your new Client ID and Client Secret credentials.
-
Find your credentials in the list of available credentials. You should see something like this:
-
You can now use these credentials in the Custom Authorization tab when authorizing the Google Analytics data source connector.