Data Catalog
- List View and Enhanced Features
- Overview
- Enable Sharing
- Link a Bucket
- Managing Bucket Metadata
- Filtering and Sorting Buckets
- Stop Sharing a Bucket
Note: The original feature called Shared Buckets is now integrated into our Data Catalog.
The data catalog represents an overview of data shared to and from the project. There are generally numerous options to share data (ranging from CSV exports to writing to a dedicated database). The data catalog allows you to share data in a very efficient, controlled and auditable way.
List View and Enhanced Features
The Data Catalog now offers a list view instead of the previous grid view, providing better organization and visibility of shared data:
- List View: Easily sort and filter shared buckets with a table-based interface
- Metadata Editing: Edit descriptions and customize bucket colors directly from the catalog
- Datashare Owner: Assign ownership to buckets, indicating who is responsible for the shared data
- Filtering Options: Filter buckets by “All”, “Linked”, or “Mine” (buckets you own)
These enhancements make it easier to manage shared data and provide better governance capabilities, especially for organizations with extensive data sharing needs.
Overview
Sharing data via the data catalog is useful in numerous ways – for example:
- You want to share the results of your analysis with another department. Instead of exporting it to CSV, you can simply share the data with their project. They will gain instant access to the selected data and can, e.g., load it into their sandbox immediately. The data is live, so whenever you update the results, your colleagues will see the changes.
- You want to share some data with a data-processing contractor. Instead of exporting the data to CSV, you can create a new Keboola Connection project for them and share the data into that project. They will get immediate access to the selected data and can start working instantly. They can also share the results of their work with you the same way.
- You need to provide your company with a set of curated data in auxiliary tables. You can have changing product names and instead of distributing updates throughout your company, you can create a project with the product table shared to the rest of the company. Regardless of how and how often the table is updated, this ensures that everyone always looks at the same data.
- You might want to use Multi-project architecture.
The following terminology is used:
- Shared bucket — source project bucket with Sharing enabled; it contains data to be available in other projects.
- Linked bucket — reference to a shared bucket in any of the destination projects.
- Datashare Owner — person responsible for the shared bucket; this helps with governance and accountability.
All changes and events in a shared bucket are propagated to its linked buckets; any tables you create in the shared bucket become immediately available in the destination projects. Data size and rows are counted only in the source project. Metadata changes, such as bucket color and description, are also propagated to linked buckets.
There are some constraints to how shared buckets can be used:
- Source and destination projects must belong to the same organization (and region).
- To manage shared buckets, your user account must be an organization member or a project administrator with the share role assigned.
- Table aliases filtered by a condition are not shared.
- Table aliases without automatically synchronized columns are not shared.
- Tables in linked buckets work like aliases — i.e., all tables are read-only in the destination project.
- If your bucket is already linked in other projects, you cannot drop it. Nor can you drop any of its children, tables or columns.
- You cannot delete a shared bucket that has been linked, all the links need to be removed first.
Sharing Types
There are several options how you can share data:
- Project Members – To the entire organization. Any user of any project in the organization can link the data bucket.
- Organization Members – To administrators of the organization. Any user of any project in the organization can link the data bucket provided that they are also an administrator of the organization.
- Selected Projects – To specified projects. Any user of the listed projects in the organization can link the data bucket.
- Selected Users – To specified users. Any listed users in the organization can link the data bucket.
Enable Sharing
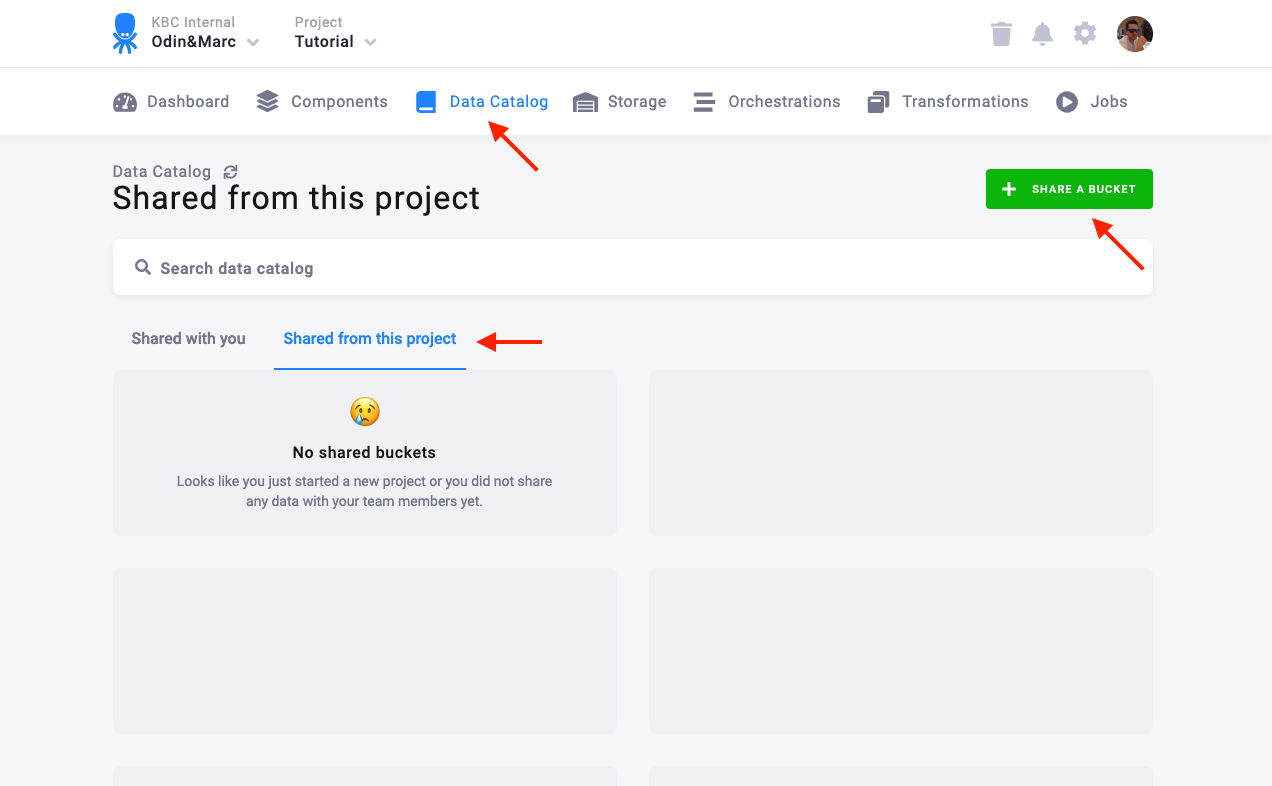
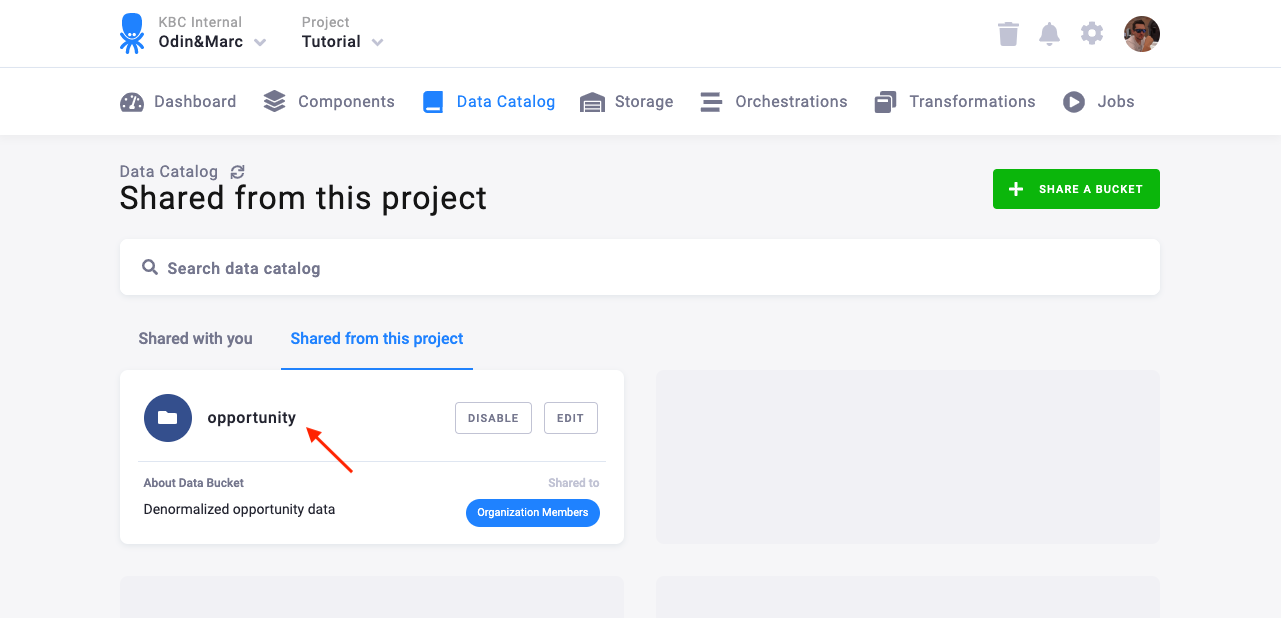
To share data outside of your project, go to Catalog and click SHARE BUCKET.
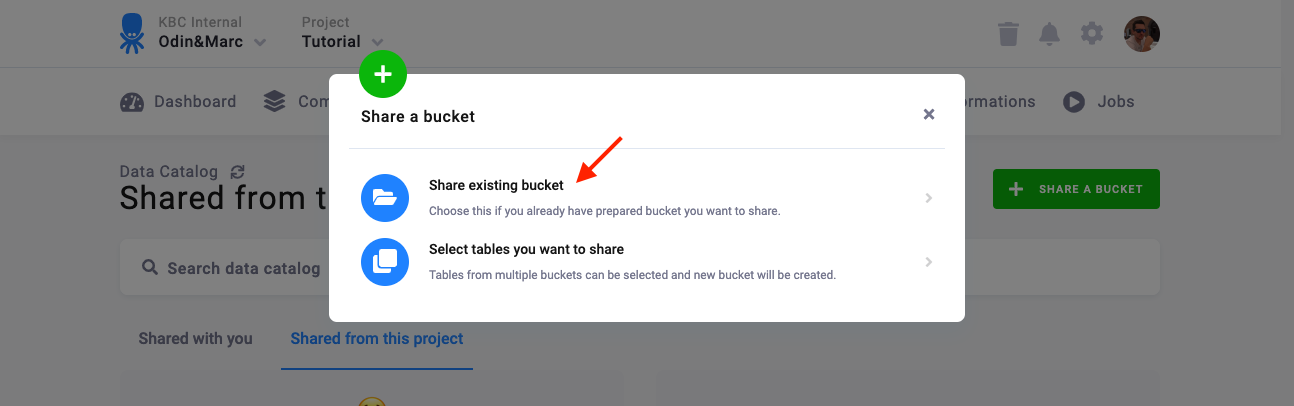
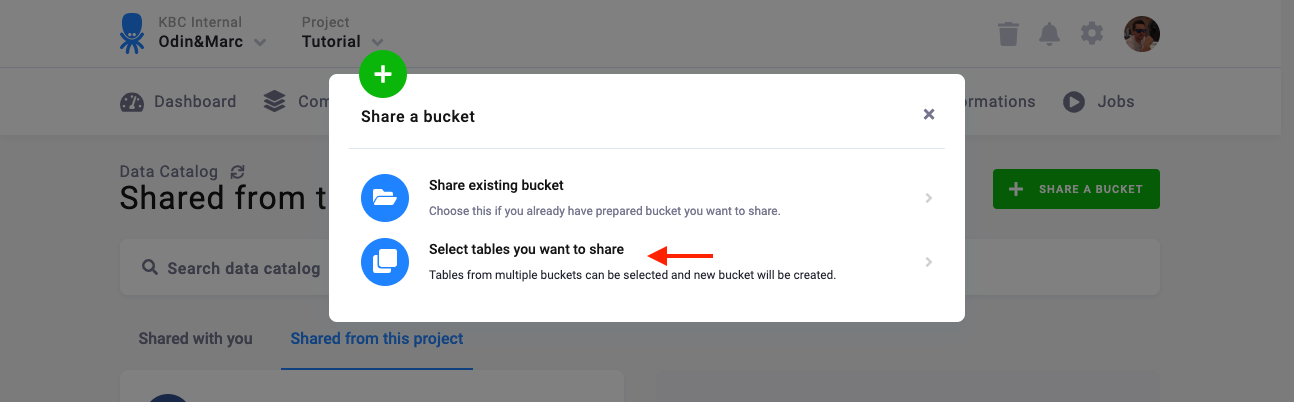
Next you can choose whether you want to share an existing bucket or create a new one. Both options are technically the same, the choice depends purely on whether you prepared the data in advance (an existing bucket) or not (create a new bucket).
Share an Existing Bucket
Choose the Share existing bucket option:
Then, select the bucket and a sharing type. You can also assign a Datashare Owner who will be responsible for the bucket. Optionally, provide a description of the bucket and select a custom color so others know what to expect.
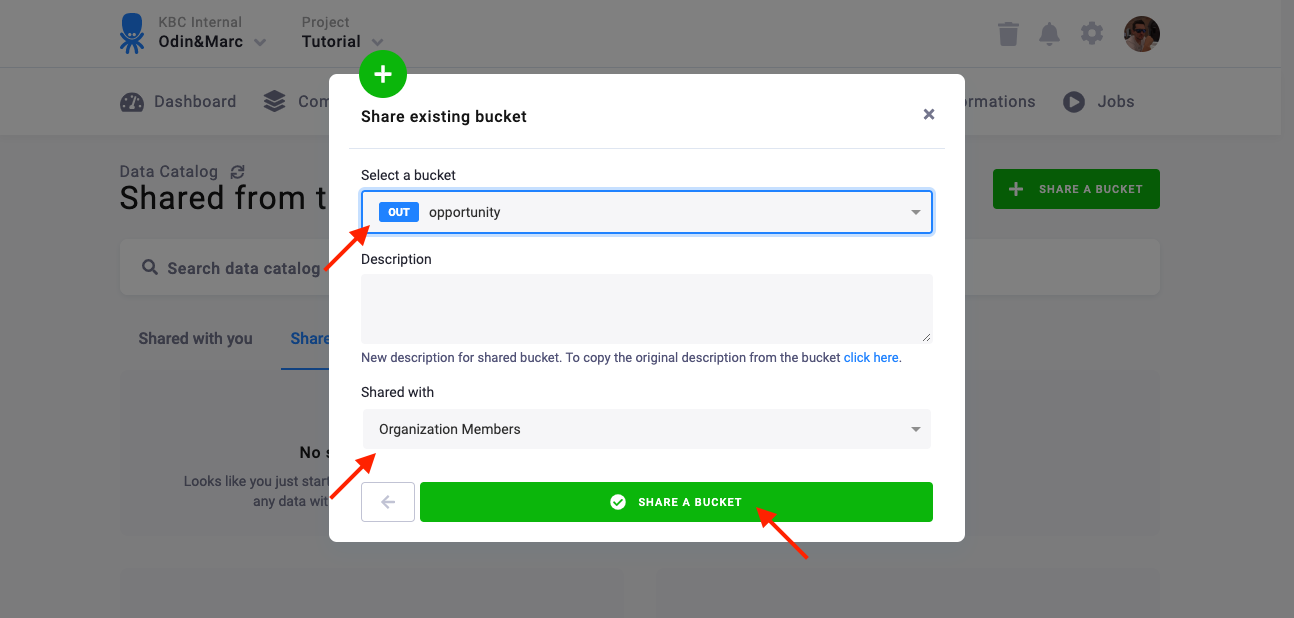
The bucket is shared and instantly available to other projects in the organization depending on the sharing type you have chosen.
To change sharing settings, go to the bucket detail page and click the Edit Sharing button:

Adding new tables to an existing shared bucket
To extend an existing shared bucket with additional tables, you don’t need to delete the bucket and recreate it. Instead, create an alias of the table and set the shared bucket as the destination. Here is how to do so:
-
Go to Storage → Tables and locate the table you want to add.
-
Click Create Alias.
-
Select the shared bucket as the destination. Ensure the alias has no filter and automatic synchronization of the columns enabled.
Once created in the shared bucket, the alias will immediately appear in all linked projects.
Share a New bucket
Choose the Select tables option:
Select the tables and/or buckets you want to share:

Enter the bucket name and a sharing type. Assign a Datashare Owner, and optionally customize the bucket color and enter a description:
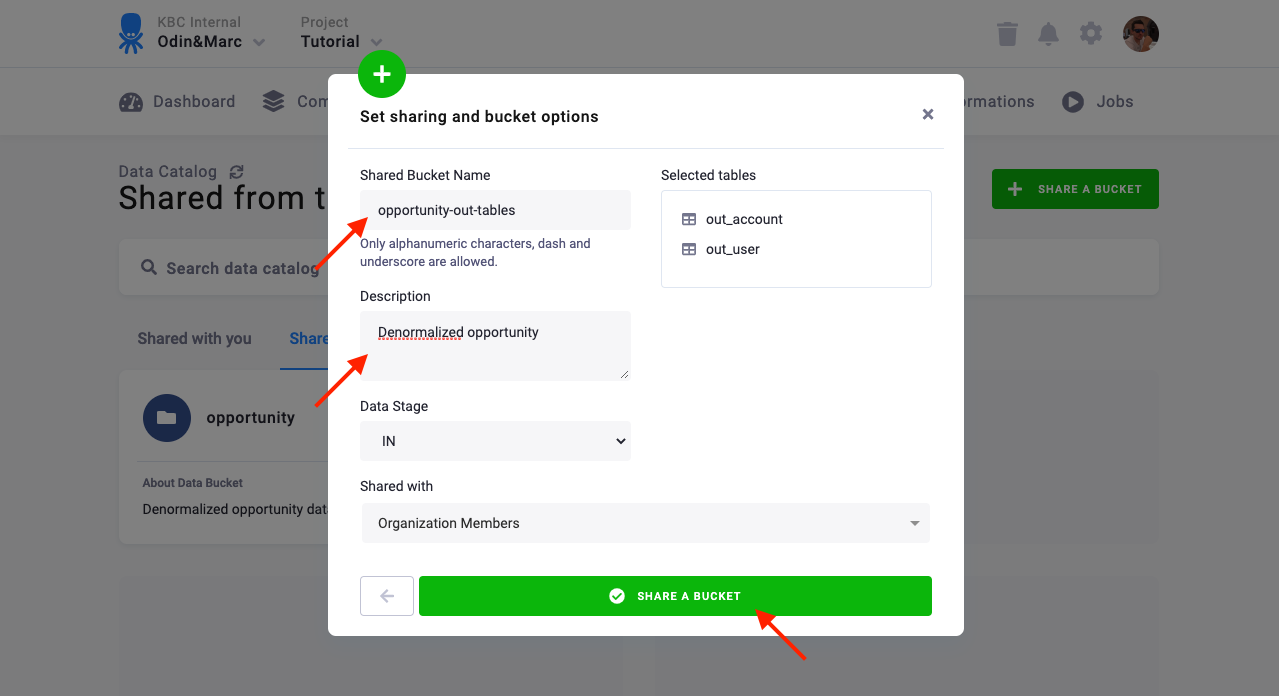
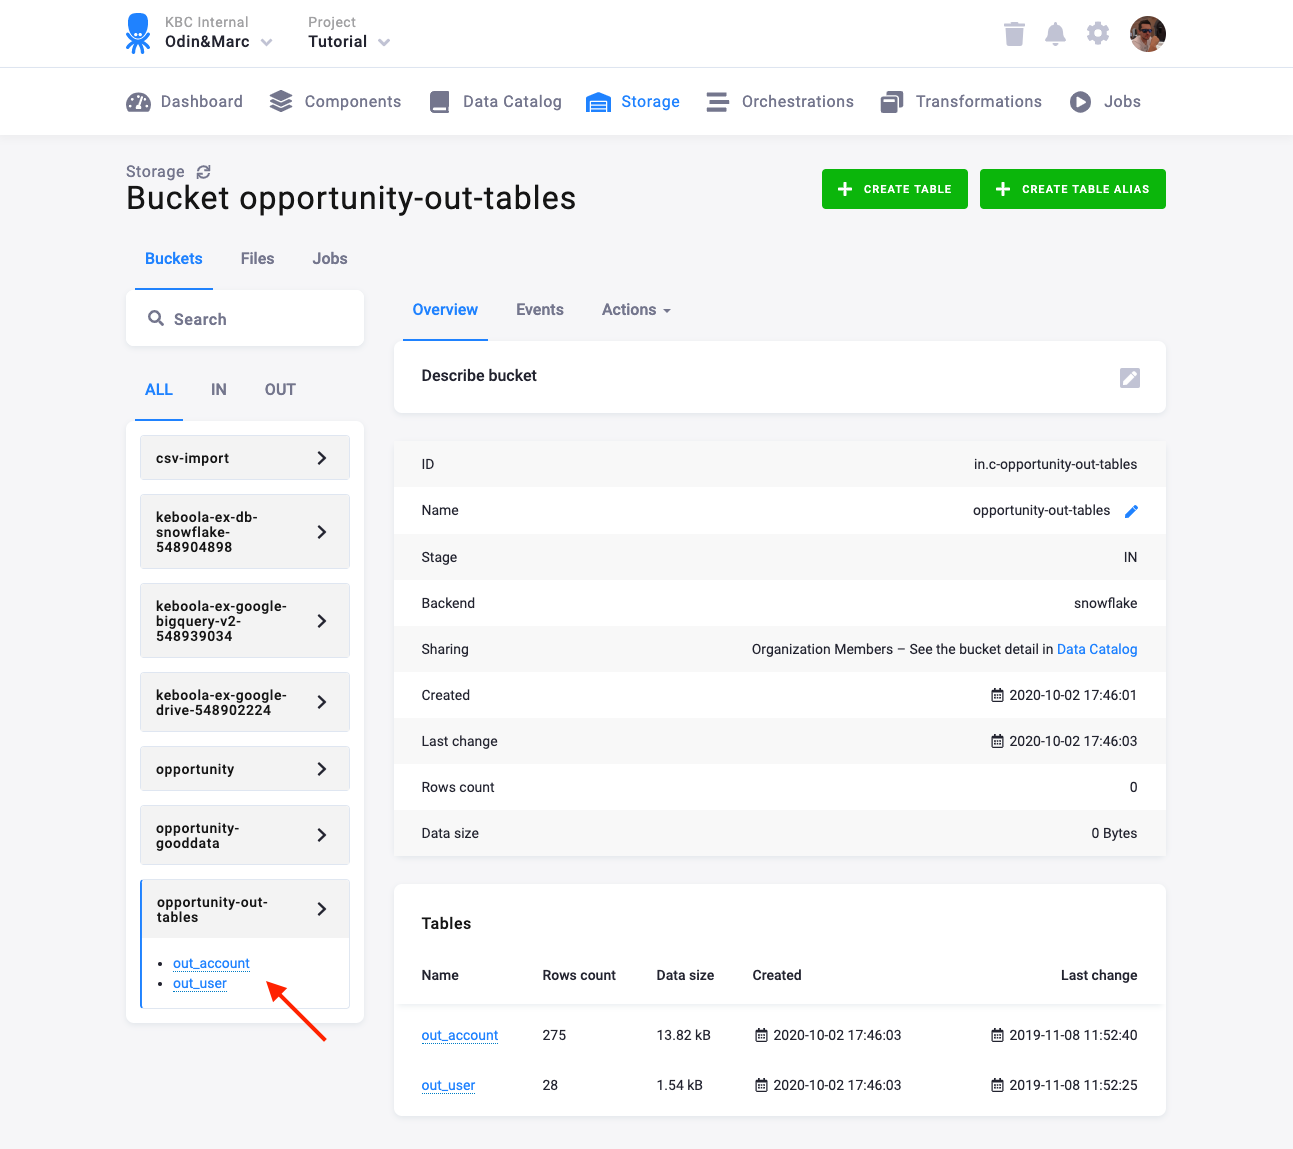
A new bucket will be created for you, the selected tables will be linked to it using aliases.
To change sharing settings, share the newly created bucket again. The newly selected settings will overwrite the old ones.
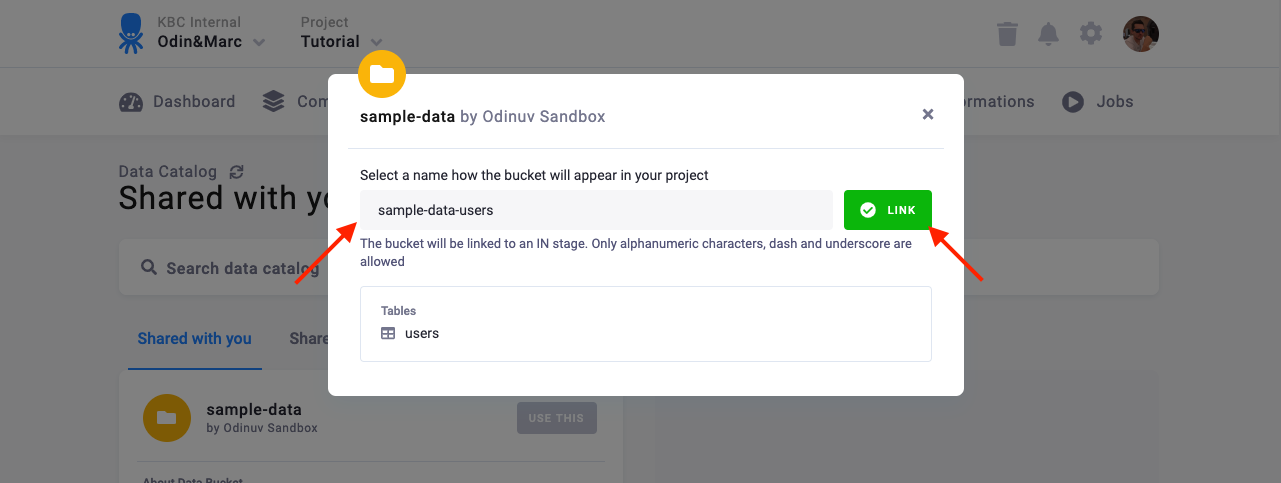
Link a Bucket
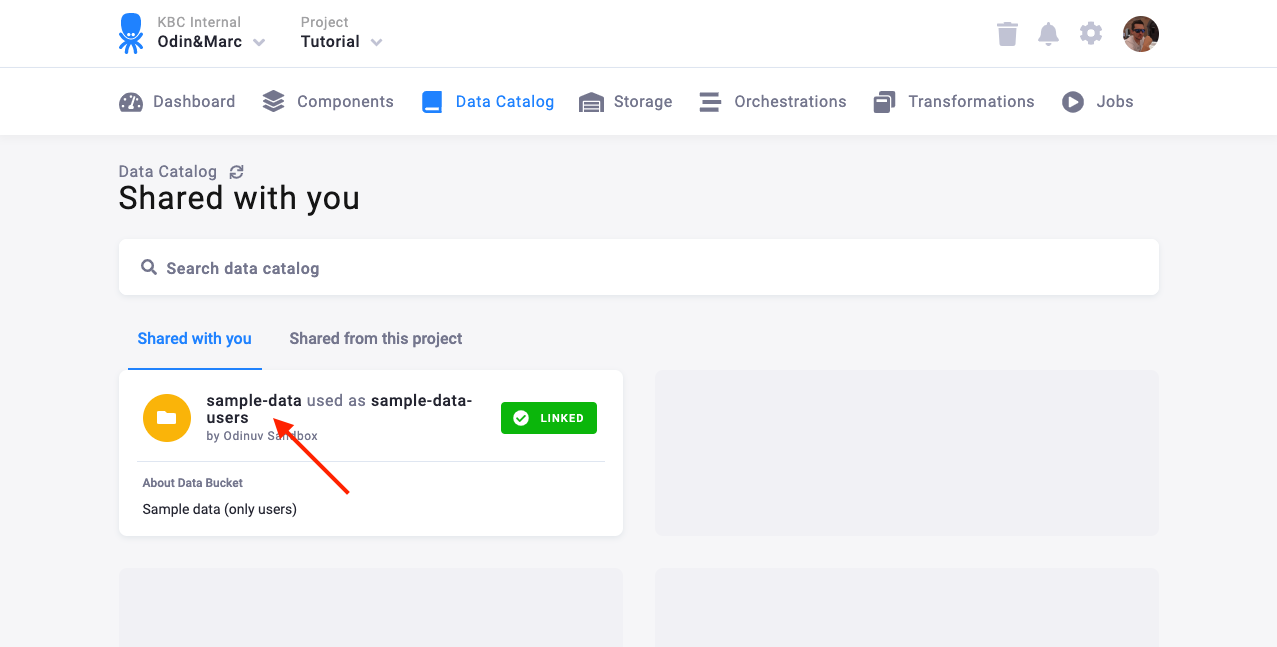
You can link a shared bucket into your project from the Shared with you tab in the Data Catalog:

Enter a name of the bucket as you’d like to see it in the current project and Link the bucket:
You’ll see that the bucket is available in your project:
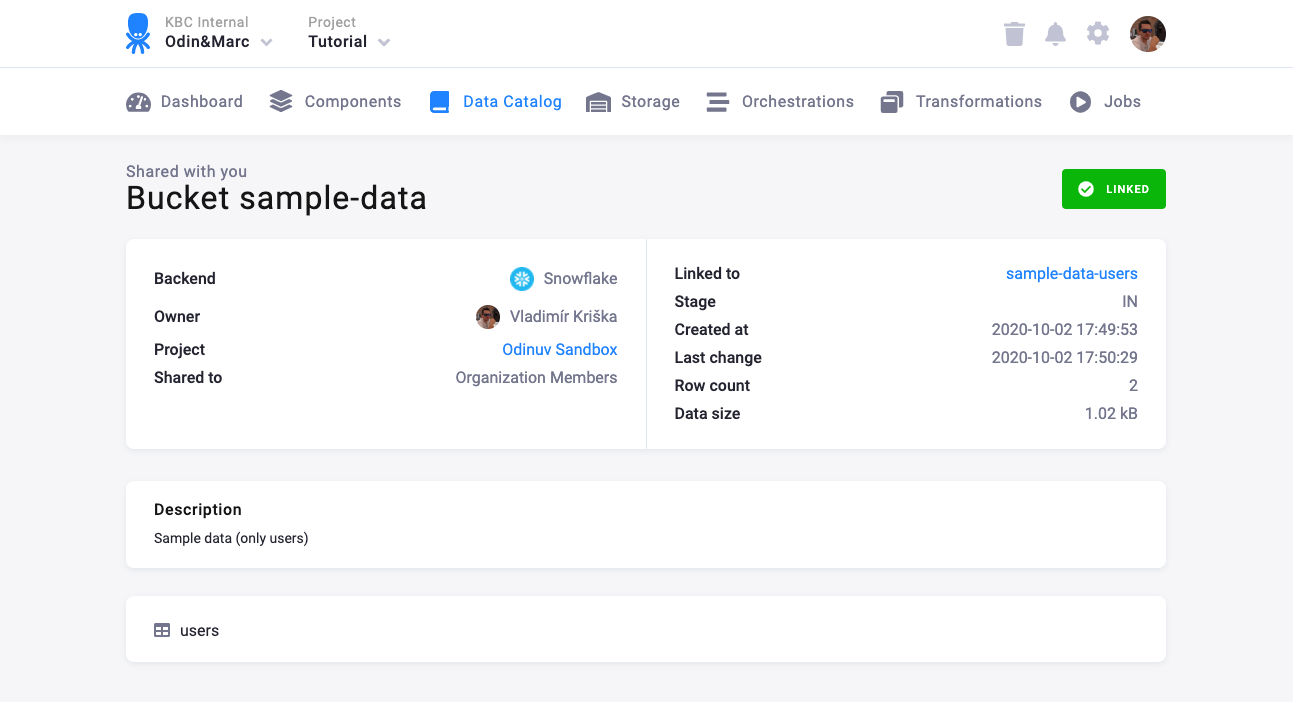
You can see the detail of the shared bucket with a link to the source project (if you have access to it). The bucket will inherit the color and description from the source bucket.
Managing Bucket Metadata
You can edit the metadata of shared buckets directly from the Data Catalog:
- Navigate to the Data Catalog and locate the bucket you want to edit
- Click on the bucket to view its details
- Click Edit Sharing to modify:
- Description: Add or update the bucket description
- Color: Change the bucket color from the default gray to a custom color
- Datashare Owner: Assign or change the person responsible for the bucket
These metadata changes will be propagated to all linked buckets, ensuring consistency across projects.
Filtering and Sorting Buckets
The new list view in the Data Catalog provides enhanced filtering and sorting capabilities:
- Filter buttons: Use the “ALL”, “LINKED”, or “MINE” buttons to filter buckets
- Column sorting: Click on column headers to sort by Name, Datashare Owner, Size, etc.
- Search: Use the search box to find specific buckets by name or description
These features help you quickly locate and manage your shared data, especially in environments with many shared buckets.
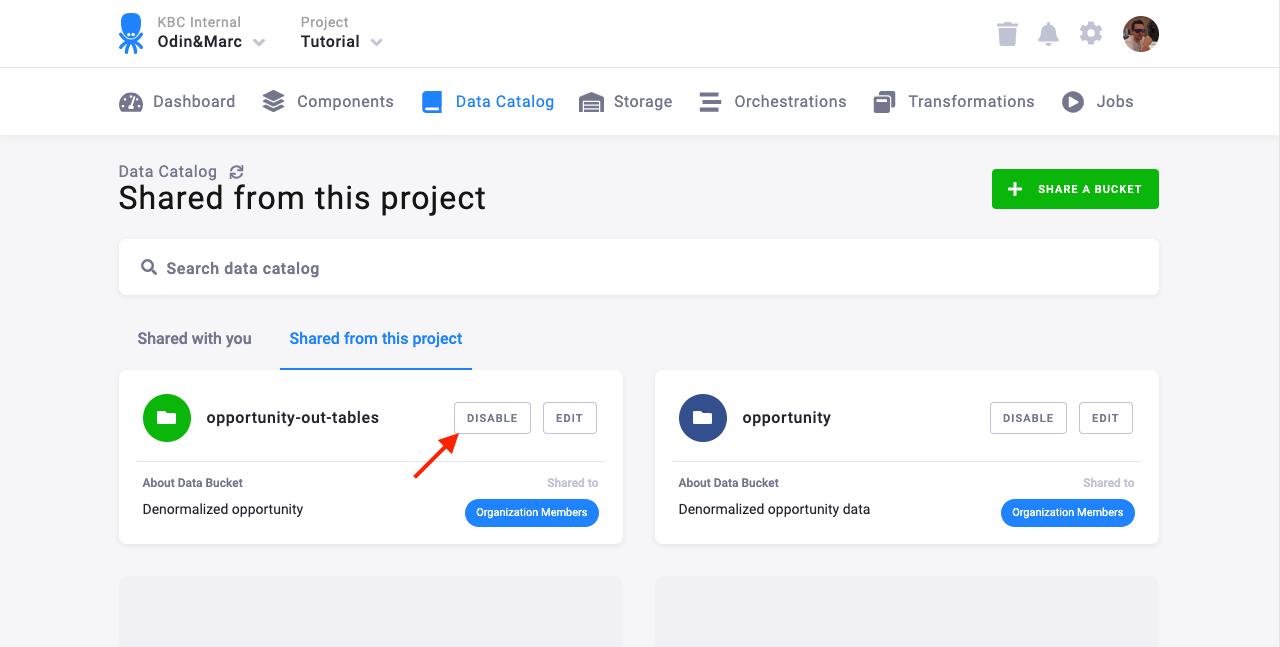
Stop Sharing a Bucket
To stop sharing a bucket, go to Data Catalog and click Disable sharing: